Caldera Forms has been my go-to form plugin for years. In fact, one of my very first tutorials was on how to add a contact form to your footer using Caldera Forms.
Lately, I have been getting a lot of spam on my Caldera forms and so I started implementing Google reCAPTCHA on my forms for both myself, and my clients. While Caldera Forms no longer offers this feature as part of the free plugin, the team over at Yahoo Plugins have created a plugin that does the job wonderfully.
Setting up reCAPTCHA on Caldera Forms is easy and only takes a few steps.
Let’s Get Started Setting up Google reCAPTCHA on Your Caldera Form.
1. Install the Caldera Forms Anti Spam Plugin
Upload the plugin files to the ‘/wp-content/plugins’ directory, or install the plugin through the WordPress plugins screen directly and activate the plugin through the ‘Plugins’ screen in WordPress.

2. Register with Google reCAPTCHA
To start using reCAPTCHA, you need to sign up for an API key pair for your site. The key pair consists of a site key and secret key. The site key is used to invoke reCAPTCHA service on your site or mobile application. The secret key authorizes communication between your application backend and the reCAPTCHA server to verify the user’s response. The secret key needs to be kept safe for security purposes.
Give it a label, choose the type of reCAPTCHA and then fill in authorized domains and owners. Be sure to select reCAPCTCHA v2 & “I’m not a robot” Checkbox. After you accept their terms of service, you can click Submit button to get new API key pair. Once you’ve added the site, you’ll be given a site key and a secret key. You’ll need both shortly so keep them handy.

3. Add reCAPTCHA To Your Caldera Form
Once you have installed and activated the Caldera Forms and Caldera Forms Anti Spam plugins, the reCAPTCHA field which is now available in the form builder under the Special tab.
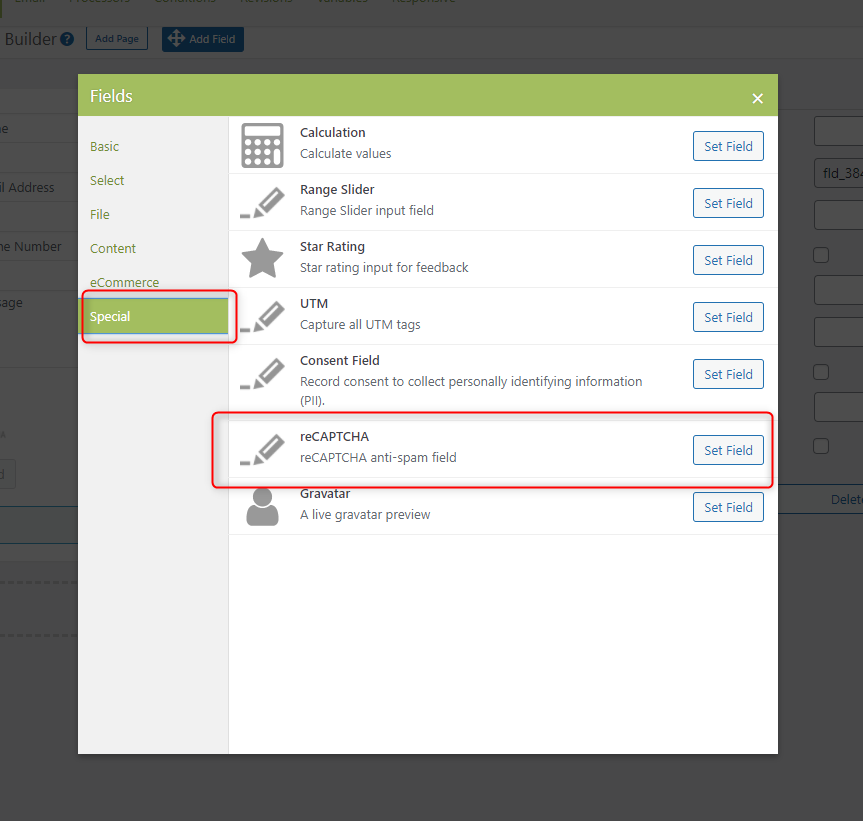
Once you have added the field, you just need to give it a name and add the Site Key and Secret Key.

And that’s it.

As you can see, it now only takes minutes to add Google reCAPTCHA to your Caldera Forms. Let us know if you have any other Caldera Forms tips, tricks and inspirations that you have come across.
Well, that’s all for now. I hope you find this article useful.


Another great tip, Geno. Just what I was looking for! What form plugin will you be using in the future?