
Another way to make your Divi Blurbs stand out is to add a horizontal line behind the title. I know there are some tutorials already out there but I was inspired to create some tutorials exclusive to Divi Modules.
In this case I am choosing to start with the Divi Blurb Module. In this tutorial I will show you how to add a horizontal line behind the Divi Blurb title using a little custom CSS.
Let’s Get Started Adding the Horizontal Line Behind the Divi Blurb Title.
Adding The Blurb Modules
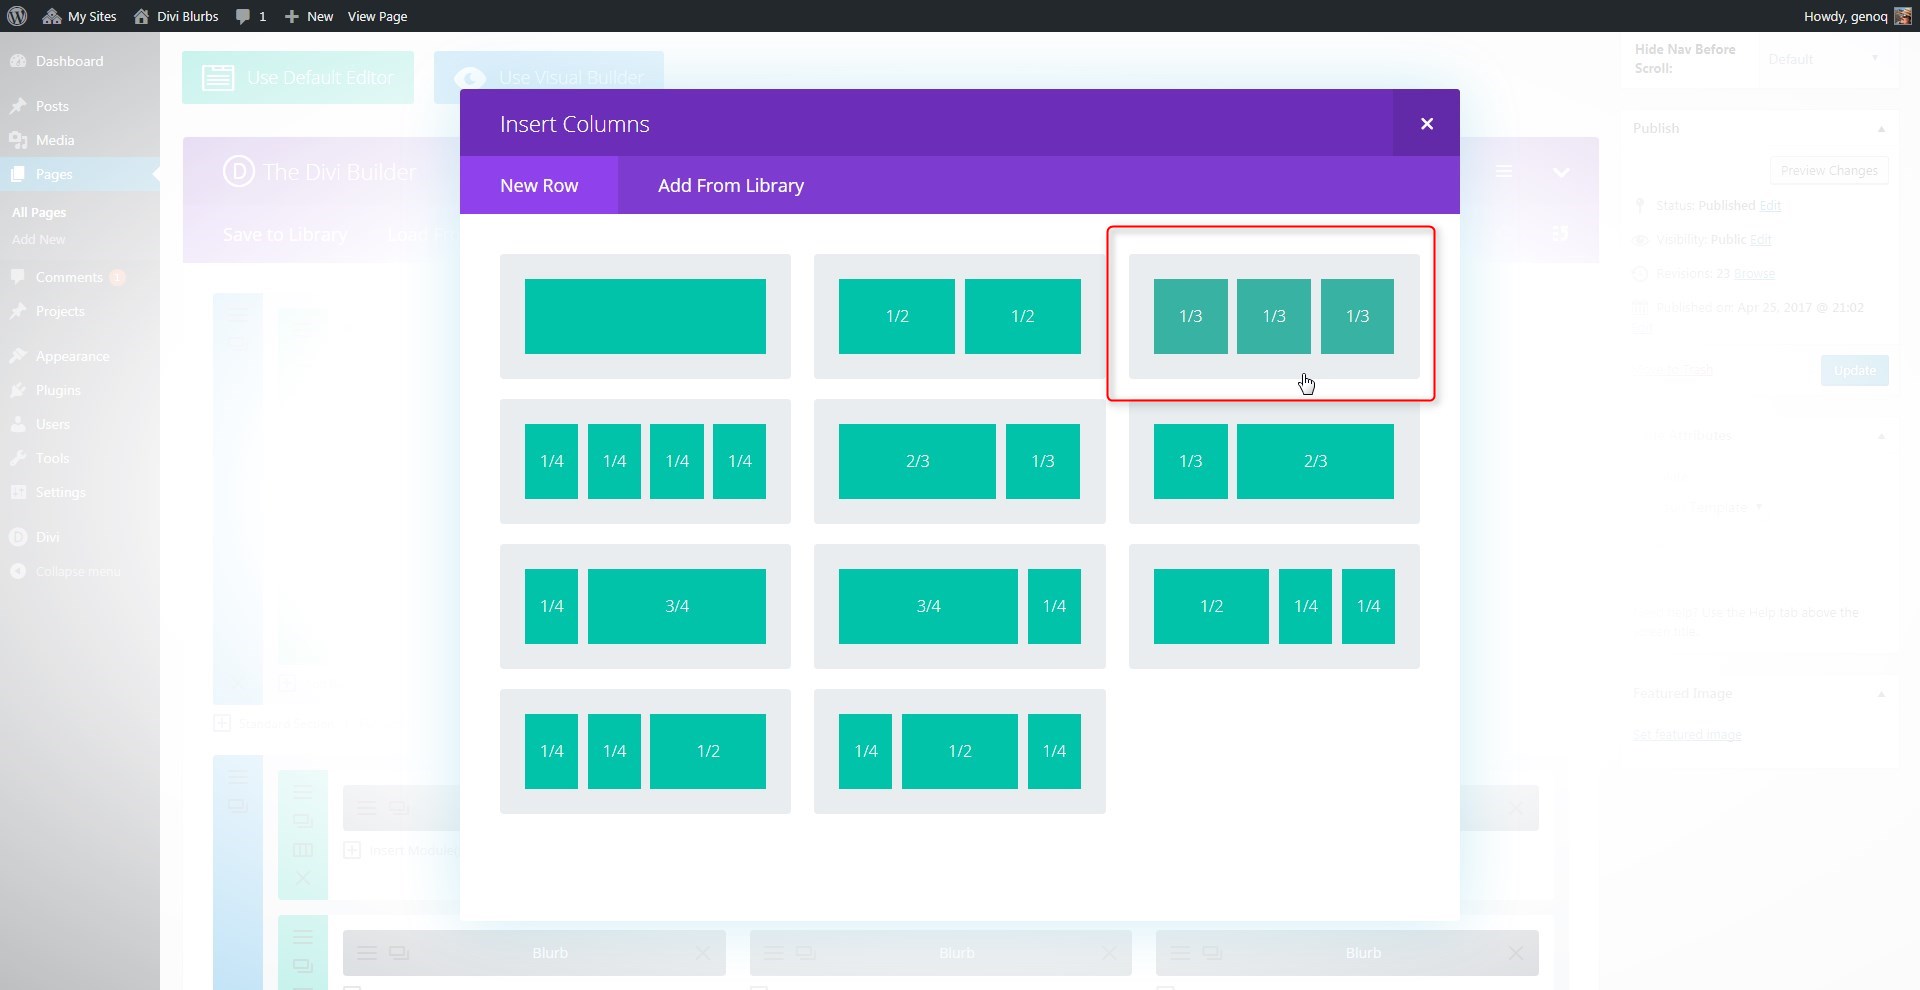
1. Create a row and give it 3 columns.
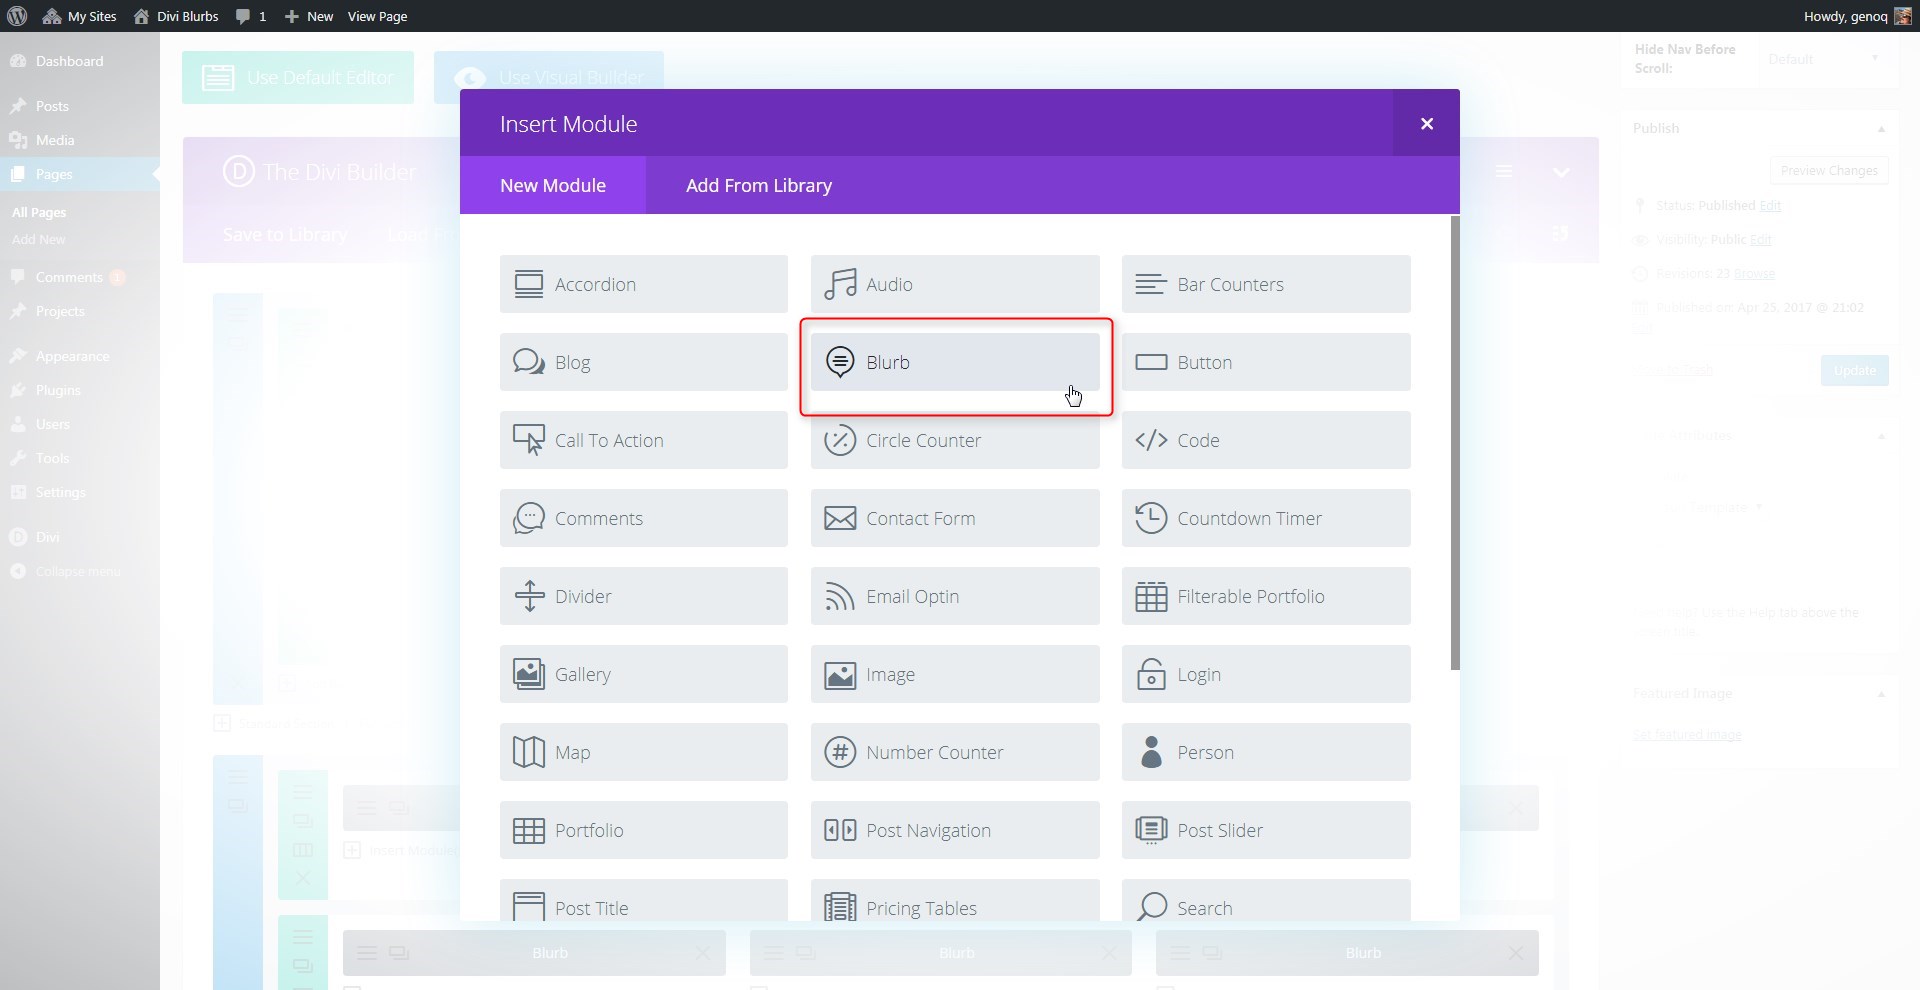
2. Add a Blurb Module to the first column.
3. Under Content: give it a title & text. I chose not to use an icon so that it is not too busy but feel free to do so if you want.

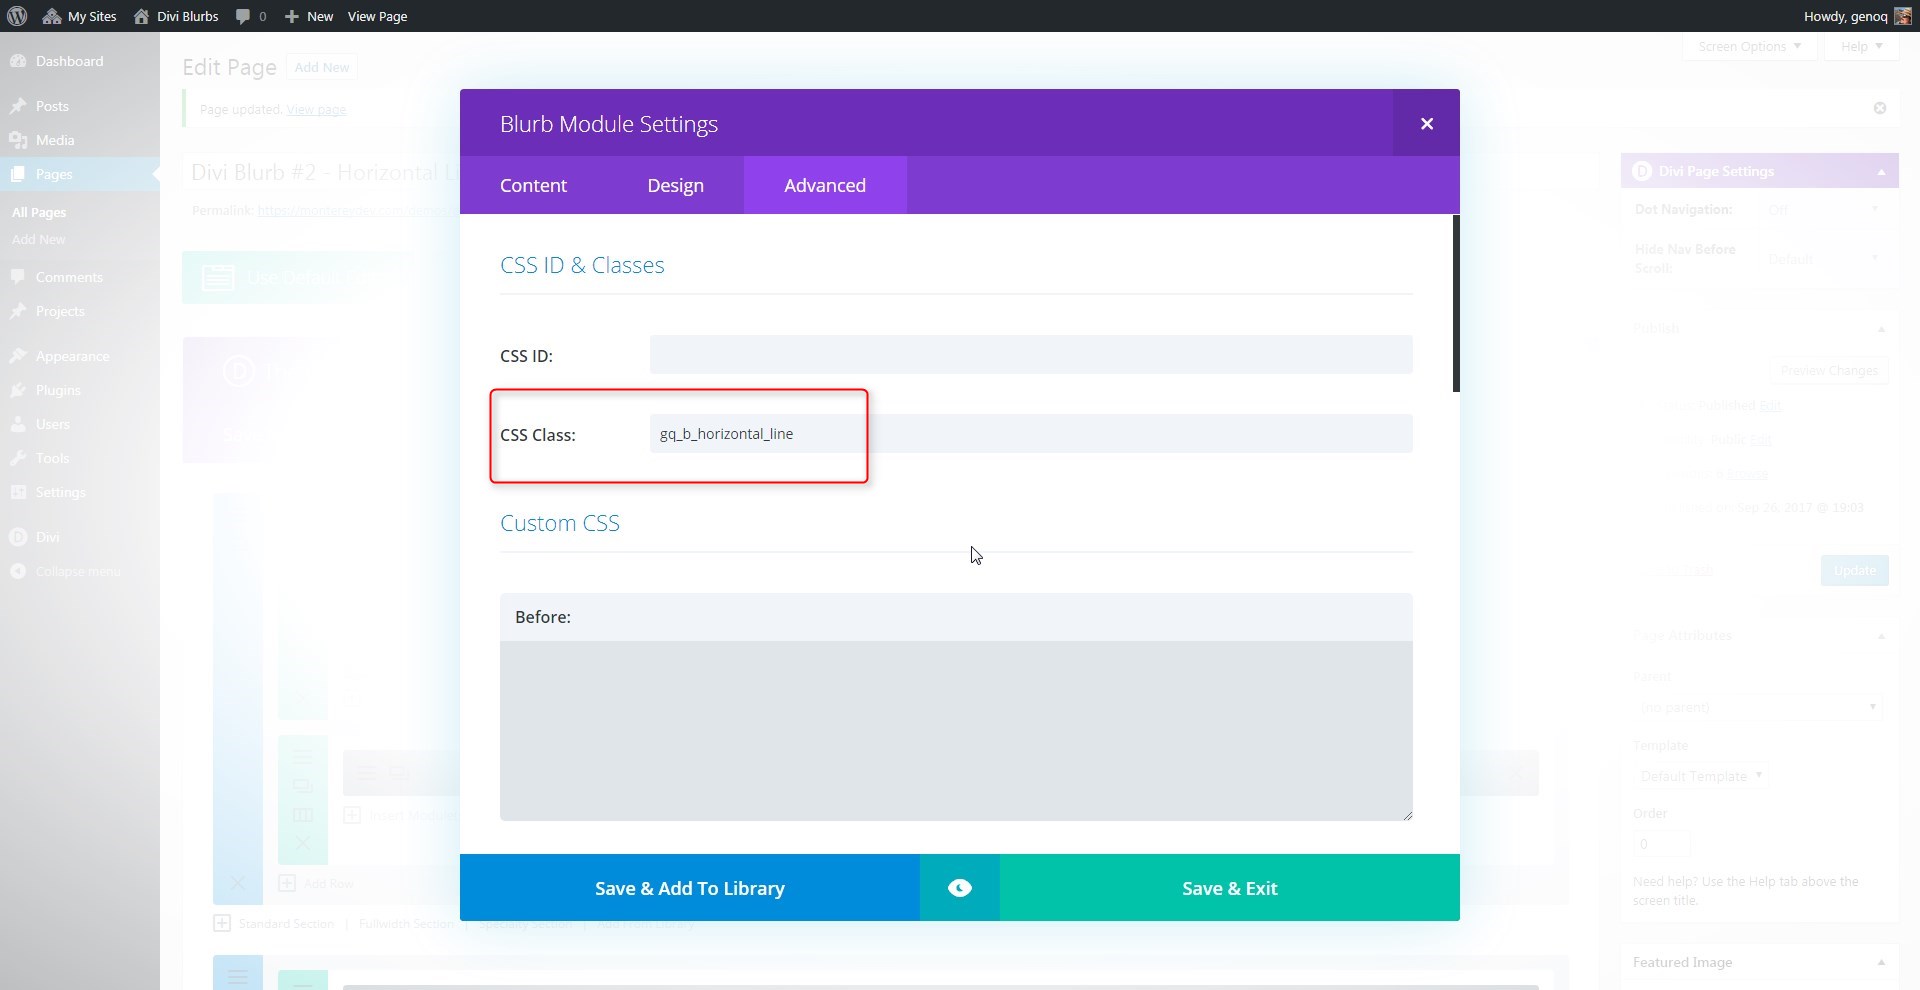
4. In the Advanced Tab: assign the module the following CSS Class: gq_b_horizontal_line
5. Now duplicate the blurb module and move it into the second and third column.
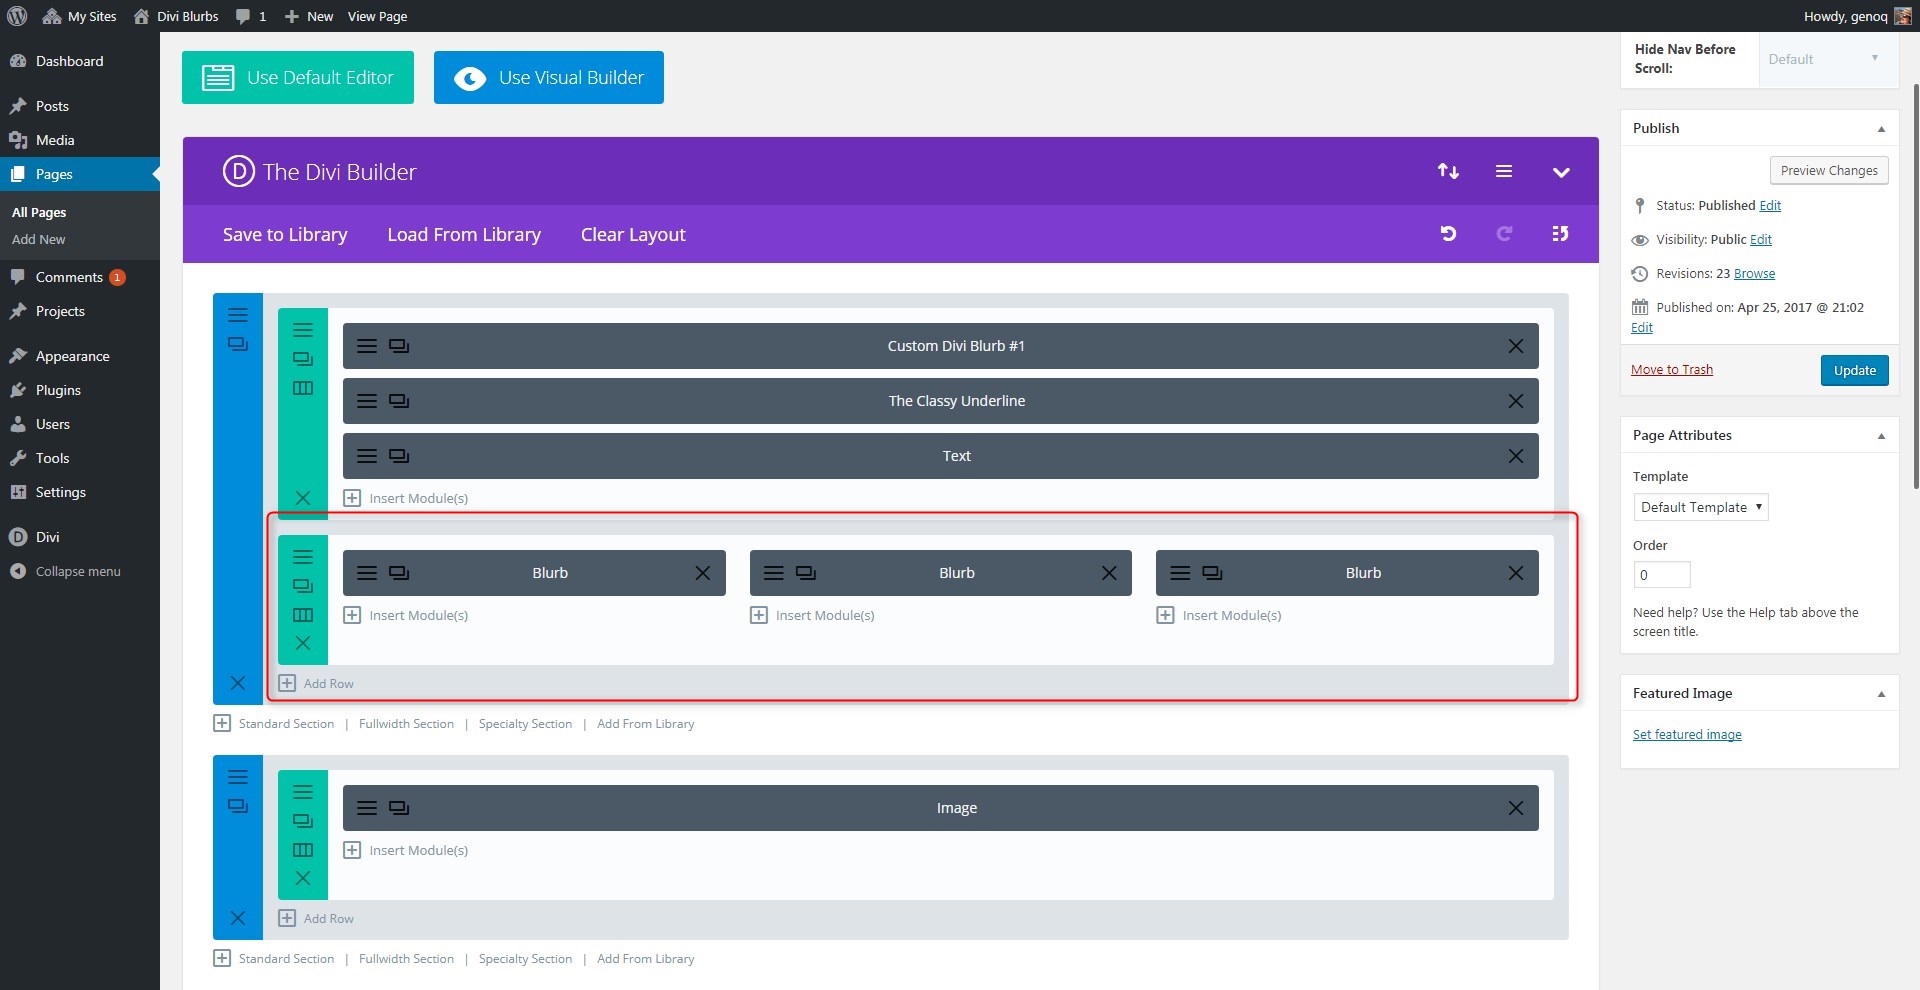
6. Save your page and move on to the magic of adding a little CSS.
Adding The Custom CSS
If you are working with a child theme you can go to Appearance>Editor and open your stylesheet. If not, go to Appearance>Divi Theme Options>Custom CSS (which is located at the bottom of the first tab in Theme Options)
Add this CSS.
/*------------------------------------------------*/
/*----[GQ BLURB HORIZONTAL LINE BEHIND TITLE]-----*/
/*------------------------------------------------*/

		.gq_b_horizontal_line h4 {
			font-size: 17px;
			letter-spacing: 2px;
			font-weight: 900;
			text-transform: uppercase;
			padding-bottom: 0px;
			margin-bottom: 8px;
			color: #000000;
			position: relative;
			z-index: 1;}

		.gq_b_horizontal_line a {
			display: inline;
			background: #fff;
			padding-right: 11px;}

		.gq_b_horizontal_line h4:before {
			border-top: 2px solid #26abe6;
			content: "";
			margin: 0 auto;
			position: absolute;
			top: 50%;
			left: 0;
			right: 0;
			bottom: 0;
			width: 95%;
			z-index: -1;}
Centered Blurbs
If you want to use a centered blurb title, start by adjusting the Blurb Module Settings
1. In the Design tab, change the text and title orientation to centered.

2. And use this CSS instead. The only difference is an adjustment to the Title left and right padding.
/*------------------------------------------------*/
/*----[GQ BLURB HORIZONTAL LINE BEHIND TITLE]-----*/
/*------------------------------------------------*/

		.gq_b_horizontal_line h4 {
			font-size: 17px;
			letter-spacing: 2px;
			font-weight: 900;
			text-transform: uppercase;
			padding-bottom: 0px;
			margin-bottom: 8px;
			color: #000000;
			position: relative;
			z-index: 1;}

		.gq_b_horizontal_line a {
			display: inline;
			background: #fff;
			padding-left: 8px;
			padding-right: 8px;}

		.gq_b_horizontal_line h4:before {
			border-top: 2px solid #26abe6;
			content: "";
			margin: 0 auto;
			position: absolute;
			top: 50%;
			left: 0;
			right: 0;
			bottom: 0;
			width: 95%;
			z-index: -1;}
Making Adjustments
As with all my tutorials, my goal is not to teach you how to use Divi Settings as much as it is to teach you how to customize your website learning a little CSS along the way. So with that being said, here are a few CSS tips to help you learn a little more about CSS.
To adjust the title’s font weight, size, color, letter-spacing and more, you can do so here:

The Blurb Title has a little padding and a background color to hide the divider directly behind it. If your blurb or page background is a different color, you will want to change this to match your background color. If you are using centered text, you will want to add “padding-left” to match the padding right. You can do so here:

And lastly, if you want to change the color, thickness, or width of the horizontal line, you can do so here.

And that’s it.
If you used this on one of your projects, please share a link below so we can see how you used it.
Have fun!
Well, that’s all for now. I hope you find this article useful.
![]()


Thank you for your tutorials! Learning a lot using your examples!
Glad to hear it 🙂
Thanks for the tutorial! Would love to see a variant of this code that can be used in the Custom CSS > Blurb Title section as opposed to applying this universally in the Divi Custom CSS area so that it can be more easily adjusted for individual blurbs with varying background colors.
Hi!
Great tutorial 🙂
I do however have a problem. The Horizontal line is still visible bahind the blurb title text.
Any ideas as to why?
PS: Changing the following CSS code does not seem to change anything (even deleting the code doesn’t affect the result)
.gq_b_horizontal_line a {
display: inline;
background: #fff;
padding-left: 8px;
padding-right: 8px;}
If the title does not link to anything, replace the “a” with the appropriate header class (ie: h3 or h4)
Great tutorial!
Is there a way to add horizontal lines in the title module?
Thanks!!!
I am not sure I understand the question. What do you mean by title module?
Hi Geno, great tutorial. I used it here -> larimerlawllc.com and it looks great. One thing I noticed is a notch at the bottom of the icon. Is there a way to remove that? Thanks!
Since the CSS is targeting active links, it is affecting both the blurb icon and the header. Isolate the css to just the header active link by replacing this
.gq_b_horizontal_line a {
	display: inline;
	background: #e5e5e5;
	padding-left: 8px;
	padding-right: 8px;
}
with this
.gq_b_horizontal_line .et_pb_module_header a { display: inline; background: #e5e5e5; padding-left: 8px; padding-right: 8px; }Thank you Geno, just what I needed, as usual.