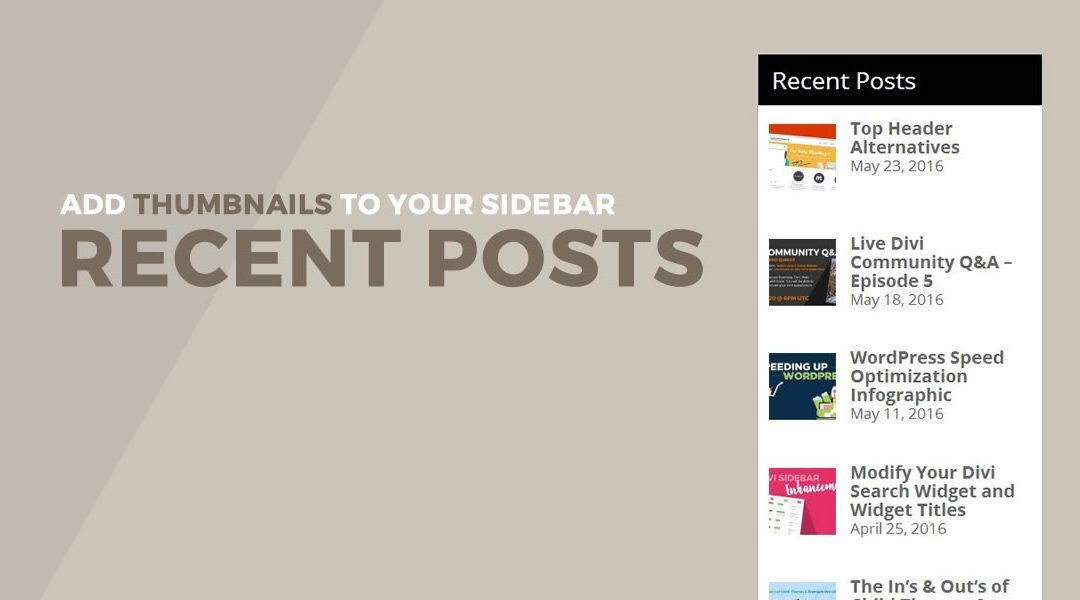
Ready to add a little pizazz to your sidebar? In this tutorial we are going to show you how to add thumbnail images to your Recent Posts Links on your Divi Sidebar using the Recent Posts Widget with Thumbnails plugin.
After publishing my tutorial and free layout pack for a magazine style blog, many asked for more tutorials on making the sidebar a little fancier. I also published a tutorial on Enhancing your Divi Sidebar Search and Widget Headers.
But now we are going to step it up a notch and create a Recent Posts list that resembles my own Magazine Blog: MontereyBayFun.com
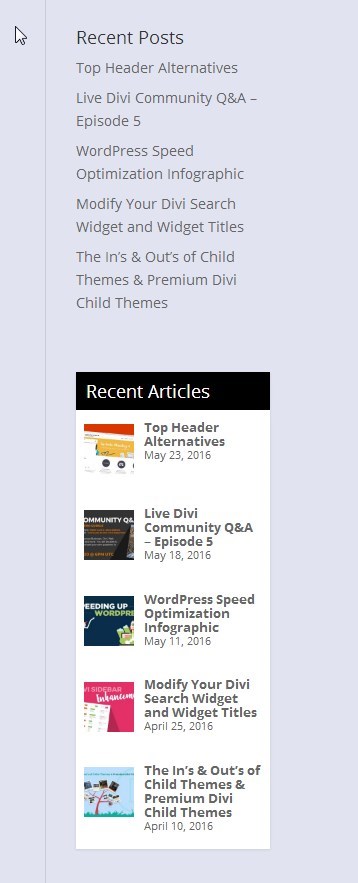
You can check out the before and after demo here.
First you will need to download the Recent Posts Widget with Thumbnails and install it on your website.

Lets Get Started
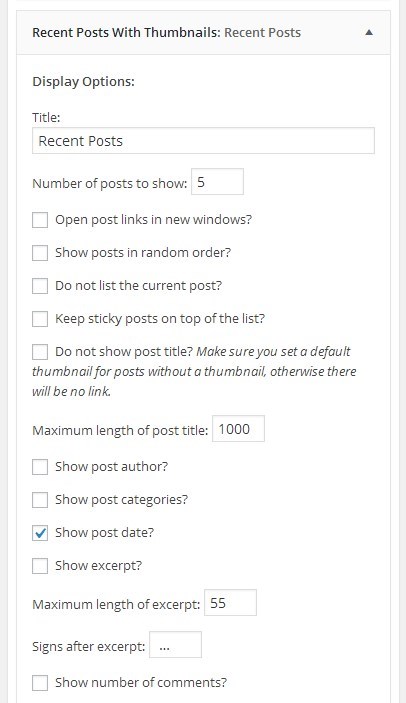
1. Go to Appearance > Widgets and drag and drop the Recent Posts With Thumbnails widget into the Sidebar area.

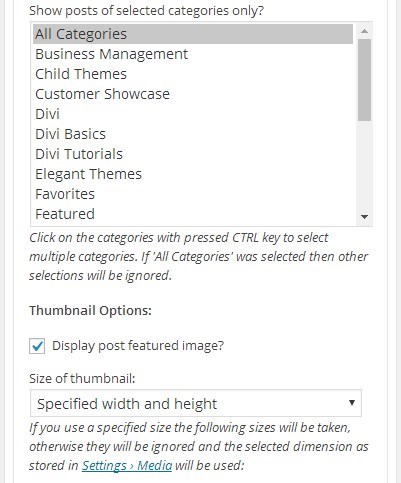
2. Update the settings as follows

The Magic of CSS
Now lets start to dazzle things up a bit with some CSS.
If you are working with a child theme you can go to Appearance>Editor and open your stylesheet. If not, go to Appearance>Divi Theme Options>ePanel>Custom CSS (which is located at the bottom of the ePanel)
/*------------------------------------------------*/
/*-------------[CUSTOM RECENT POSTS]--------------*/
/*---------------[BY GENO QUIROZ]-----------------*/
/*------------------------------------------------*/

	.rpwwt-widget h4 {
    		color: #fff;
    		background: #000;
    		padding: 10px;
		box-shadow: 0 1px 3px rgba(0, 0, 0, 0.1)!important;}
	.rpwwt-widget ul {
    		background: #fff;
		box-shadow: 0 1px 3px rgba(0, 0, 0, 0.1)!important;}
	.rpwwt-widget ul li {
    		padding: 0px 8px 0px;}
	span.rpwwt-post-title {
    		font-size: 13px;
    		font-weight: 700;
    		line-height: 1px;}
	.et_pb_widget_area .rpwwt-widget ul {
    		line-height: 14px!important;
		padding: 10px 0 16px!important;}
	.rpwwt-post-date {
    		font-size: 11px;}
And that’s it. Now you will have gone from ordinary to extraordinary.
And here are a few snippets you can find on my Divi Snippets page just in case you wanted to make that sidebar a little wider and remove that dividing line.
/* remove left padding in sidebar area */
	.et_pb_widget_area_right, .et_right_sidebar #sidebar {padding-left: 0px;}

/* removes divider on post pages*/
	.container::before {display:none;}

/* removes divider in sidebar modules */
	.et_pb_widget_area_left {border-right: 0px solid rgba(0, 0, 0, 0);padding-right: 0px;}
	.et_pb_widget_area_right {border-left: 0px solid rgba(0,0,0,0); padding-right: 0px;}
And now you have one more way to make your Divi website stand out above the rest!
Have fun!!!
Well that’s all for now. I hope you find this article useful.
![]()


Very cool. It conflicts with the h4 tweak from a few weeks back, though.
https://dl.dropboxusercontent.com/u/5313087/weird.jpg
I put it on http://www.motionpub.com. Thanks, man. Great stuff as usual.
Never mind. I removed
padding: 4px;
and it took. 🙂
I am really glad you showed this really wanted to tweak the sidebar. http://pamperyourdogs.com
is starting to like like a real site.
Thanks Stephen. Your site is looking great. And I love the content as well. Also try adding this little css snippet to your ePanel to see if it helps make your logo a little more clear.
/* fix blurry logo */ #logo {-webkit-transform:none;}Love this Geno. I tweaked the sizing for my rectangular blog header images and it works a treat. Thanks for continuing to be so generous with your tips!
Geno – Love this!
Quick question… I believe I followed the instructions, but the sidebar title of the recent post list if off center and down into the side bar line / underscore (I got that from one of your other great tuts).
Thoughts on how I can have it look the same as the other side bar elements?
The site I’m working on is: http://howtoscrivener.com/hello-world/
Looks like there is some conflicting CSS, I don’t see what is causing it, but this line of CSS should override it…
.rpwwt-widget h4 { padding: 0px !important; }Thank you!
Works Great.
I tweaked it a little bit though.
/* This code snippet is used to add an underline to the Widget Titles */
.widgettitle {
border-bottom: solid 2px #000000;
margin-bottom: 25px;
}
/* This code snippet is used to add a background color Widget Selections */
.et_pb_widget ul li {
background-color: #f9f9f9;
padding: 10px;
}
/* This code snippet is used to indent the unordered lists */
#left-area ul, .entry-content ul, .comment-content ul {
margin-left: 30px;
list-style-position: outside;
}
/*————————————————*/
/*————-[CUSTOM RECENT POSTS]————–*/
/*—————[BY GENO QUIROZ]—————–*/
/*————————————————*/
.rpwwt-widget ul {
background: #fff;
box-shadow: 0 1px 3px rgba(0, 0, 0, 0.1)!important;}
.rpwwt-widget ul li {
padding: 0px 8px 0px;}
span.rpwwt-post-title {
font-size: 13px;
font-weight: 700;
line-height: 1px;}
.et_pb_widget_area .rpwwt-widget ul {
line-height: 14px!important;
padding: 10px 0 16px!important;}
.rpwwt-post-date {
font-size: 11px;}
You can see it in action
https://chaunceycrandall.com/blog
Nice. Thanks for sharing. Your site looks great!
Pasted the code at the bottom of my child theme stylesheet, but it didn’t change the formatting. Probably doing something silly. . .
Try making sure you have cleared all your cache. Always make sure you have cleared your browser cache, any plugin cache, and then your hosting cache.
you are the best!!
Awesome Plugin!! Easy to implement and works great! Thank you!
Thanks for taking the time to comment Amy. Glad to have you here 🙂
Great plugin, I installed it on divi, but I am having too much space between the post tile. I need to decrease the line height for it. It seems to be stuck on 2 anyone have this issue?
Do you have a link you could share?
I’m so glad I found your site. I was going mad looking for a plugin like this. The CSS code has helped me enormously. Thanks a lot!
Awesome. Glad to be of service Bianca. Cool blog you have by the way. Great branding and consistency on all the images you use. 🙂
Very cool indeed. I can see on the example the text are left justified. MIne are centered. How can I make them left justified?
Thanks. It is left aligned by default. There might be some other CSS on your website causing that maybe? You can add
.rpwwt-widget ul {text-align:left}