Have you ever wanted to add more info to the top header instead of just a phone # and email address? How about a physical street address or new social icons?
Well it is easier than you think using the secondary menu and Font Awesome.
Getting Started With Font Awesome
We are going to be using Font Awesome in this tutorial. Font Awesome allows you to integrate Font Icons very quickly and easily. Click here to read more about Font Awesome.
1. To get started you will need to download the entire font awesome directory to your website. You can download it here at Font Awesome.
2. Once you had ftp’s the library into your website you will need to go to Divi > Theme Options > Integration and adding the following code to the head of the blog.
<link rel="stylesheet" href="path/to/font-awesome/css/font-awesome.min.css">

3. The scroll down to the bottom of the page and Save Changes.
Building the Secondary Menu
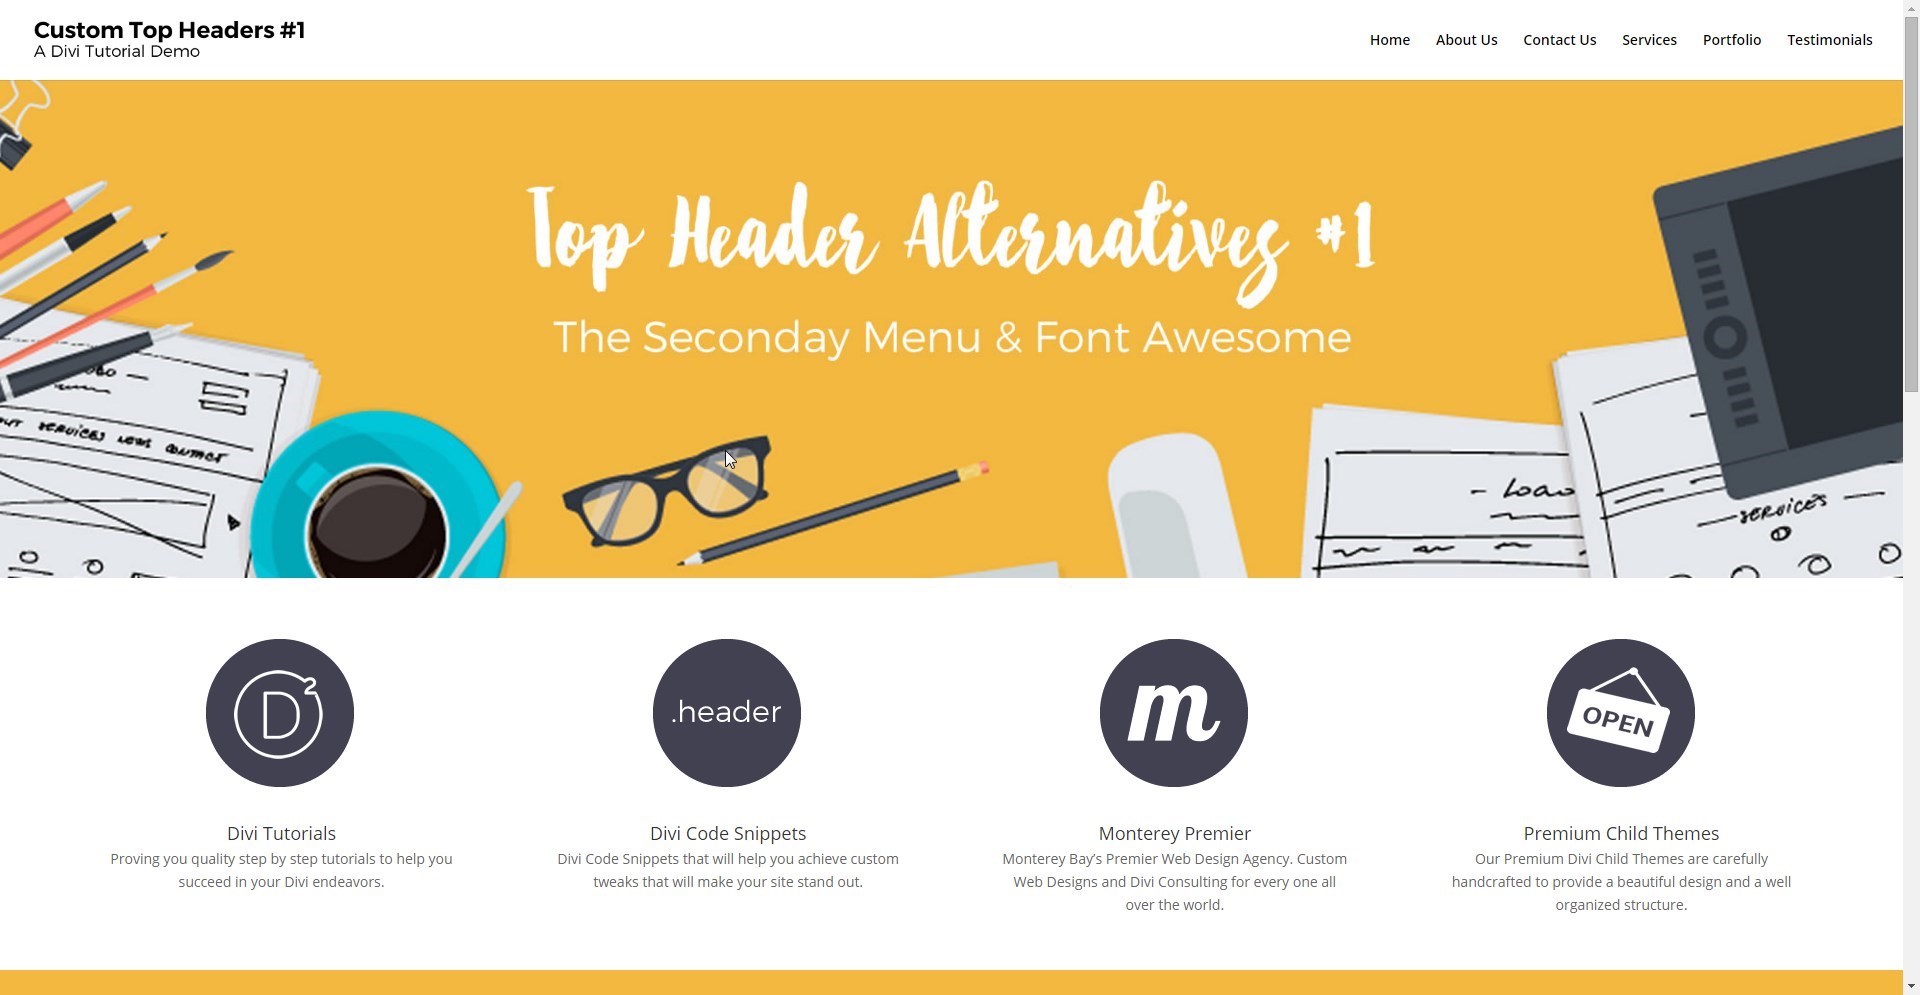
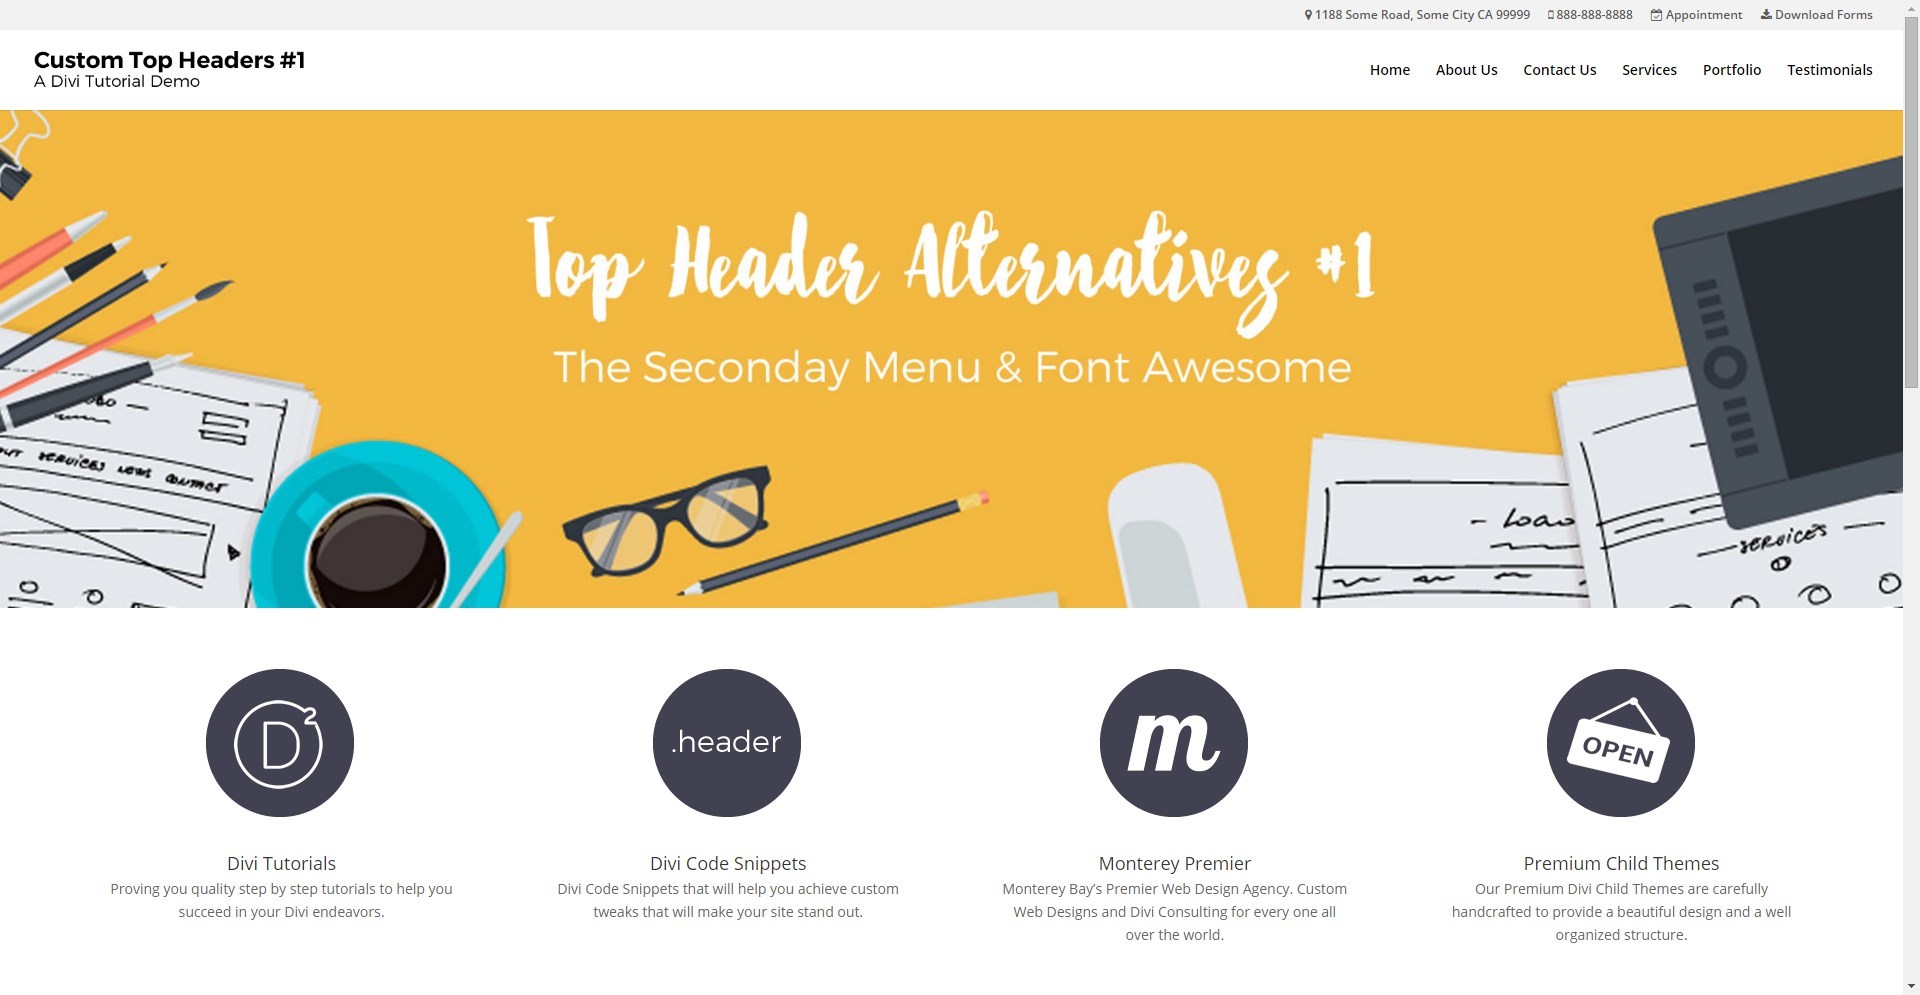
So to get things started a I created a basic home page with a standard primary menu
1. As you can see here I have not done any other customization to the header area except change some colors and added some basic content.
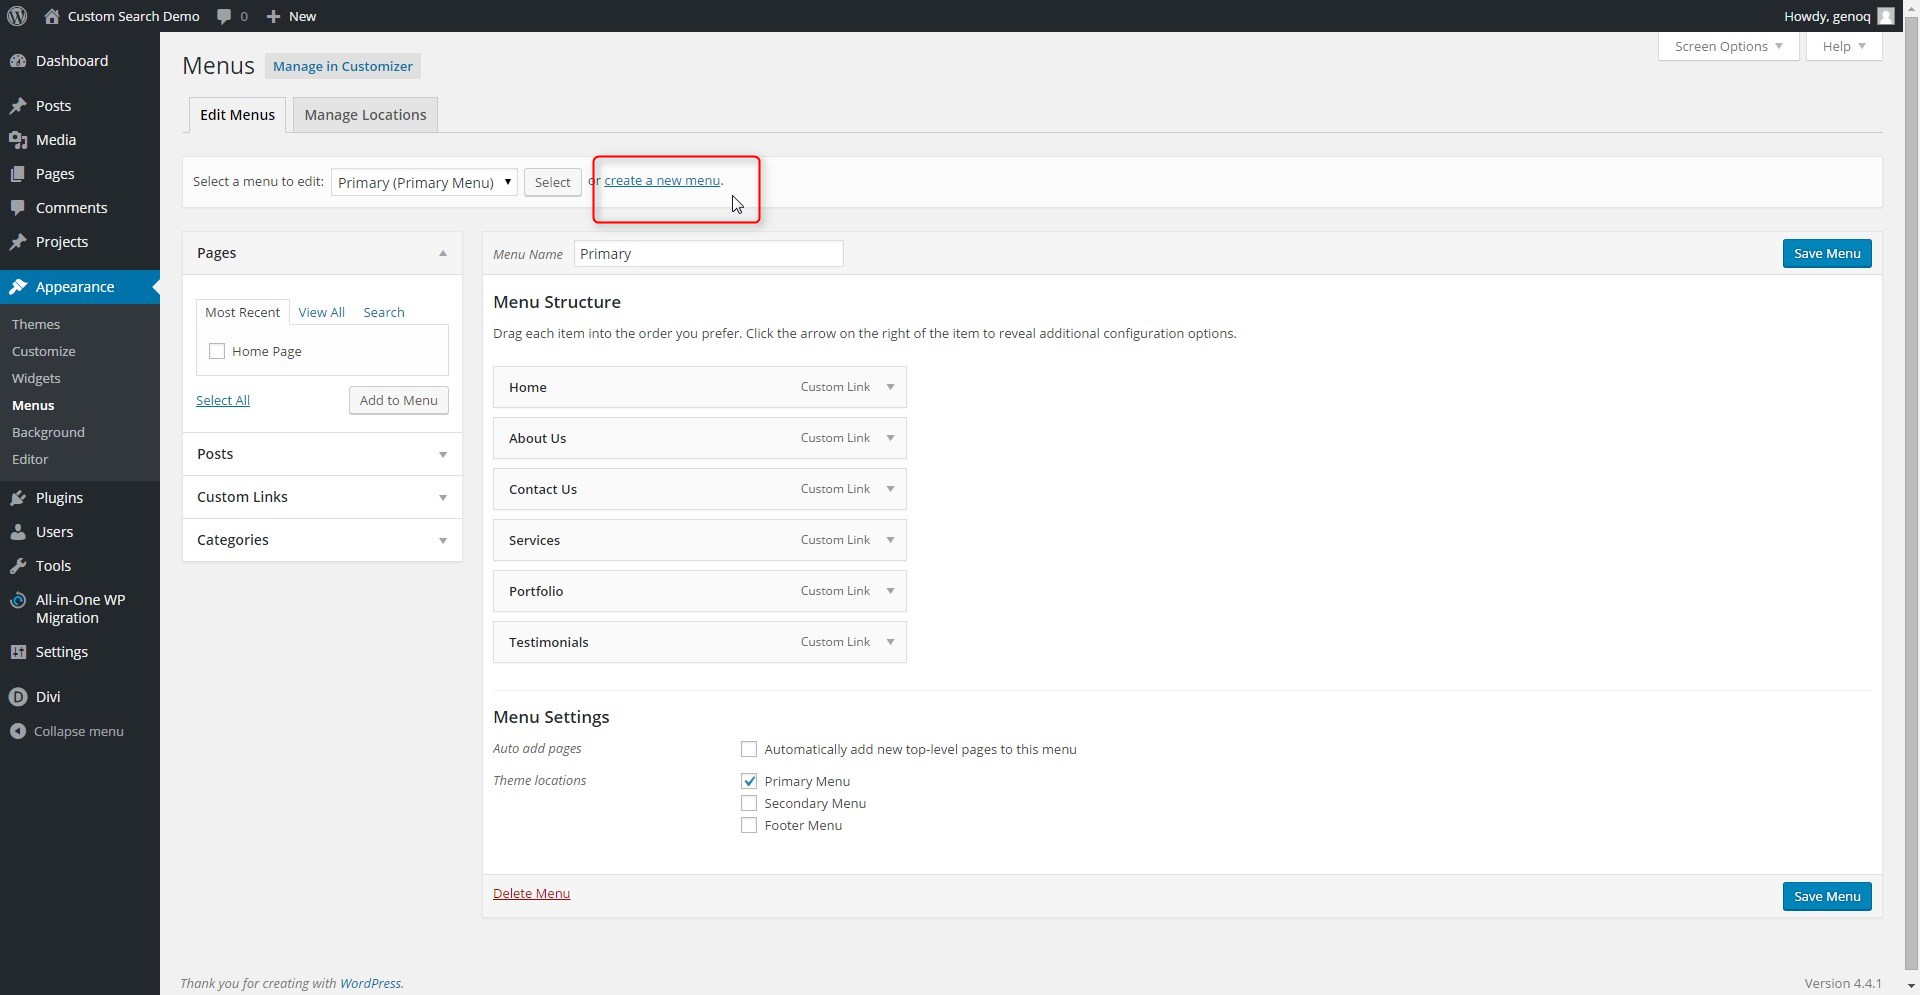
2. Now the first thing you are going to do is create a secondary menu. Go to Appearance > Menus, Select “create new menu”, name it Secondary and select “Save Menu”.
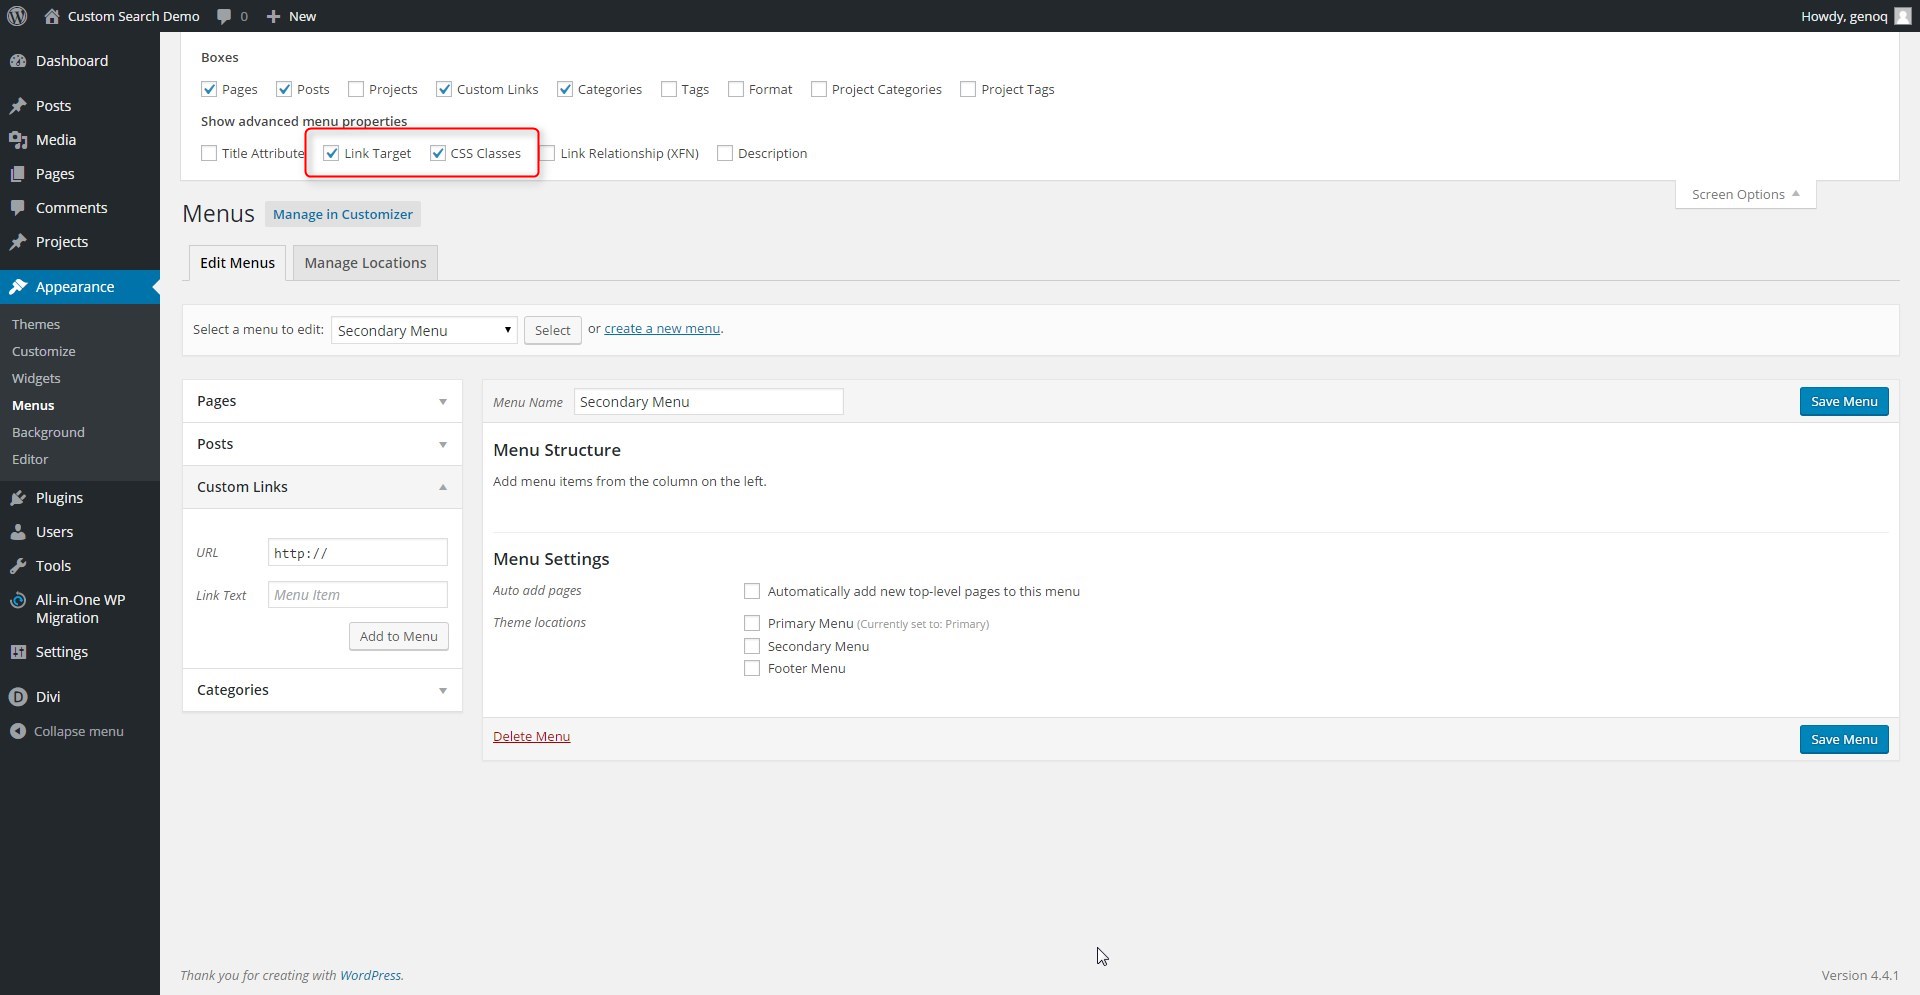
3. Enable the Link Target and CSS options by selecting the Screen Options Tab on the upper left hand corner of the page.

4. Then tick the Link Target and CSS boxes.
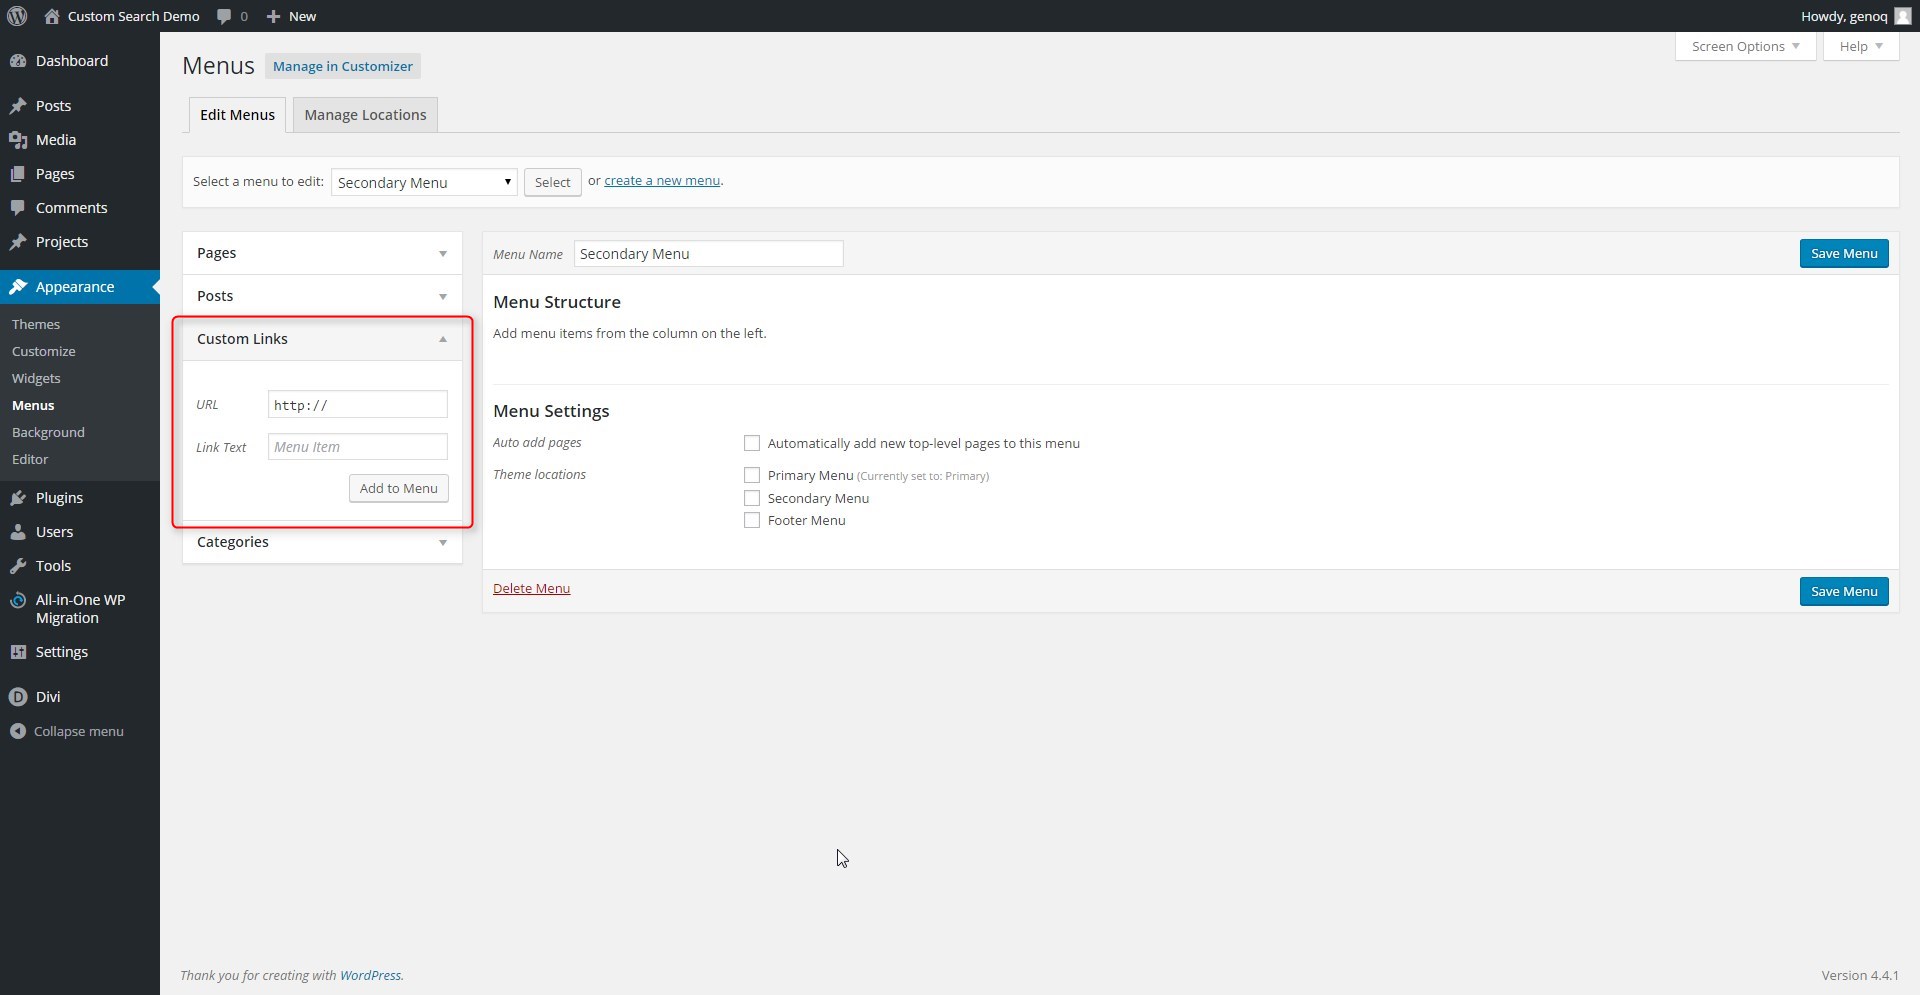
4. Next you are going to add each menu item. You have several ways to add menu items. On the left you have options to add Pages, Posts, Custom Links and Categories. In today’s tutorial we are going to be adding custom links.
4. So for example if you wanted to add an address that links to Google Maps. You would add the url for Google maps and then the actual address in the Link Text.

5. If you want to add an icon in front of it, like a map marker for instance, then you can include the Font Awesome code in front of it.

6. Now to enable your new Secondary Menu in the Top Header, scroll to the bottom and tick the Secondary Menu option.
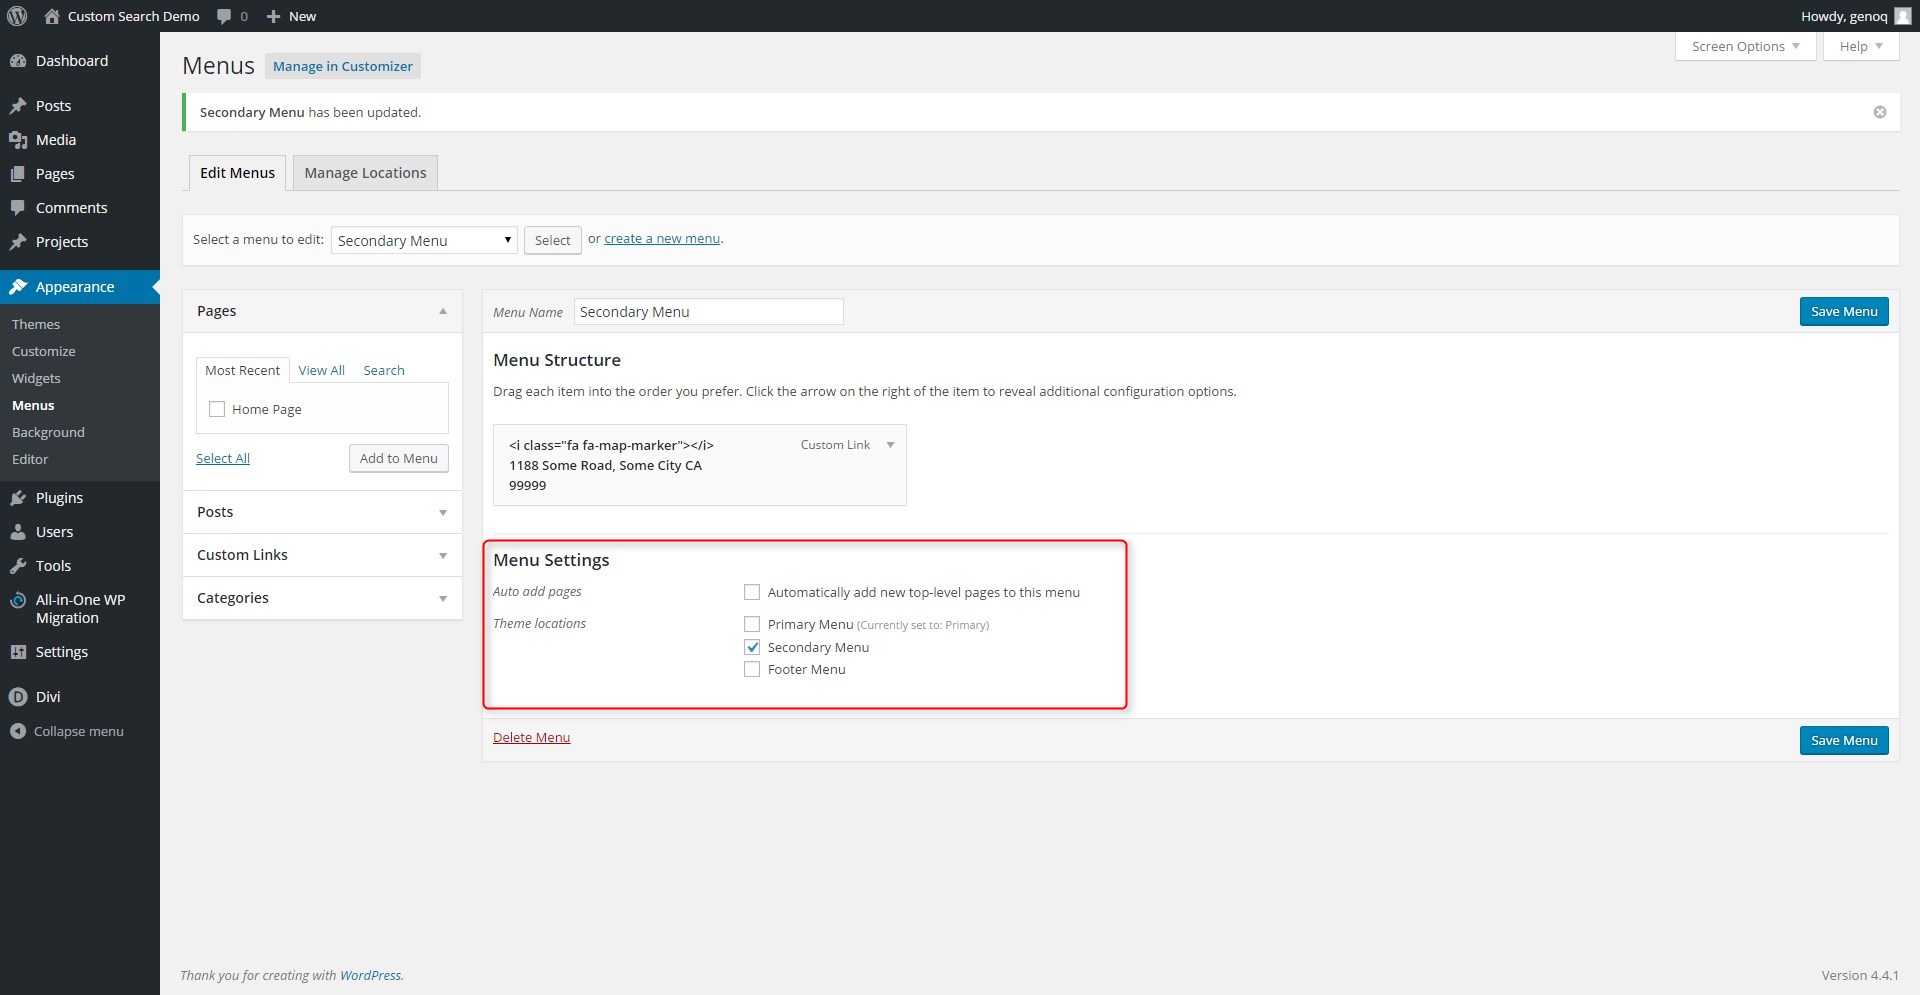
7. And now your Secondary Menu is enabled in the Top Header

8. Now you can go through and add the other items. Here are some Link Titles to get you started. Just add your own url.
<i class="fa fa-mobile"></i> 888-888-8888
<i class="fa fa-calendar-check-o"></i> Appointment
<i class="fa fa-download"></i> Download Forms
<i class="fa fa-cloud-download"></i> Resources
<i class="fa fa-map-marker"></i> 1188 Some Road, Some City CA 99999
TIP # 1: To make the telephone number launch a call in mobile, use this format as the url: tel:+8888888888
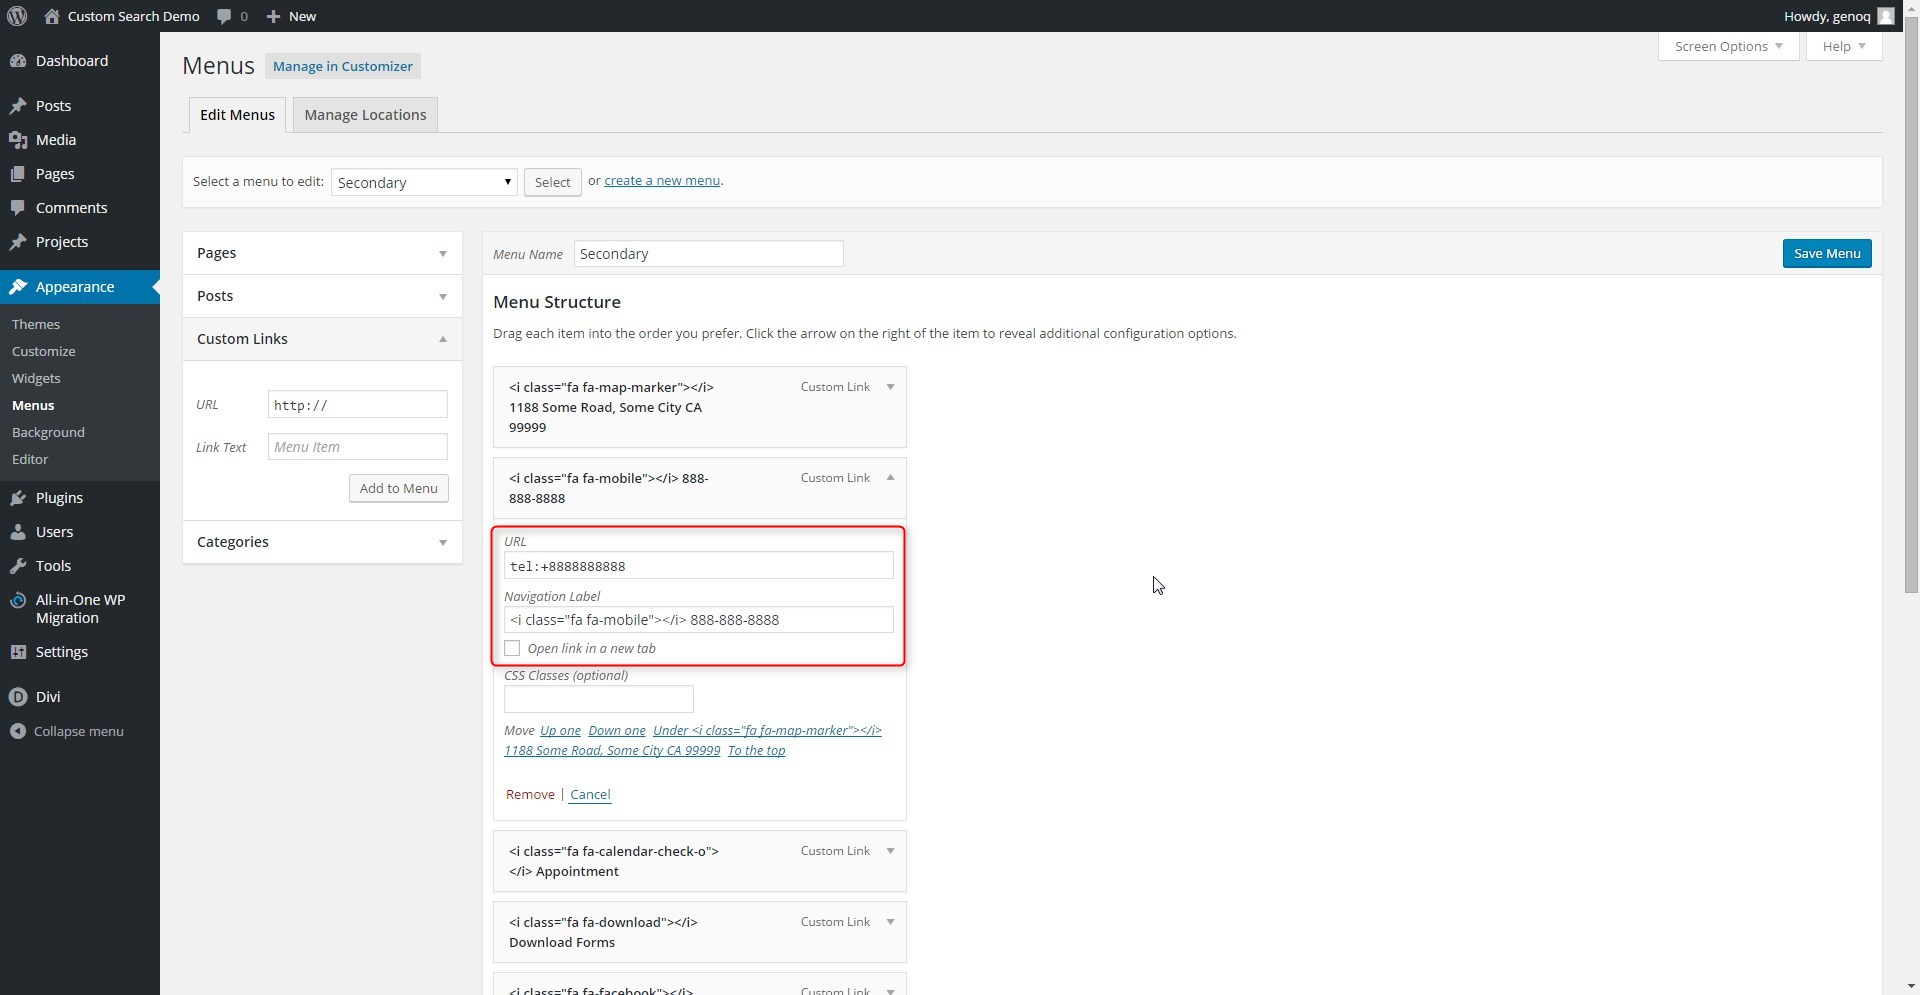
TIP # 2: To make the links open in new tabs, select the “open in new tab” box

9. So after adding a few more your menu now looks something like this
Adding Social Icons
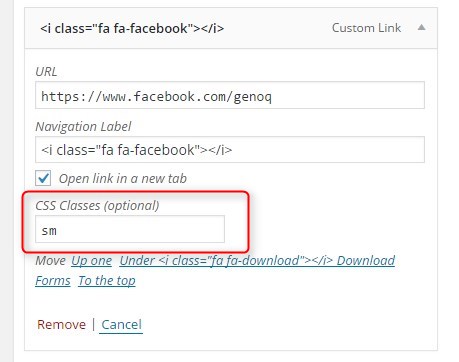
10. Now to add social icons, we follow the same steps but the Link Title will only be the Font Icon. No text.
Also add the following CSS Class: sm I will explain more later.
11. Go ahead and add a few more. Here are some common Font Awesome icons. More can be found here.
<i class="fa fa-facebook"></i>
<i class="fa fa-facebook-square"></i>


<i class="fa fa-twitter"></i>
<i class="fa fa-twitter-square"></i>


<i class="fa fa-pinterest-p"></i>
<i class="fa fa-pinterest-square"></i>


<i class="fa fa-google-plus"></i>
<i class="fa fa-google-plus-square"></i>


<i class="fa fa-linkedin"></i>
<i class="fa fa-linkedin-square"></i>


<i class="fa fa-yelp"></i>
<i class="fa fa-tripadvisor"></i>
12. And now you have something like this.

But lets say you want to add some color and make those SM icons stand out a bit more.
And Now The Magic of CSS.
If you are working with a child theme you can go to Appearance>Editor and open your stylesheet. If not, go to Appearance>Divi Theme Options>ePanel>Custom CSS (which is located at the bottom of the ePanel)
13. Add this CSS.
/*------------------------------------------------*/
/*----------[TOP HEADER ALTERNATIVES]-------------*/
/*-------------[BY GENO QUIROZ]-------------------*/
/*------------------------------------------------*/

/* icon colors */
i.fa.fa-facebook {color: #265999; font-size:20px!important;}
i.fa.fa-twitter {color: #00ace2; font-size:20px!important;}
i.fa.fa-pinterest-p {color: #ef0021; font-size:20px!important;}
i.fa.fa-google-plus {color: #df4b38; font-size:20px!important;}
i.fa.fa-linkedin {color: #117bb8; font-size:20px!important;}
i.fa.fa-yelp {color: #c42026; font-size:20px!important;}
i.fa.fa-tripadvisor {color: #71a55d; font-size:20px!important;}


/* mobile menu adjustments */
.et_mobile_menu i.fa {display: none;}
.et_mobile_menu .sm {display: inline-table; padding-left: 26px;}
.et_mobile_menu .sm .fa {display: block!important;}
14. And this should be the result.

Note. My CSS above includes adjustments to the mobile menu. This is what the mobile menu looked like before and after.


There is so much more you can do with this and I hope it gets your creative juices flowing. Check out the live Demo and if you use this one one of your projects please share a link below 🙂
Well that’s all for now. I hope you find this article useful.
![]()


Love it!
Love It. Thanks Geno
Awesome, thanks for the post.
Love your tutorials Geno. Thank you! This may be more customization that you want to share, but what about having a left aligned hamburger menu in the top header? So, hamburger menu on left, social icons in right, then hide main nav so you have one clean line with no logo…
Sounds like a fun future tut 🙂
Hi Geno, why in the mobile menu all the icons of the telephone, location and other info has been removed ? Wouldn’t it be better to keep them as well ?
Divi moves the secondary header in top the primary menu in mobile by default. So we would have to come up with a solution to stop Divi from doing that. It can be done but just needs some time to work it out.
Very helpful. Thank you!
Emanuele, I use the Divi Booster plugin to fix that. I’ve had the same thought before.
It’s from Elegant Marketplace: https://goo.gl/nEKkMj
HANDS DOWN – YOU ROCK!! THXMAN
Was able to get what I wanted (close enough) by creating a secondary menu and using font awesome hamburger as a top level and then building the menu structure underneath. not 100% like I want it as I wanted because I wanted the menu on the left and the social on the right… haven’t figured out how to split the menu items yet.
I love the work you do with DIVI 🙂
i used this on the mobile menu adjustments :
.et_mobile_menu .sm {display: inline-table; padding: 10px 5%;}
so the padding around the social icons can be perfectly aligned with the main menu above.
Love it!
Excellent.
Thx 🙂
Great tutorial.
Thanks!
Thank you!This was exactly what I needed, I was about to look for a tutorial to change the social icons and then I got your email update with the tutorial!
This is ridiculously cool, man. Very good tutorial.
Thanks a Million very useful
None of your images are loading when I click to enlarge.
Should be working now 🙂
Yes, thank you! Awesome tutorial. Should be in the Divi documentation somewhere. Thanks!
Thanks Nate
SUper cool tut, and use it a lot. But I have noticed that depending on how many extra fields and their names influence the social icon. So the social icon action comes in two lines sometimes… Where it push the top one to the line above if there is space… Sometimes the two first icon… Is there a way to make sure the social icons always are on the same line…
Yes you just have to adjust margins, padding for the menu items and I often adjust width for my top header container and main-header container for longer menus and smaller screen widths using media queries. Each project is different.
Ah okay, any special fool proof way to do this for the mobile menu?
This will help you keep the top header visible on mobile but you might have to ditch a few items on mobile due to limited space.
Top Header - Keep Top Header Menu visible on mobile /* keep top header visible on mobile */ @media (max-width: 980px) { div#top-header { display: block !important; position: relative;} #et-secondary-nav, #et-secondary-menu { display: block !important;} .et_secondary_nav_only_menu #main-header { top: 50px !important;}}This is incredibly kind of you, Geno. My team find this, and all of your tutorials very useful. Next time you’re in Jacksonville, drinks are on me!
Thanks John
Don’t we need to add- aria-hidden=”true” as well into the Font Awesome code?
That is a good option to add for accessibility. Thank you! Although you wouldn’t want to add that if the icon is the only text on a menu item.
I just love that when i get stuck on a divi problem – I google search and 9 times out of 10 one of Geno’s tutorials magically appear. Thanks Geno – worked like a charm and spared me some pain 🙂
THAnK YOU THANK YOU THANK YOU! I have been struggling all day, I have read and try so many tutorials, that my head wants to explode. I have tried everything, but nothing worked. When I saw this tutorial I thought -“No it can’t be this easy, after everything that I have tried to do all day” – and VOILÀ. It worked perfectly! Thank you so much
Thank you for taking the time to let me know. It is comments like this that encourage to keep putting out these tutorials 😀
This did not seem to work for me. Do I need to adjust the path were I uploaded my Font Awesome icons? If so, I did. Not sure what to do now.
i think I got it fixed. I add the whole FTP url instead of removing the parent_root. It seems to work now.
Sweet.
Thank-you … This, and you are why I LOVE Divi & it’s community so much. We use DIVI almost exclusively for our client work and these tutorials are why. Not only does it make our lives easier by teaching us new tricks, but it is a rare occasion that a client asks for something that someone from the DIVI community hasn’t already figured out and written a tutorial. It saves us so much time.
Yeah that’s what makes this community so great. So many people contributing makes it so easy to do just about anything with Divi. My web design agency works exclusively with Divi and nothing else these days.
Hi! Which file of the Font Awesome do I import into the DIvi library? Thanks
Request your Font Awesome embed code here: http://fontawesome.io/get-started/
Once you get it, Go to Divi Theme Options > Integration and Add it to the Header box.
Hi Geno, how can I control the size and color when I have icons with text? I tried to do the same that you do with social icons, but the icons with text doesn’t works. How can I do? Thanks a LOT
I am not sure I understand. I use text with my icons all the time. Check out how I used them here on this child theme demo.
http://montereypremier.com/themeshop/montereypoolpros/
Hey Geno! Thanks to you my desktop version of my website look exactly how I want it. However when going to tablet and phone view, the overlay logo and the header I installed like above disappear. Any suggestions? I also don’t know where to add the above CSS. Thank you Geno!
I would need to see the site to figure that out.
Good Day, im stuck with my secondary menu, i added 4 images and would like to style them but no luck..
Would you be so kind as to assist or link me to the right direction?
I would need to see the links
Hi Geno! I’ve been wracking my brains on trying to get the mobile version of my website to look like the desktop. I have the secondary header as layed out in this tutorial for desktop and im trying to make it similar for mobile. Which isnt as easy as it sounds. With this new css added, the information becomes visible but it takes up 3 lines. so, I’m curious can i move the logo to the left more and make more space and or/ is there a way to customize the secondary header content only for the mobile version? my website is: http://www.everythingjustclicked.com thank you for your time and expertise.
Matt
That will take some extra CSS because the shop link breaks into a new line. A better solution might be to hide that secondary header in mobile and use this brand new fixed mobile footer bar for those links.
https://montereydev.com/demos/divi/mobile-footer-bar/
Geno, When I attempt to click to call with my mobile number placing 8888888888 will allow the phone to dial that number when added to the url but when i place my number it calls out of the country because it changes the format to 51 64 241 791. Please advise as I really want this to work. I’ve tried adding other code from the internet but it separates the phone icon to a higher line. thank you!
try adding a 1 to the beginning of that. 18318885555
Hi Gino. All your images have disappeared from this tutorial
I was making some upgrades this week. You might have caught it in the middle of an update. Let me know if the images are showing for you know. You might need to refresh your cache.
Hi, I have fullscreen header style and second menu appears inside hamburger menu. Is it posible put this icons above hamburger menu? Many thanks
I would need to take a look at your site.
Hi! How would I be able to split the information so address stays above the logo on the left, and the icons stay above the “testimonials” parent item on the right?
Hi Sarah, I think in your case, using the new Theme Builder might be an easier solution.