
Divi comes packed with a number of Google Fonts to choose from for your body text and header text. You can sort through those in the Customizer Settings. But these are only a small fraction of the fonts available in the Google library.
Other options to add more Google Fonts to your website include plugins like WP Google Fonts and Easy Google Fonts. I prefer to use plugins for the heavy lifting and in this case it is easy enough to do without a plugin. I am always trying to figure out ways to reduce the number of plugins I use on my website for security and page load speed purposes.
So here is the easiest way using Google’s Font Library Tools.
Getting Started With Google Fonts
So let’s get started by figuring out which Google Fonts you want to use. It’s a good rule of thumb to use no more than three custom fonts on any website for design and speed purposes
1. So go to Google Fonts and select the two fonts you want to use. In this case, let’s use Varela Round and Merriweather Sans. For both fonts, you are going to select the Add To Collection button.
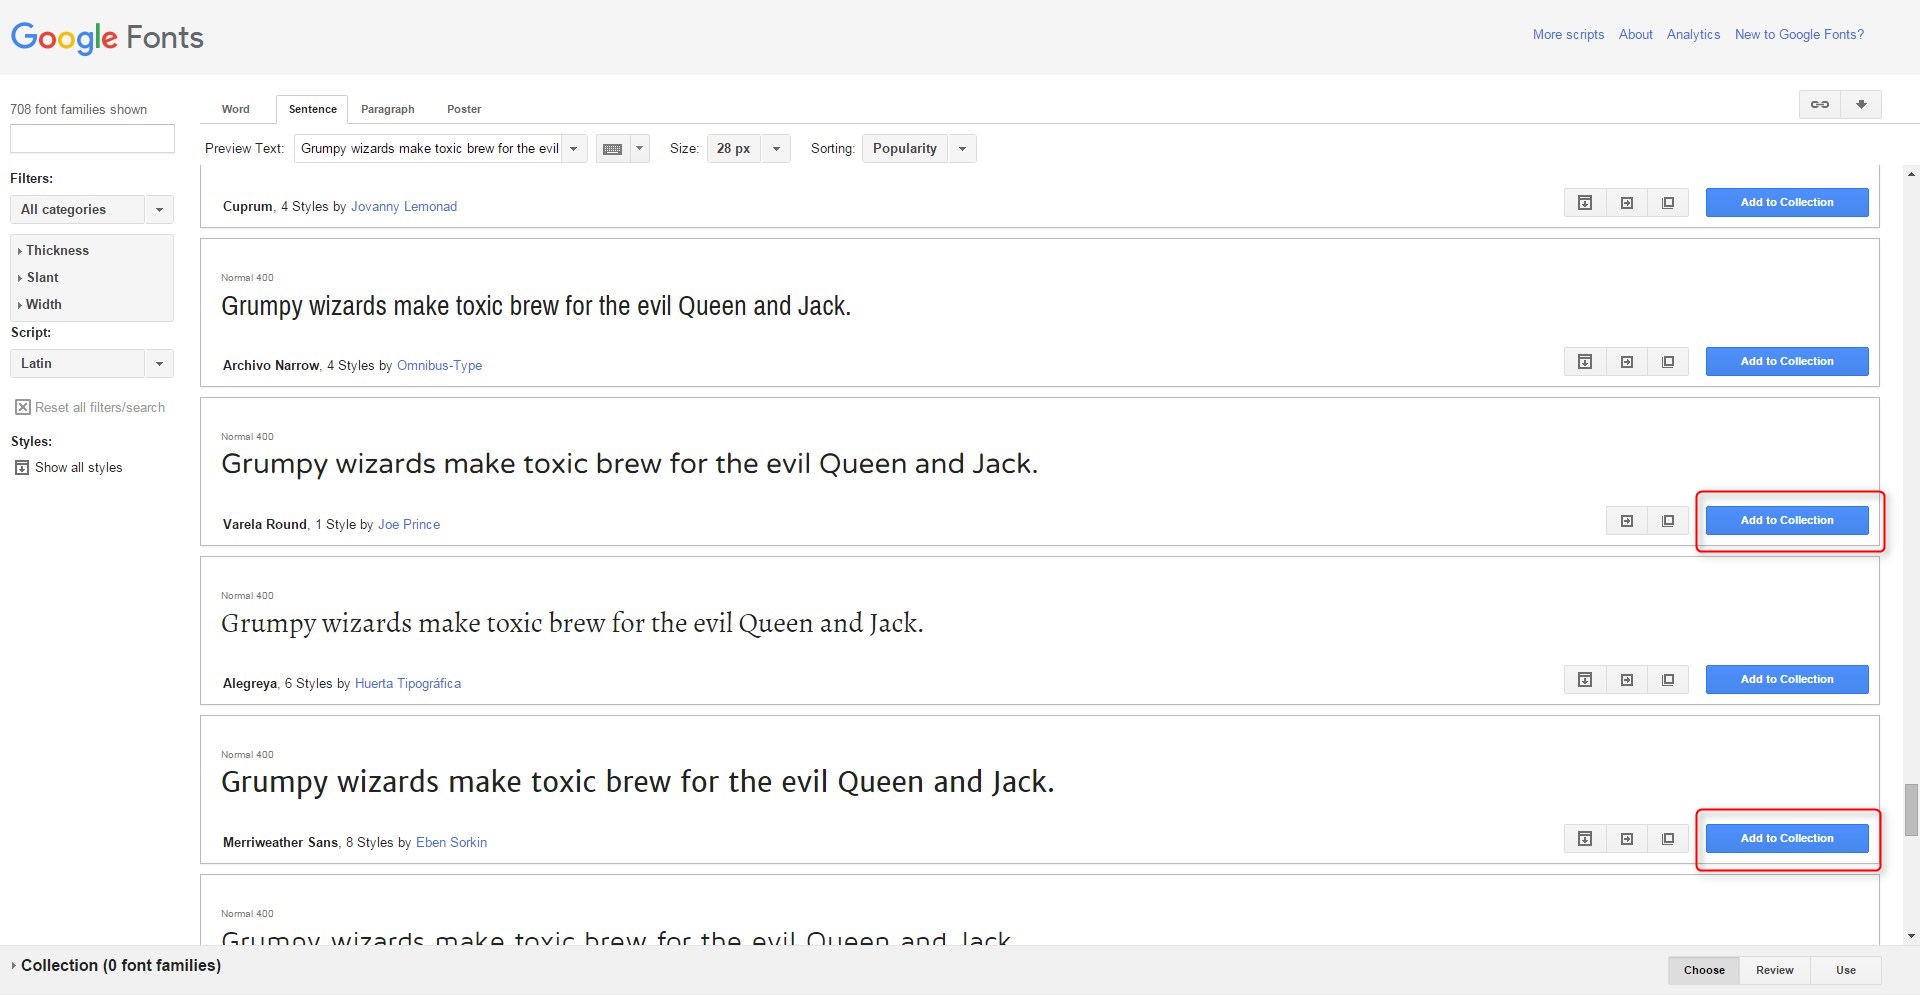
2. Next, you will select the Use tab in the bottom right hand corner of the page.

3. Then choose the styles you will want to use. Keep notice of the page load time monitor on the right. That way you can see how it impacts page load speed as you add more styles.

4. Now scroll down the page a bit and open the @import tab and copy that first line of code. This is the code that calls the fonts to your website.
![]()
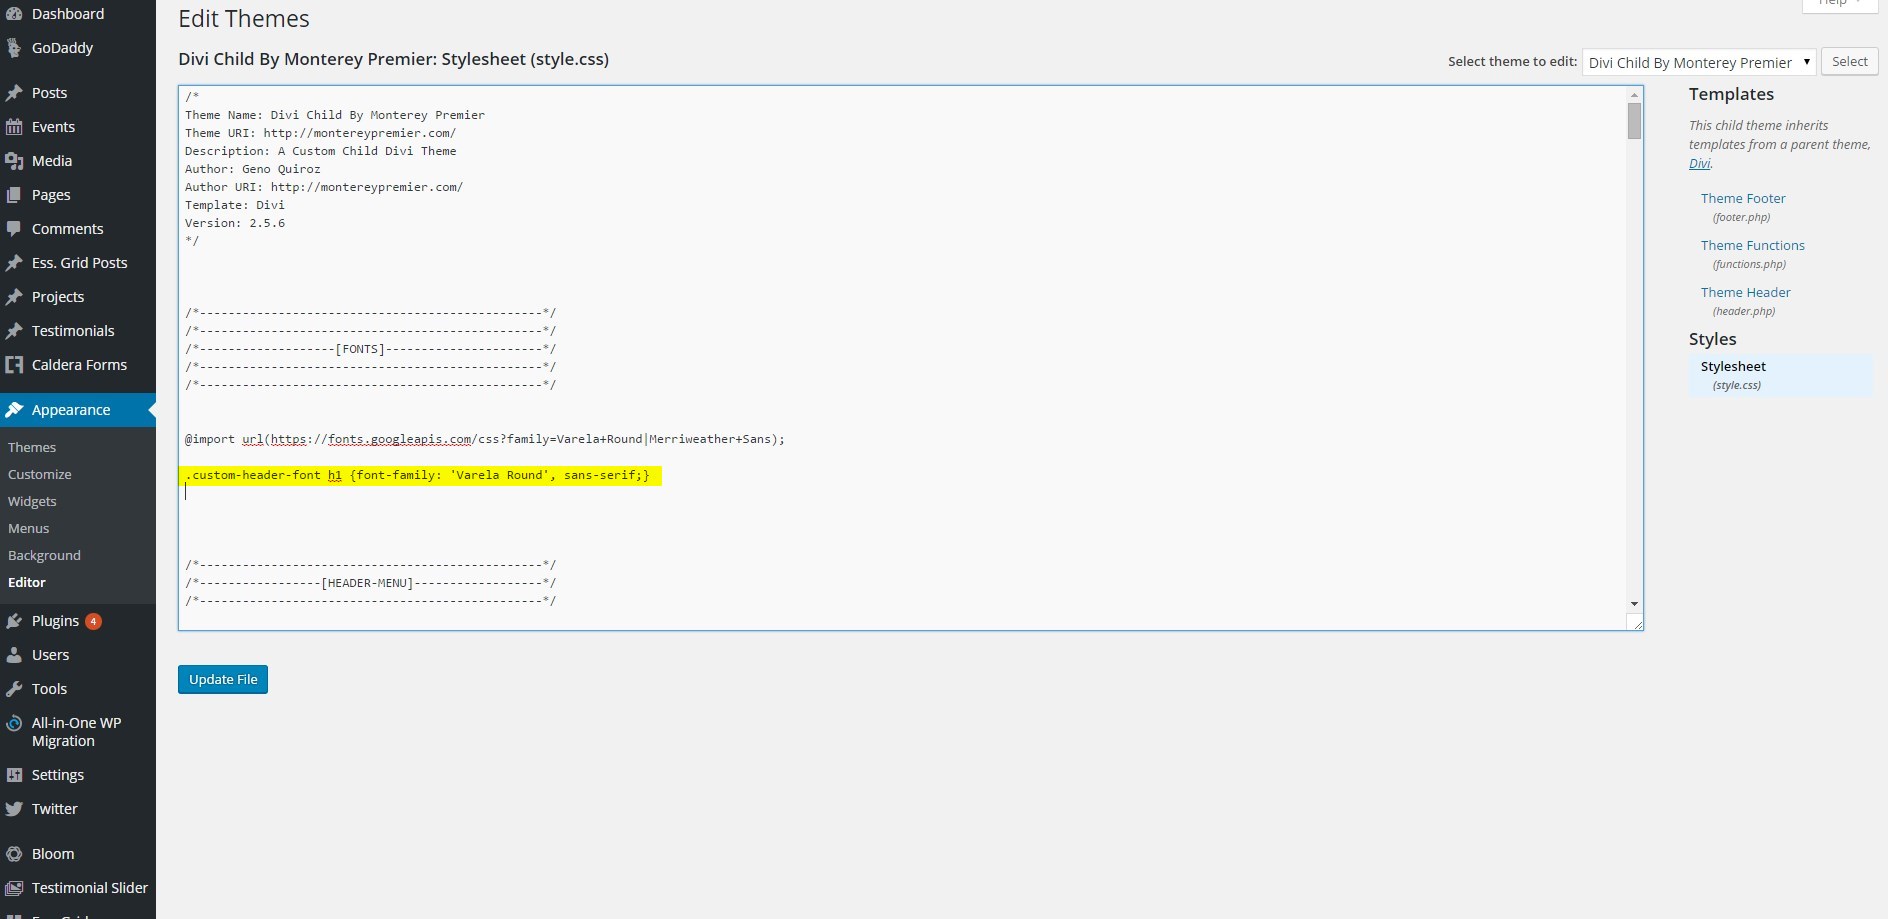
5. Now to to your Divi ePanel Custom CSS Box (or child theme stylesheet as I prefer to use) and paste that line of code.

6. Going back to the Google Font Tool, you will find the css required to change the fonts . You can them use them accordingly in your ePanel Custom CSS box or on your child theme style sheet.
![]()
7. So let’s say, for example, you would like all your headers to be Varela Round, but your regular Paragraph text to be Merriweather Sans. You would add this to your ePanel Custom CSS box or your child theme style sheet.
h1, h2, h3, h4, h5 {font-family: 'Varela Round', sans-serif;}
p {font-family: 'Merriweather Sans', sans-serif;}

8. Now if you want to target a header font in one particular location instead of site-wide, just give the module (or section / or row) a unique CSS Class. In this case, I will use custom-header-font.
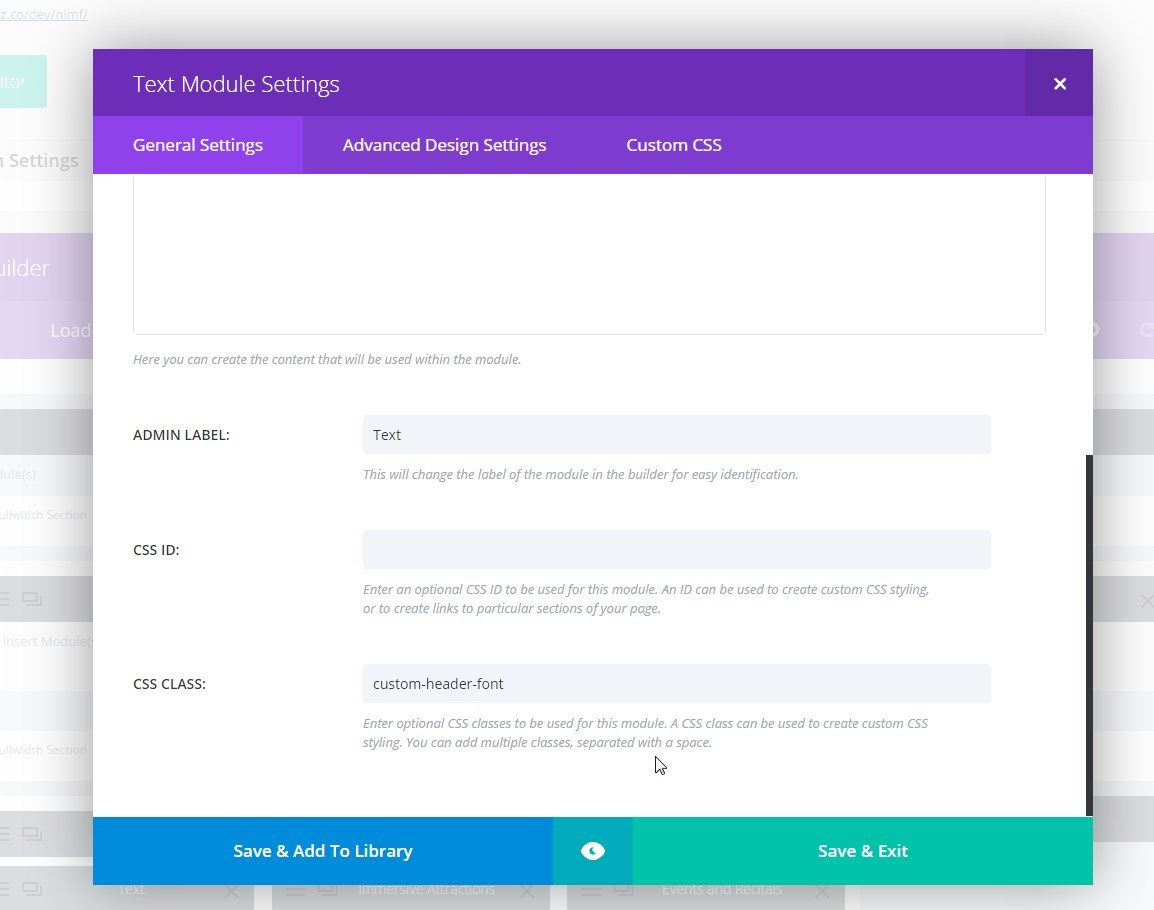
9. Make sure you assign the text as Heading 1.

10. Then add this CSS to your Divi ePanel or your child theme style sheet.
.custom-header-font h1 {font-family: 'Varela Round', sans-serif;}
That’s it! There are several methods that achieve the same result, but this one is one of the easiest in my opinion. Have fun!
Well that’s all for now. I hope you find this article useful.
Well that’s all for now. I hope you find this article useful.
![]()


Thank you Geno for this helpful guide 🙂
Thanks, Geno. I’d love to see you do something with other fonts. I see the tutorial here:
http://www.elegantthemes.com/blog/resources/10-fun-fonts-for-your-next-web-design-project
but have to think that there’s an easier way to do it in Divi once you’ve downloaded the fonts.
Working on that one soon
Thanks for sharing this. The font I want to use isn’t in Google Font. So I have downloaded a zip file copy. Do you have a “How to” add a non google font? Thanks
Exactly what I needed, thanks Geno!
ps I’m loving your site
Glad it helped and thank you for visiting the site 🙂
Hi Geno. Thanks for all the great resources you are sharing. Was following this step by step and got stopped at “Make sure you assign the text as Heading 1.” I dont have this dropdown menu at my text editor. Could you point out which editor you are using, it would be great help. Thanks
You might be using the Editor in the Text mode instead of Visual. There are two tabs on the top right of the editor to select between Visual and Text. To assign text as Heading 1 in the visual editor, you use the dropdown selector. To assign text as Heading 1 in the text editor, you can place the text inside tags that look like this…
It’s good, but as suggested by wpbeginner, usage of @import can slow down your site and you’re still requesting a url from google that is http://fonts.googleapis.com. In my case, one has to select those google fonts, download them into your theme/other folder, call them internally, and update its font family in child theme’s css file.
Extremely helpful! Thanks Geno, love your site.