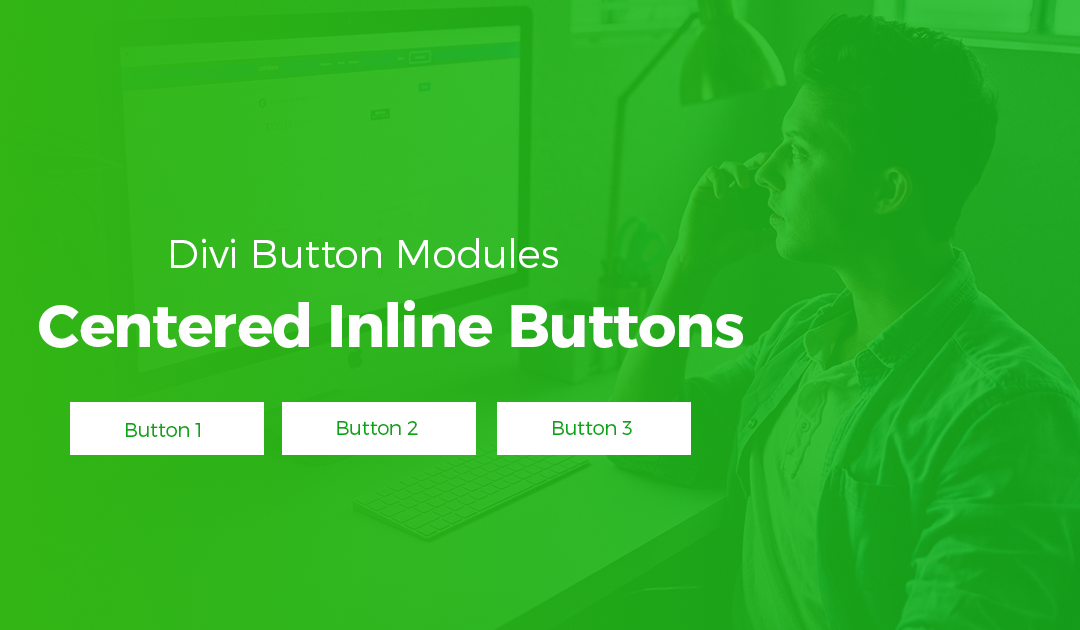
Are you looking for a quick and easy way to get all your buttons on a single line and centered?
A while back I wrote a tutorial for taking all of your buttons in a single column and putting them on a single line using a little CSS.
If you look at the comments, you will see that a number of people asked how to center those inline buttons. The solution was to put the buttons in a separate row and adding a little flex alignment CSS to the column.
This works great, but I recently came across a site where I needed to keep the button in the same column as several other modules due to the content I had on the column adjacent to these modules. By adding the flex align CSS to the column, every single module would then become inline which is problematic.
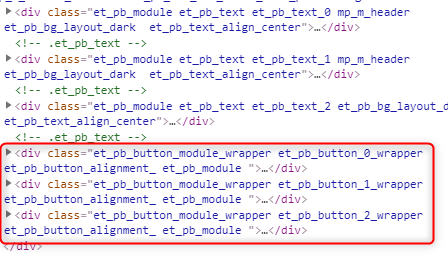
I realized I needed to figure out a way to wrap just the Divi Button Modules into their own DIV, so that I could apply that flex CSS to items within that custom DIV and without having to put them in a different row. Fortunately for me, I have been sharpening my jQuery skills and was able to find a quick solution.
Before
After

In this tutorial, I will show you how to use a little custom jQuery to wrap all the button modules within a specified column, into it’s own DIV. And with a little CSS, make them centered and in a single line.
Let’s Get Started Setting up the standard Divi Section & Classes.
Adding the section and column class
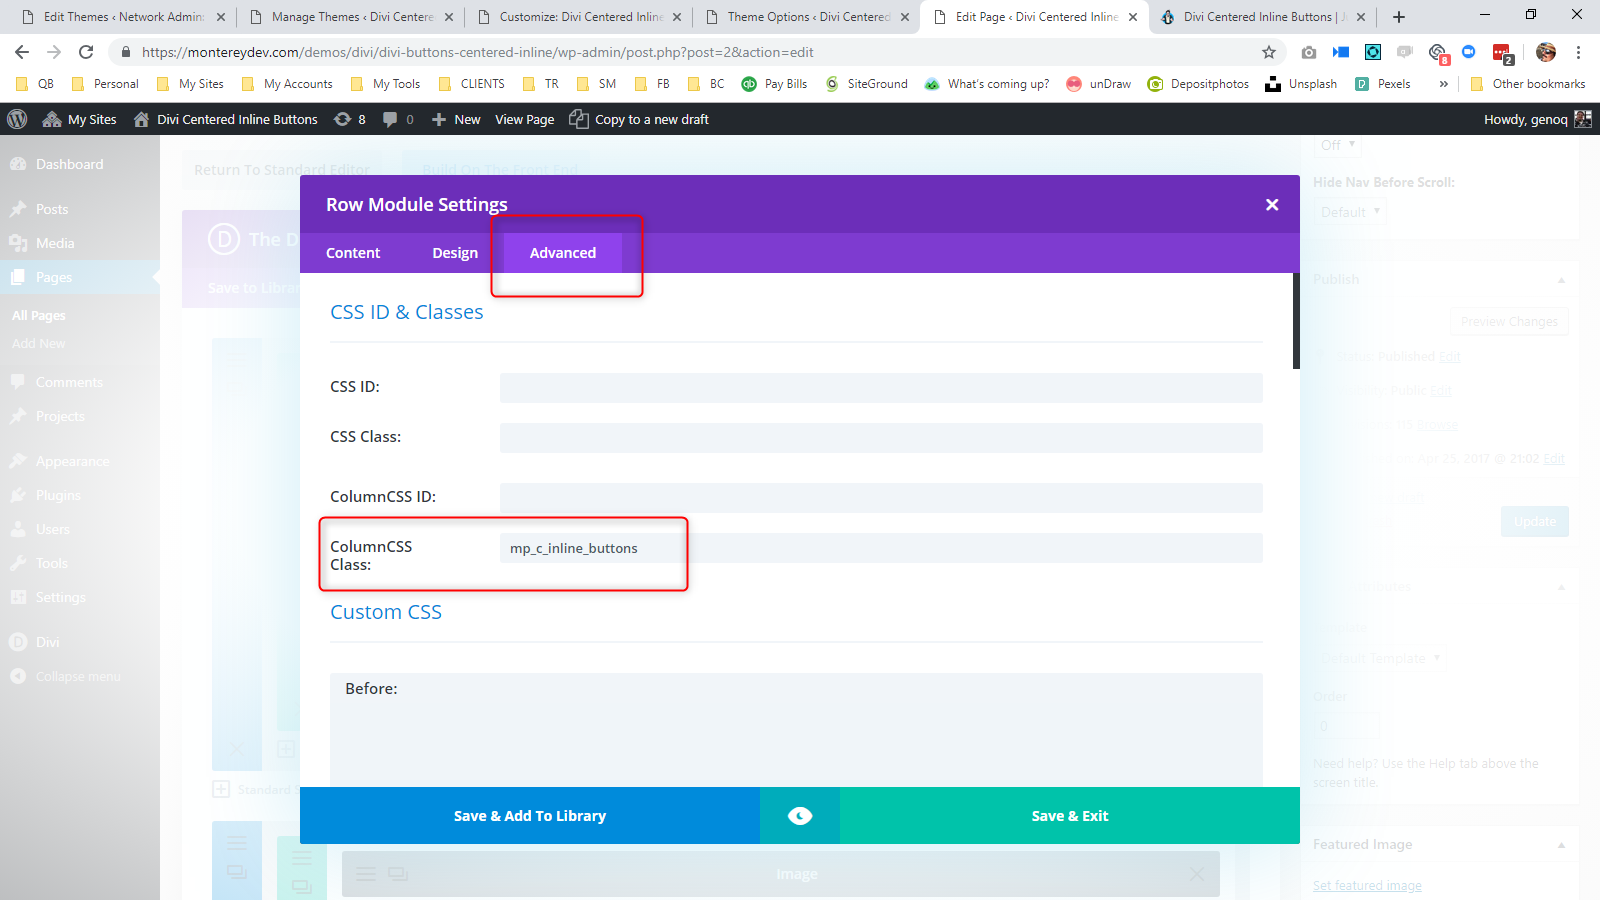
1. Once you have created a section & row, you will open up the row settings, and in the advance tab, find the column you will be adding the button modules, and add this class: mp_c_inline_buttons
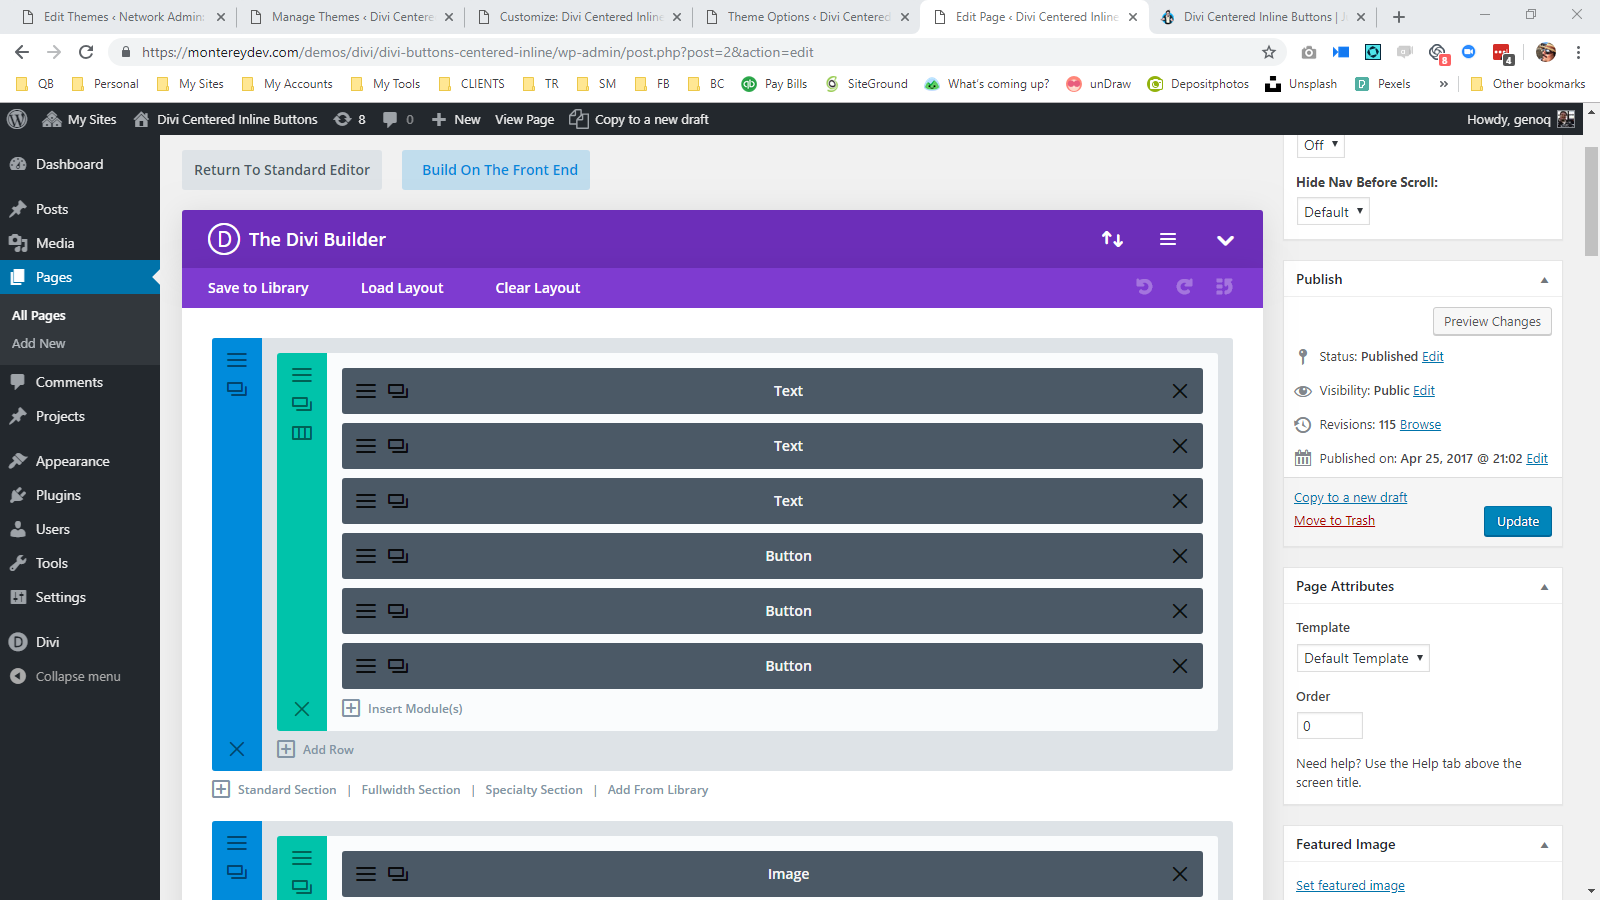
2. Go ahead and add your text modules, button modules, or whatever you want in that section. In my demo I added three text modules followed by three button modules.
3. Save your page and move on to the magic of adding a little CSS.
Adding The Custom CSS
If you are working with a child theme you can go to Appearance>Editor and open your stylesheet. If not, go to Appearance>Divi Theme Options>Custom CSS (which is located at the bottom of the first tab in Theme Options)
Add this CSS.
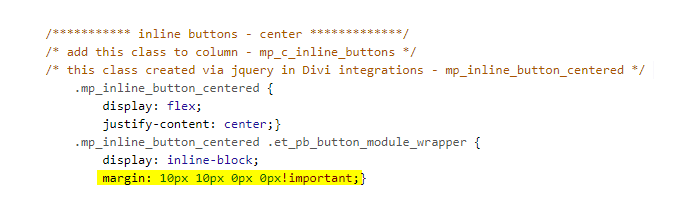
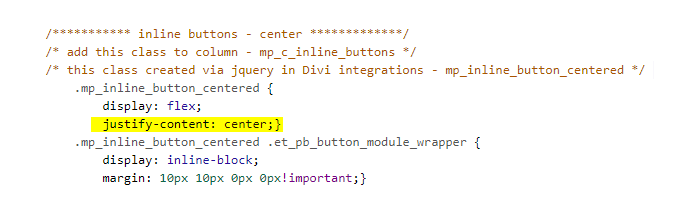
/*********** inline buttons - center *************/
/* add this class to column - mp_c_inline_buttons */
/* this class created via jquery in Divi integrations - mp_inline_button_centered */
	.mp_inline_button_centered {
		display: flex;
		justify-content: center;}
	.mp_inline_button_centered .et_pb_button_module_wrapper {
		display: inline-block;
		margin: 10px 10px 0px 0px!important;}
Adding The jQuery Script
4. Download & unzip this text file to grab the snippet you will need to copy and paste into the integration box.
5. Once you open up the zipped folder and the .txt file, copy and paste the snippet as is, into the “Add code to the < head > of your blog” box.

Making Adjustments To The CSS
As with all my tutorials, my goal is not to teach you how to use Divi Settings as much as it is to teach you how to customize your website learning a little CSS along the way. So with that being said, here are a few CSS tips to help you learn a little more about CSS.
To the margin around the button, you can do so here. The margin order goes like this: top, right, bottom, left.
If you want to align the buttons to the right or to the left just replace justify:center; with justify:flex-end; (for the right) and justify:flex-start; (for the left)
Understanding the jQuery
Without getting too technical, what we are doing is creating a function that finds each button module (.et_pb_button_module_wrapper) within this specified column (.mp_c_inline_buttons) and wraps it in it’s own DIV called .mp_inline_button_centered.

And that’s it.
If you used this on one of your projects, please share a link below so we can see how you used it.
Have fun!
Well, that’s all for now. I hope you find this article useful.


Thank you so much for sharing the blog.
Thank you for sharing the blog.
Wow thanks a lot!
I was looking for a (extra) plugin with this feature.
This is even better:).
Thanks