
Hover Over Blurb to Reveal Hidden Rows in Divi Using a Little CSS and jQuery.
In this tutorial, I will show you how to reveal hidden rows when hovering over blurb modules using a little CSS and jQuery. We did this using hidden text modules on a recent project but then it occurred to me that if we use hidden rows, we can use multiple modules and have more layout options.
View Live Demo
Let’s Get Started Setting up the standard Divi Section & Classes.
Adding the sections, rows, and columns.
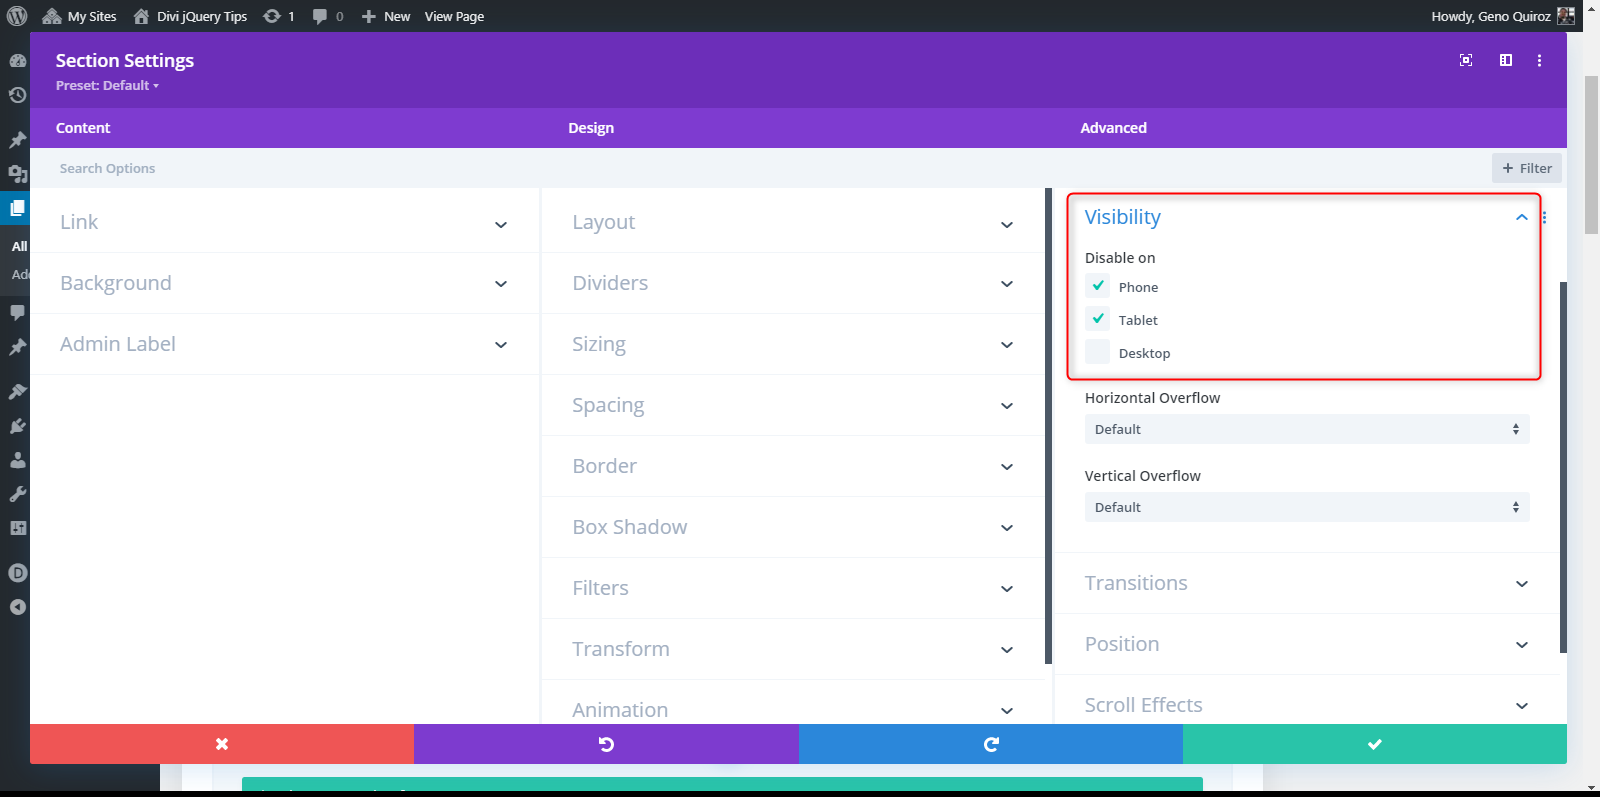
1. Since this function does not work well on mobile, you should plan on creating a section for Desktop and a section for Mobile. Lets start with the Desktop section. Once you have created a section, open up the section settings and in the advanced tab, disable Visibility on Phone and Tablet.
2. Create a row with as many columns as you need. In my demo, I use 5 columns. Add a blurb module to each column and add an image and title to each blurb. I also labeled mine to match the classes we are going to add next.

3. In the first blurb, open up the settings and go to the Advanced tab. In CSS ID & Classes, we are going to add two classes. There is no need to add a comma between the two classes. Just copy and paste as is: mp_blurb_1 first

tip: you can add as many classes as you want. be sure to leave out the period before each class and only use a single space between classes
4. In the rest of the blurbs, you will only need to add one class. Each blurb class will be assigned a different number such as this one you will be adding to the second blurb: mp_blurb_2

5. Do the same for blurbs three, four & five:
mp_blurb_3
mp_blurb_4
mp_blurb_5
Adding the hidden rows that will be revealed when a particular blurb is hovered over
In this tutorial I will be using five rows that can have as many columns and modules as you want. In my demo, I use two columns and the following modules:
- Image
- Text (2)
- Contact Form

6. Once you have the five rows and all the modules you intend to use, open up the first row’s settings and go to the Advanced tab CSS ID & Classes section. Under CSS Class, add this class: mp_row_1

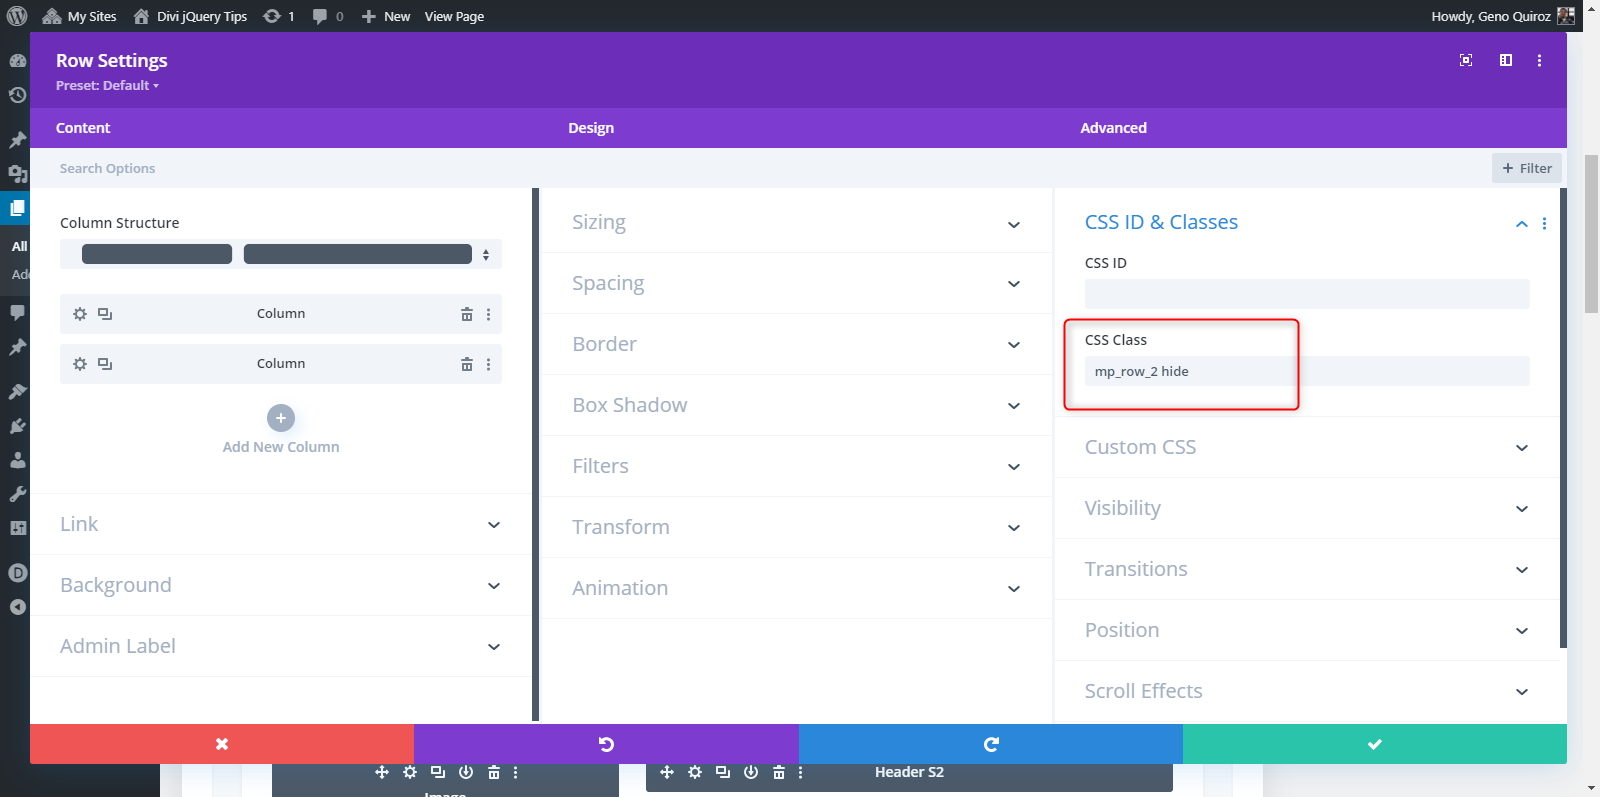
7. For the remaining four rows, we will be adding two classes. Each one will have it’s own number and a class to initially hide it. These are the two classes you will add to rows two through five:
mp_row_2 hide
mp_row_3 hide
mp_row_4 hide
mp_row_5 hide
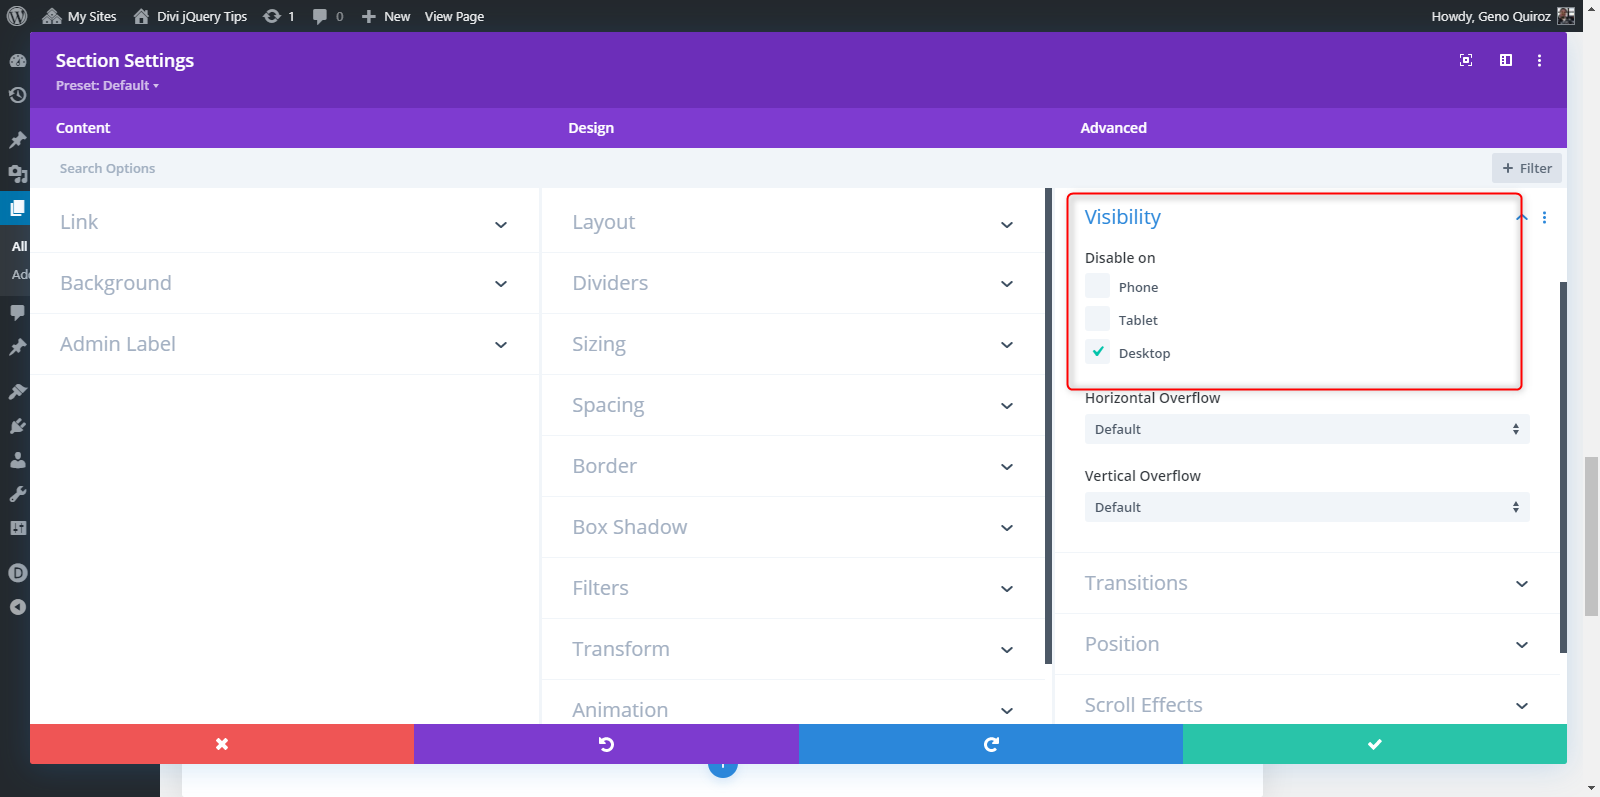
8. Now go ahead and create a second section with either the blurbs or the rows you created in the previous section and remove all the Classes. You can then disable that section on Desktop so that this will be the Mobile version of the section.

9. Save your page and move on to the magic of adding a little CSS & jQuery.
Adding The Custom CSS
If you are working with a child theme you can go to Appearance>Editor and open your stylesheet. If not, go to Appearance>Divi Theme Options>Custom CSS (which is located at the bottom of the first tab in Theme Options)
Add this CSS.
	/*=================================*/
	/*=================================*/
	/* Hover Over Blurb To Show Hidden Row */

		.mp_blurb_1:hover .et_pb_module_header,
		.mp_blurb_2:hover .et_pb_module_header,
		.mp_blurb_3:hover .et_pb_module_header,
		.mp_blurb_4:hover .et_pb_module_header,
		.mp_blurb_5:hover .et_pb_module_header {
			color: #3264cf!important;}

		.show {
			opacity:1!important;
			display:block;
			transition: 0.3s;}

		.hide {
			opacity:0!important;
			display:none;
			transition: 0.3s;}
Adding The jQuery Script
Download & unzip this text file to grab the snippet you will need to copy and paste into the integration box.
5. Once you open up the zipped folder and the .txt file, copy and paste the snippet as is, into the “Add code to the < head > of your blog” box.

Making Adjustments To The CSS
As with all my tutorials, my goal is not to teach you how to use Divi Settings as much as it is to teach you how to customize your website learning a little CSS along the way. So with that being said, here are a few CSS tips to help you learn a little more about CSS.
Their is not much going on with the CSS in this particular tutorial except to show and hide the rows. Although, I did add the option to change the color of the header when hovering over the blurb. You can either change the hover color here or remove it all together

And that’s it.
If you used this on one of your projects, please share a link below so we can see how you used it.
Have fun!
Well, that’s all for now. I hope you find this article useful.


Figured it out…
I enabled the “Equalize Column Heights”.
I disabled it and everything is working as it should…
Screenshot = https://www.screencast.com/t/iroqfNVmm4