My friend Leisa Cooper over at www.stanleywebsites.com is a fellow designer and Divi enthusiast who recently approached me about this little tweak in Divi. Since she wasn’t the first one to ask about it, I thought it was about time I share my tips on this one for all to enjoy.
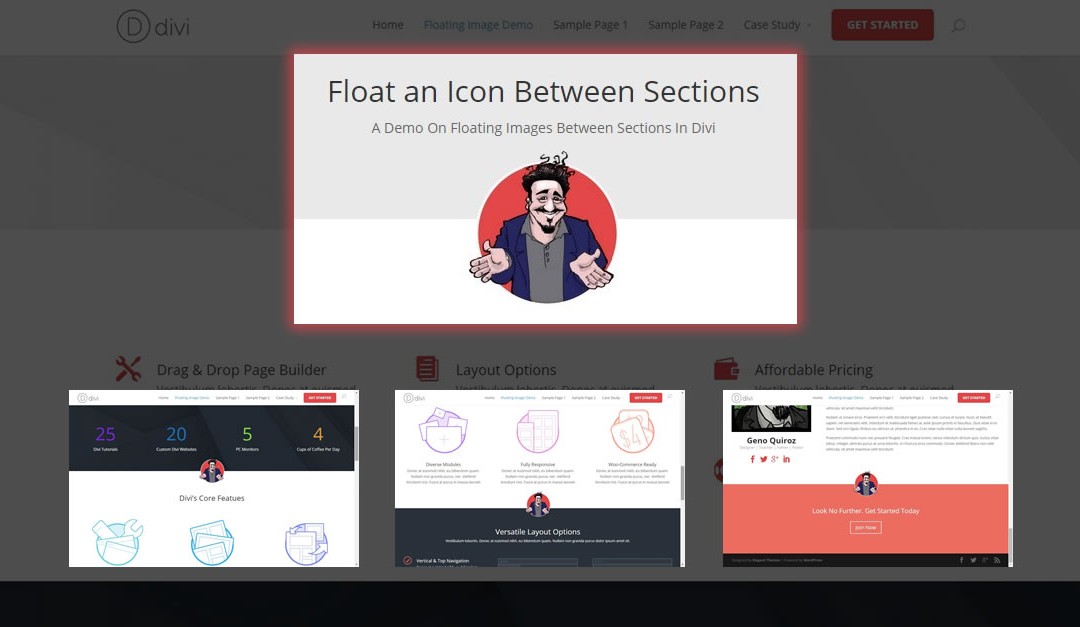
This little tip will walk you through how I like to float an image between sections anywhere on your Divi pages.
Lets Get Started
First thing you need to do is create a section for the floating image. It should be placed in between the two sections you want to blend. In this first part lets add it just below the first section which I am using as a header section.
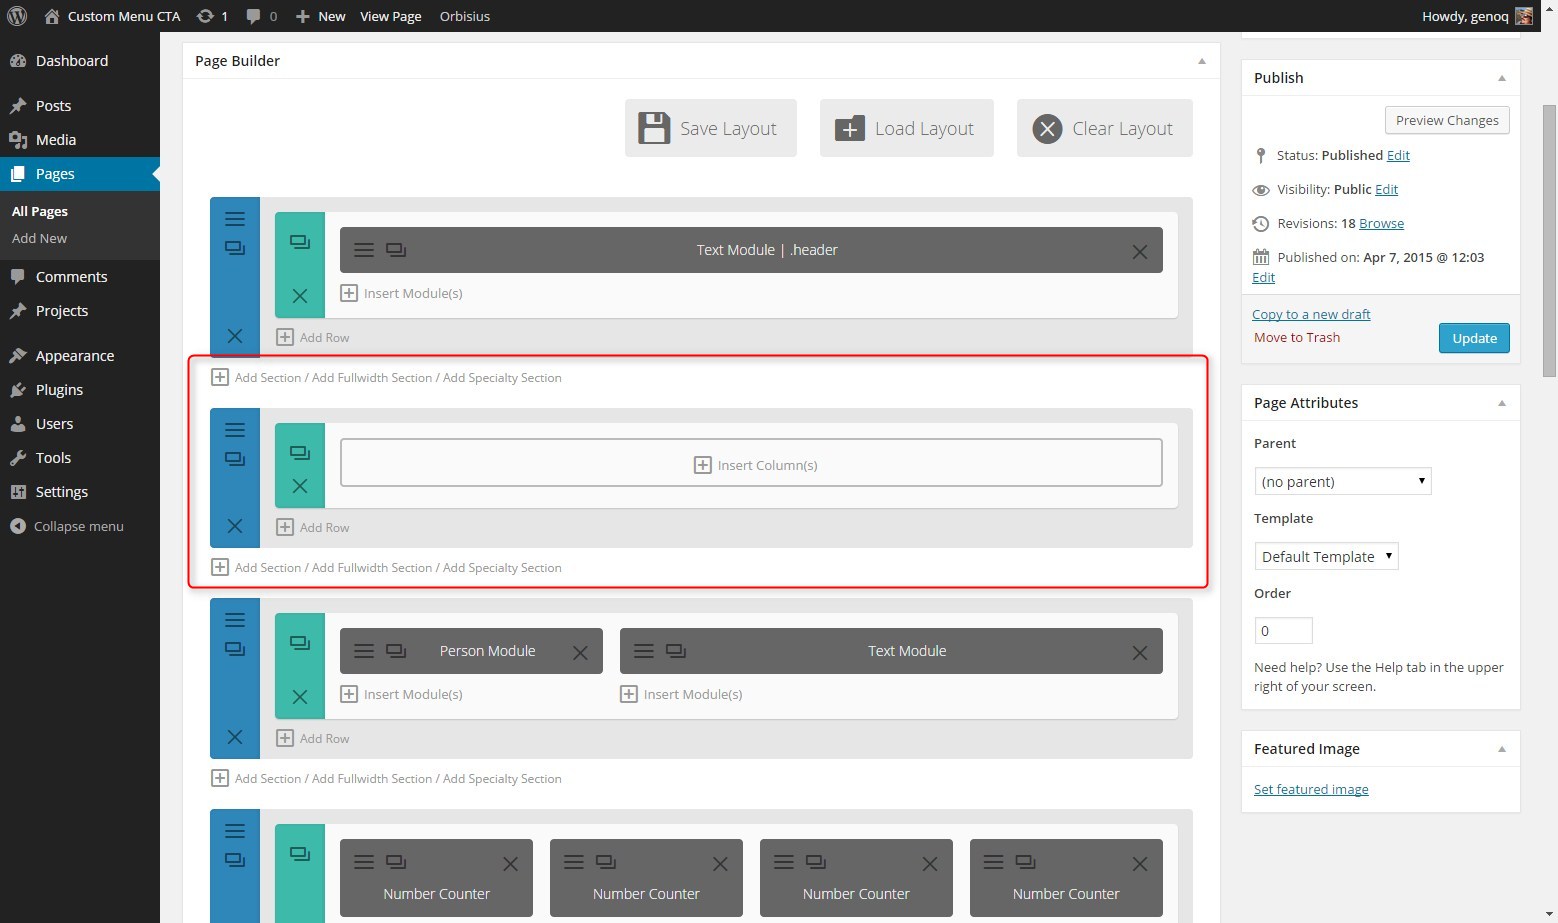
1. In your page builder go to Add Section
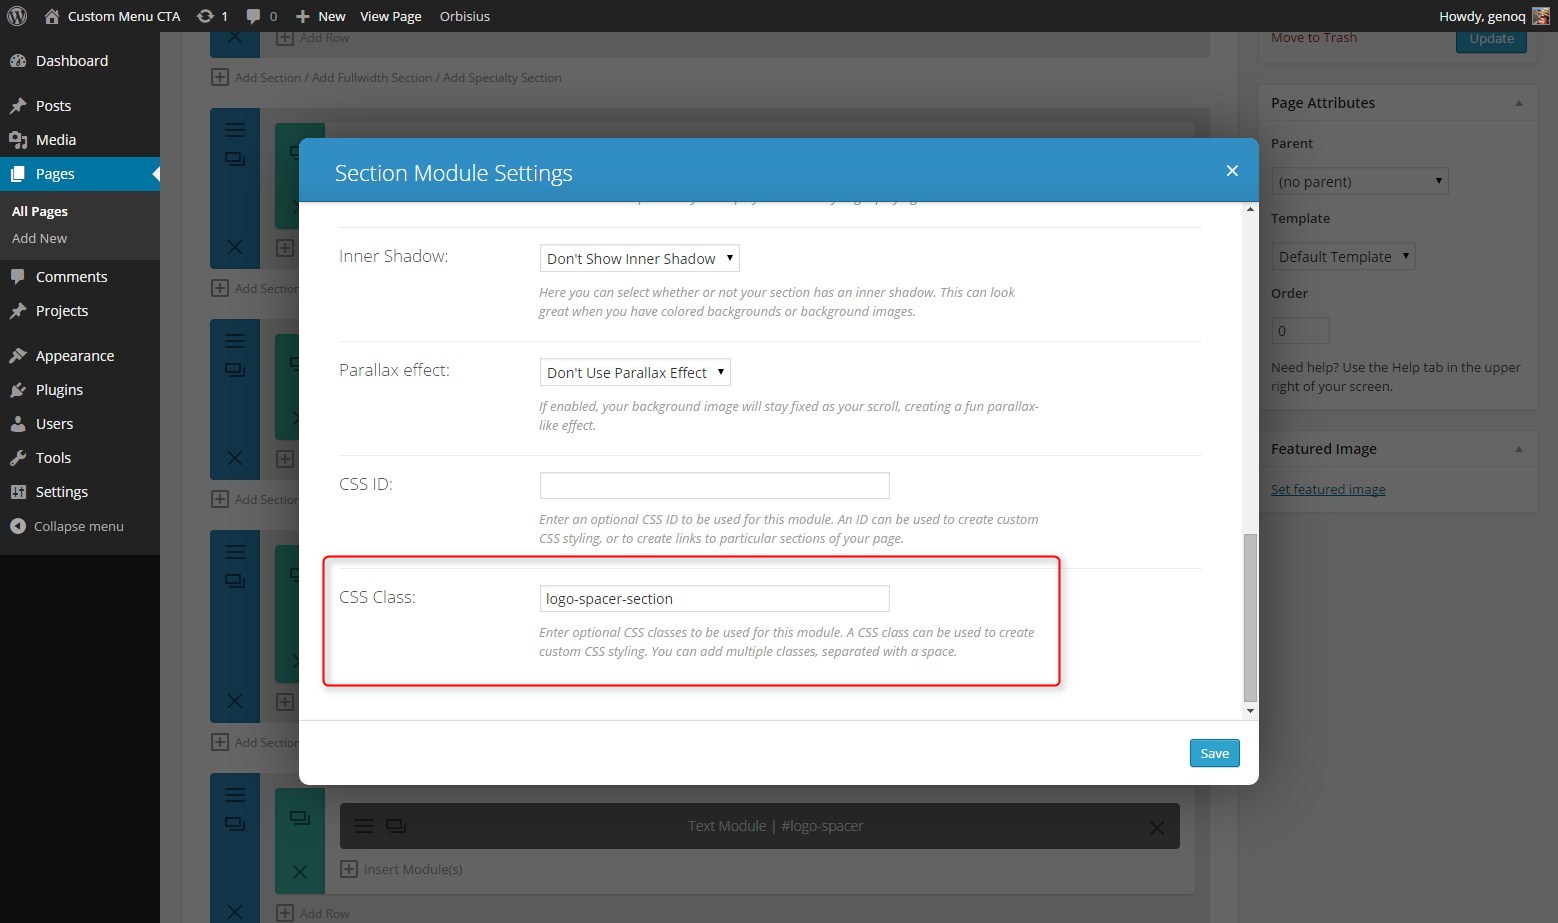
2. Open the Section Module Settings and give it the following CSS Class: logo-spacer-section.
Be sure to change the top and bottom padding to 0 in the section settings and in the row settings!
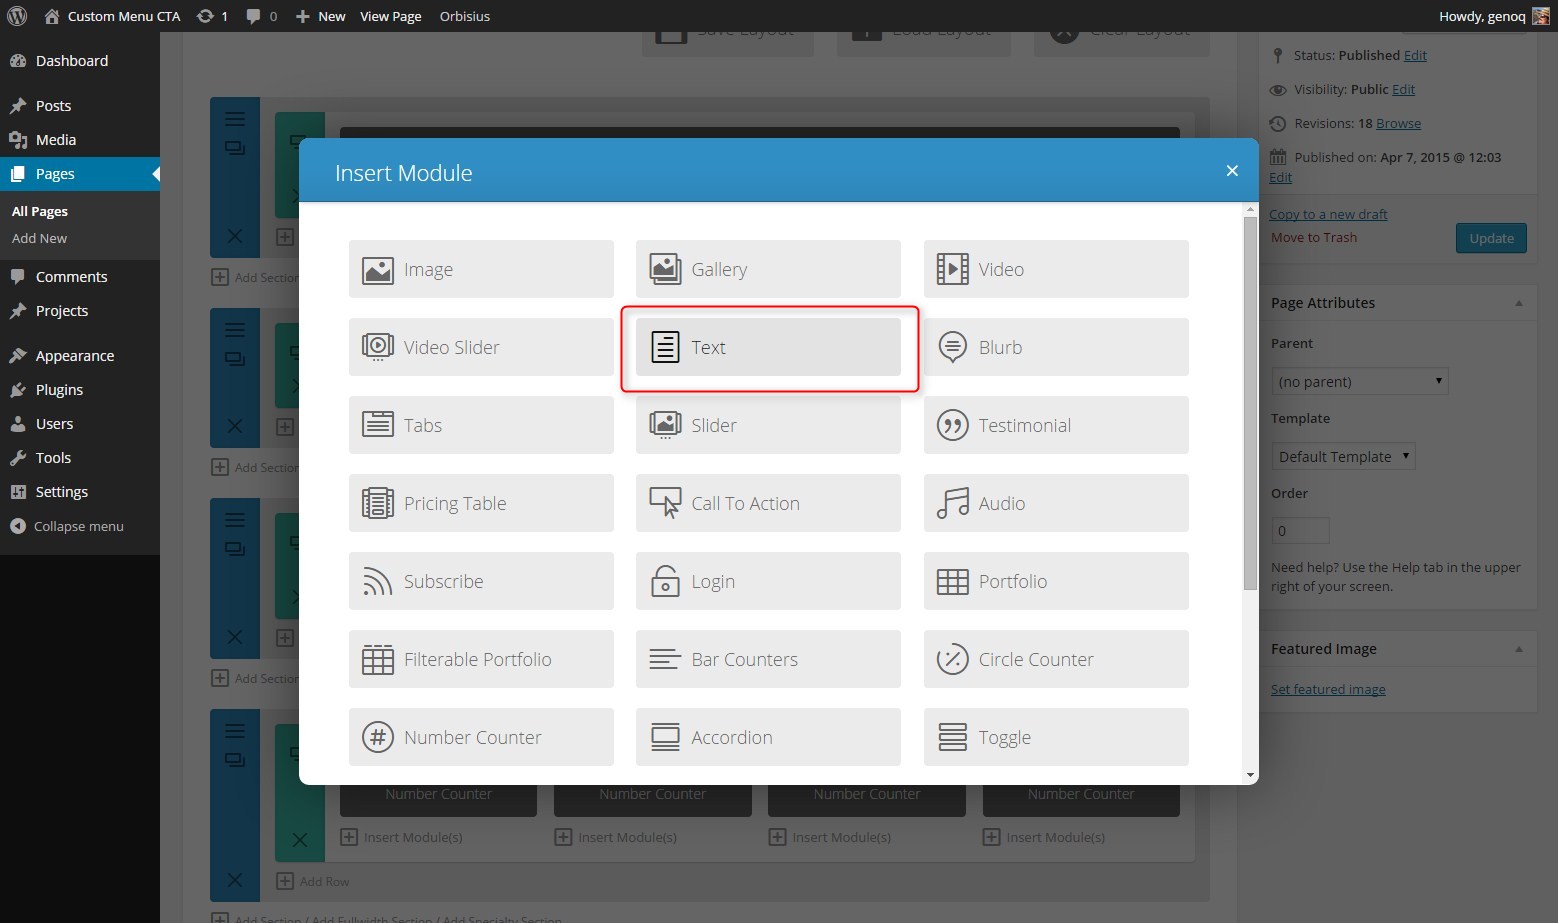
3. Now after you save the settings, insert a single column and then insert a Text Module.
4. The Text Module settings open, go ahead and change the text orientation to center and insert your image/logo in the content area via the Add Media button.
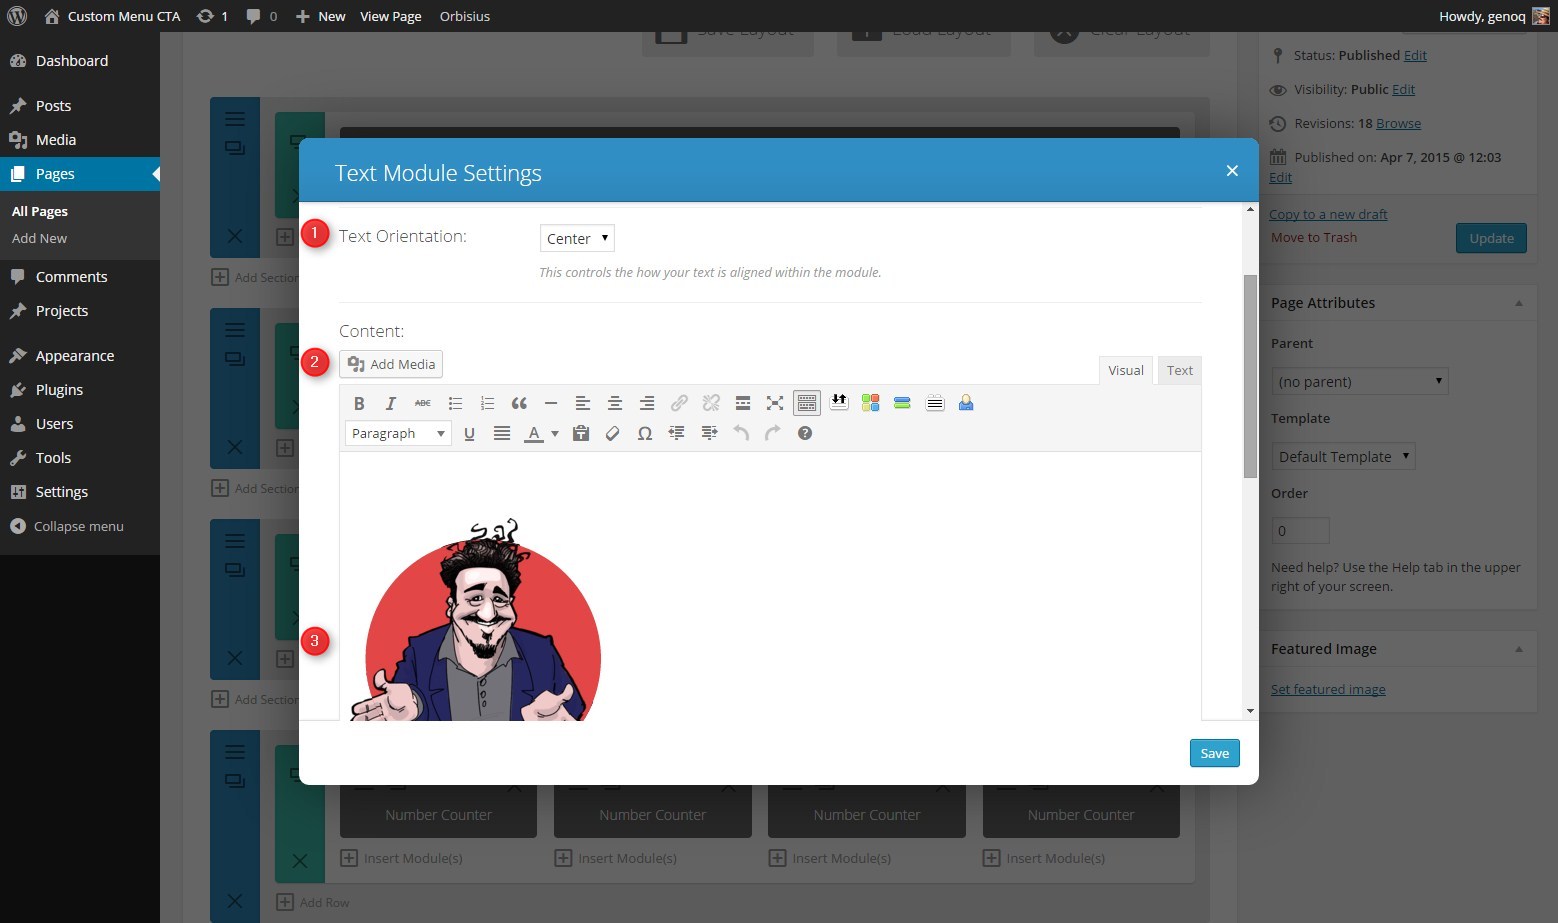
Don’t worry about the size of the image at this point. We will control that using CSS. The the image should have a transparent background.
5. Now you will give this Text Module the following CSS ID: logo-under-header
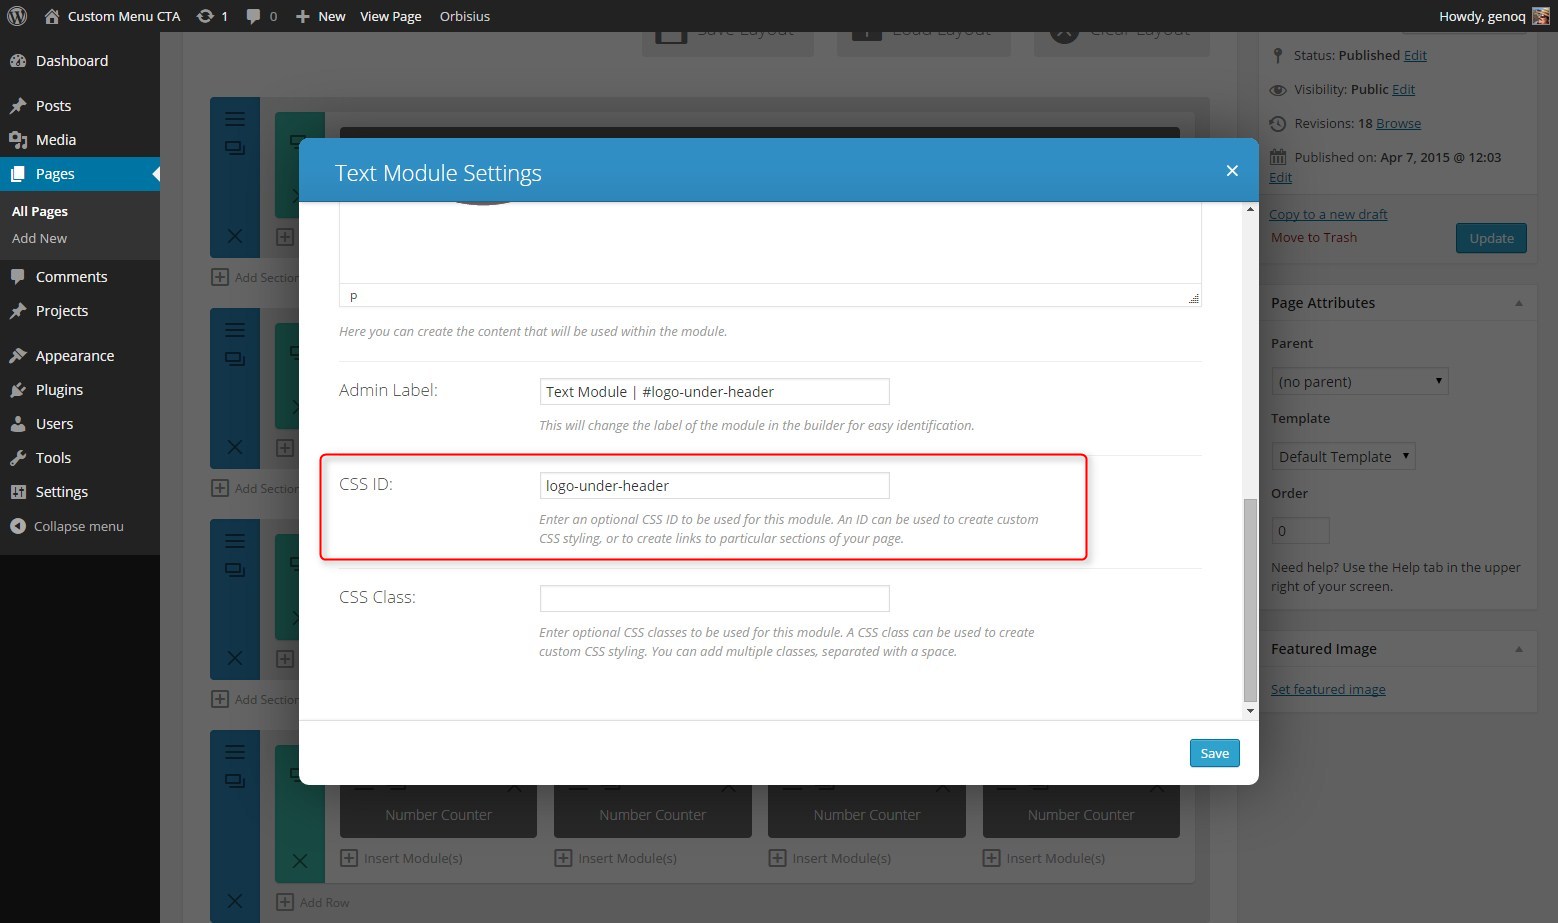
The CSS for this specific ID is one is going to make the image slighter larger than the ones being used throughout the rest of the site because it is right under the header.
6. Now make a copy of this entire section so that we can use this in other places throughout the page
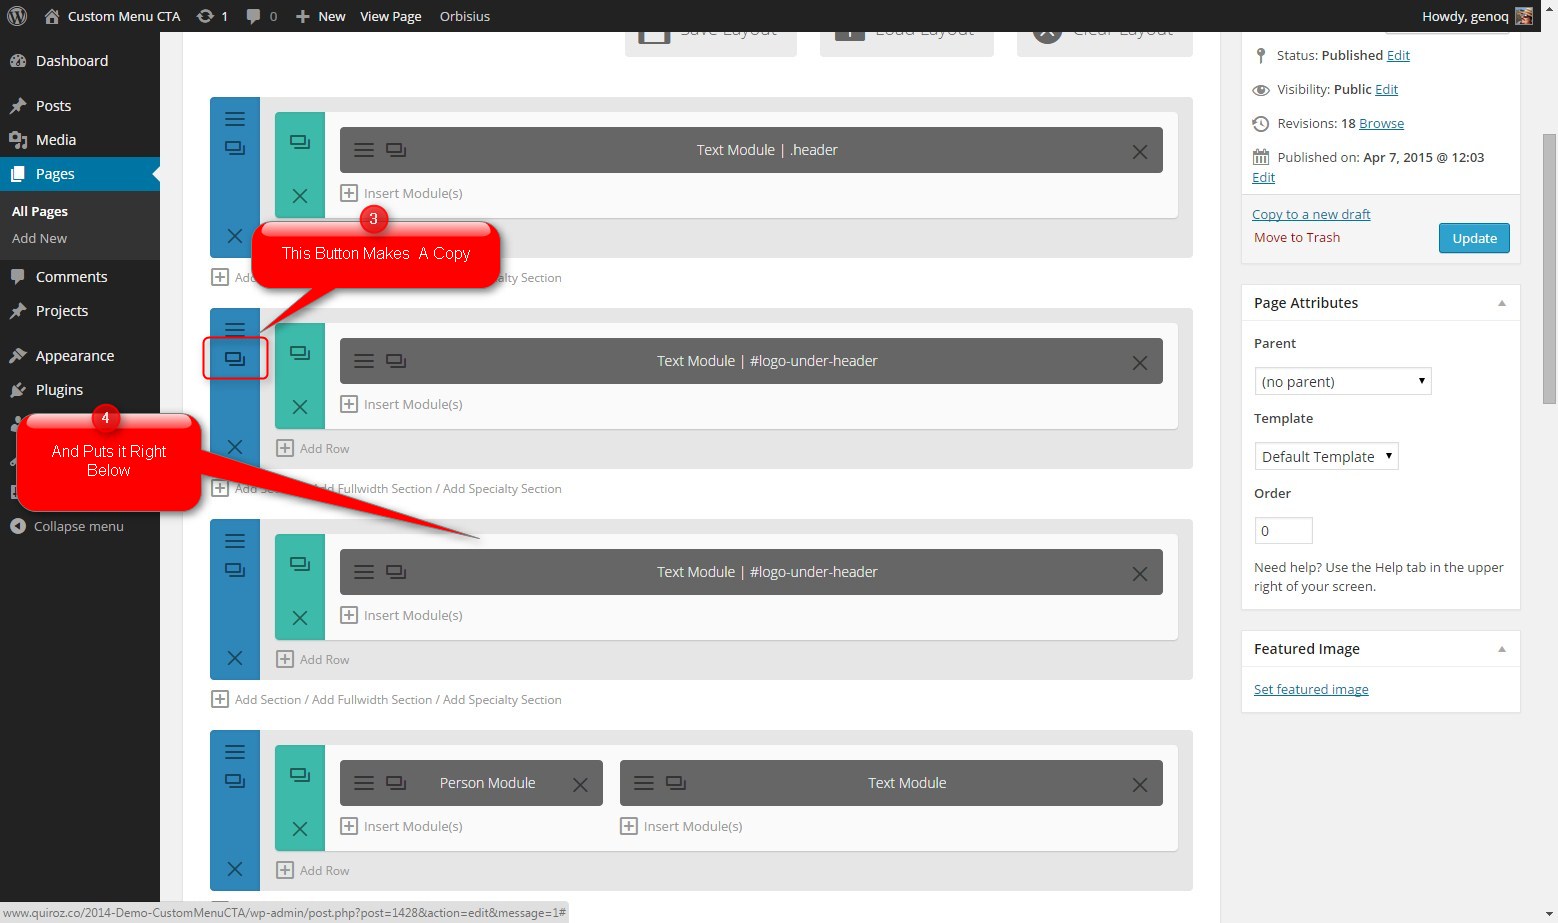
7. Open up the settings of the text module in the duplicate section and change the label to whatever you want and then change the CSS ID to: logo-spacer
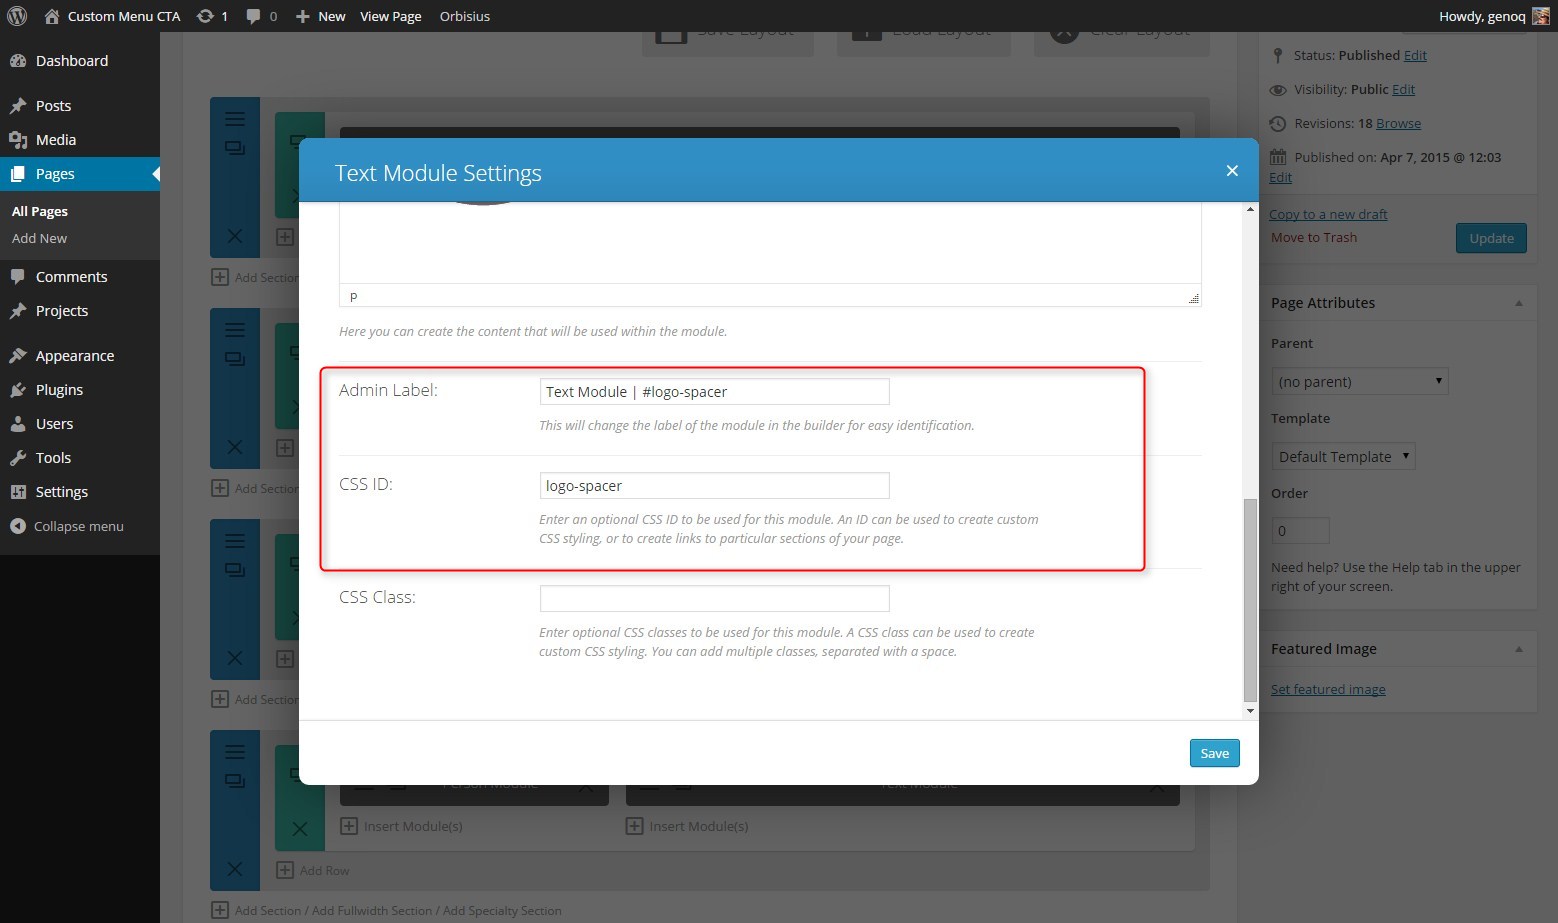
The CSS for this specific ID is one is going to make the image slighter smaller than the one being used below the header.
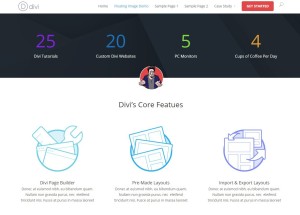
8. Now drag this new section down the page between another two sections. Preferably between two sections with contrasting background colors.
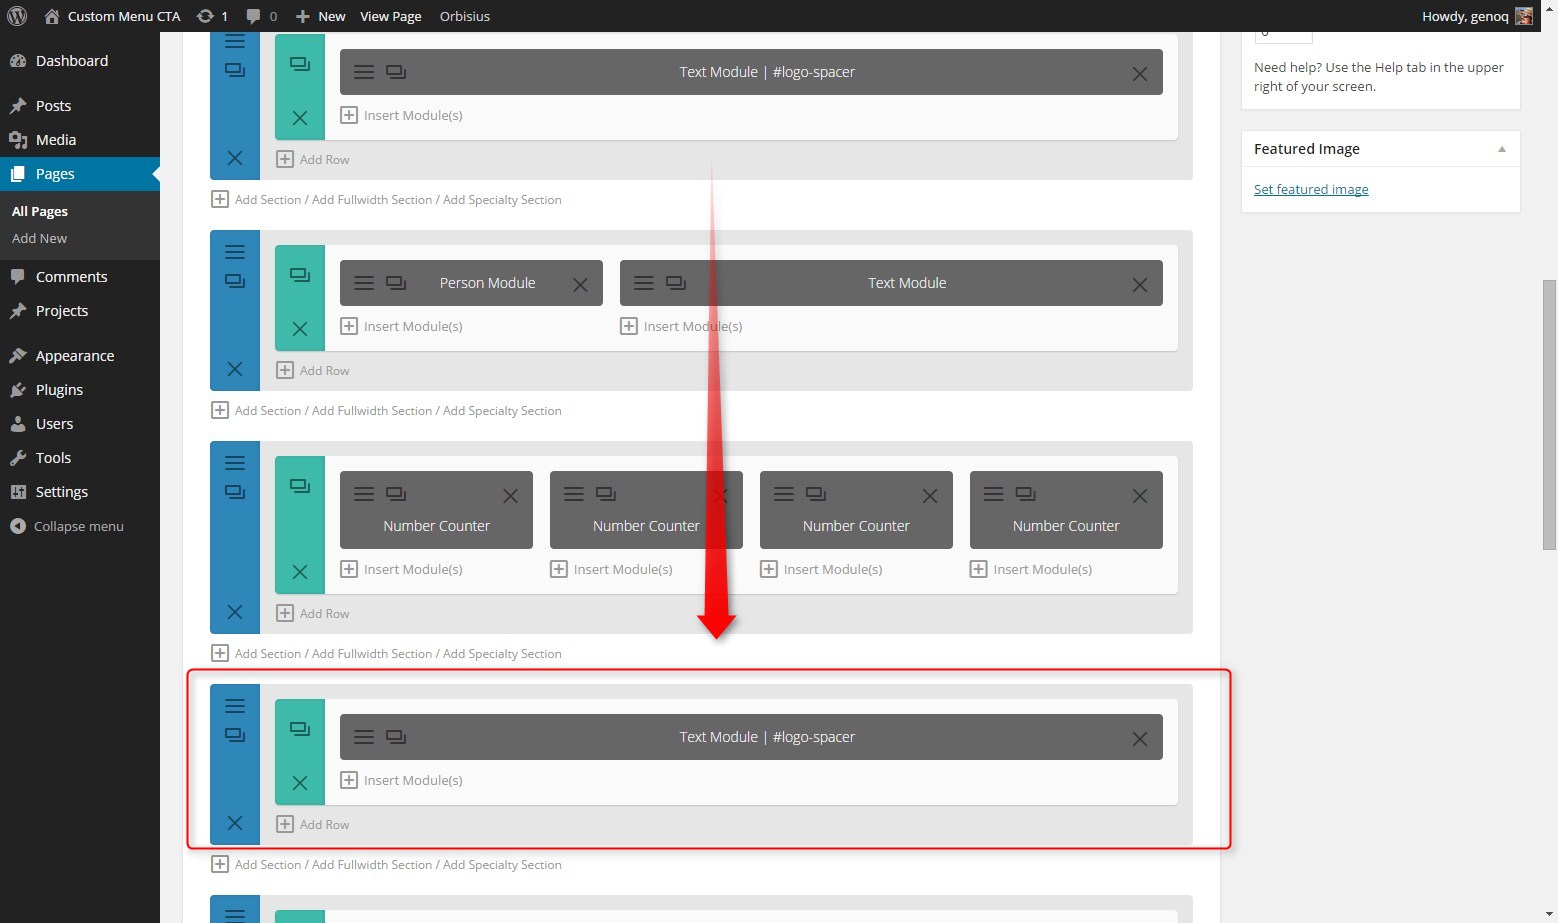
Hint: You can drag sections around by grabbing the blue border of the section with your mouse and dragging it up or down
Hint 2: The background color of this section should match the background color of the section below it.
9. Now you can make as many duplicates of this second section as necessary depending on the number of times you want to use it on your page.
The Magic of CSS
Now lets start to dazzle things up a bit with some CSS.
If you are working with a child theme you can go to Appearance>Editor and open your stylesheet. If not, go to Appearance>Divi Theme Options>ePanel>Custom CSS (which is located at the bottom of the ePanel)
Add this CSS.
/*------------------------------------------------*/
/*-------[Float and Image Between Sections]-------*/
/*------------------------------------------------*/

/* remove all padding in section */
	.logo-spacer-section { padding:0px; margin:0 0 -54px 0;}
	.logo-spacer-section .et_pb_row, .logo-spacer-section .et_pb_section  { padding: 0px;}
	@media only screen and (min-width: 1350px){
		.logo-spacer-section {
			padding: 0px!important;}}

/* logo under header */
	#logo-under-header {padding: 0px; margin: 0px;}
	#logo-under-header img {margin-top:-105px; width: 150px; z-index: 1; position: relative;}

/* logo under standard sections */
	#logo-spacer {padding: 0px; margin: 0px;}
	#logo-spacer img {margin-top: -55px; width: 100px; z-index: 1; position: relative;}
And that’s it. Remember now you can just duplicate that second section and move the copies around between different sections through out the page. And below is a tip to help you easily add these sections to other pages throughout your website. Have fun!
Tip:
Here is a tip to easily add these sections to other pages.
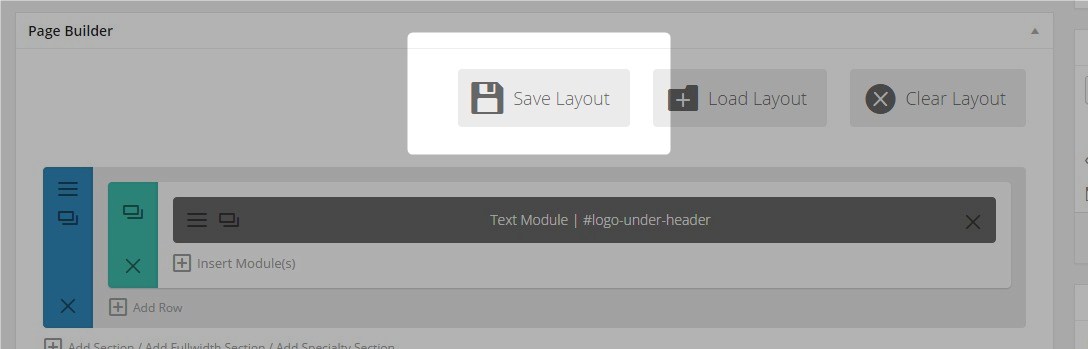
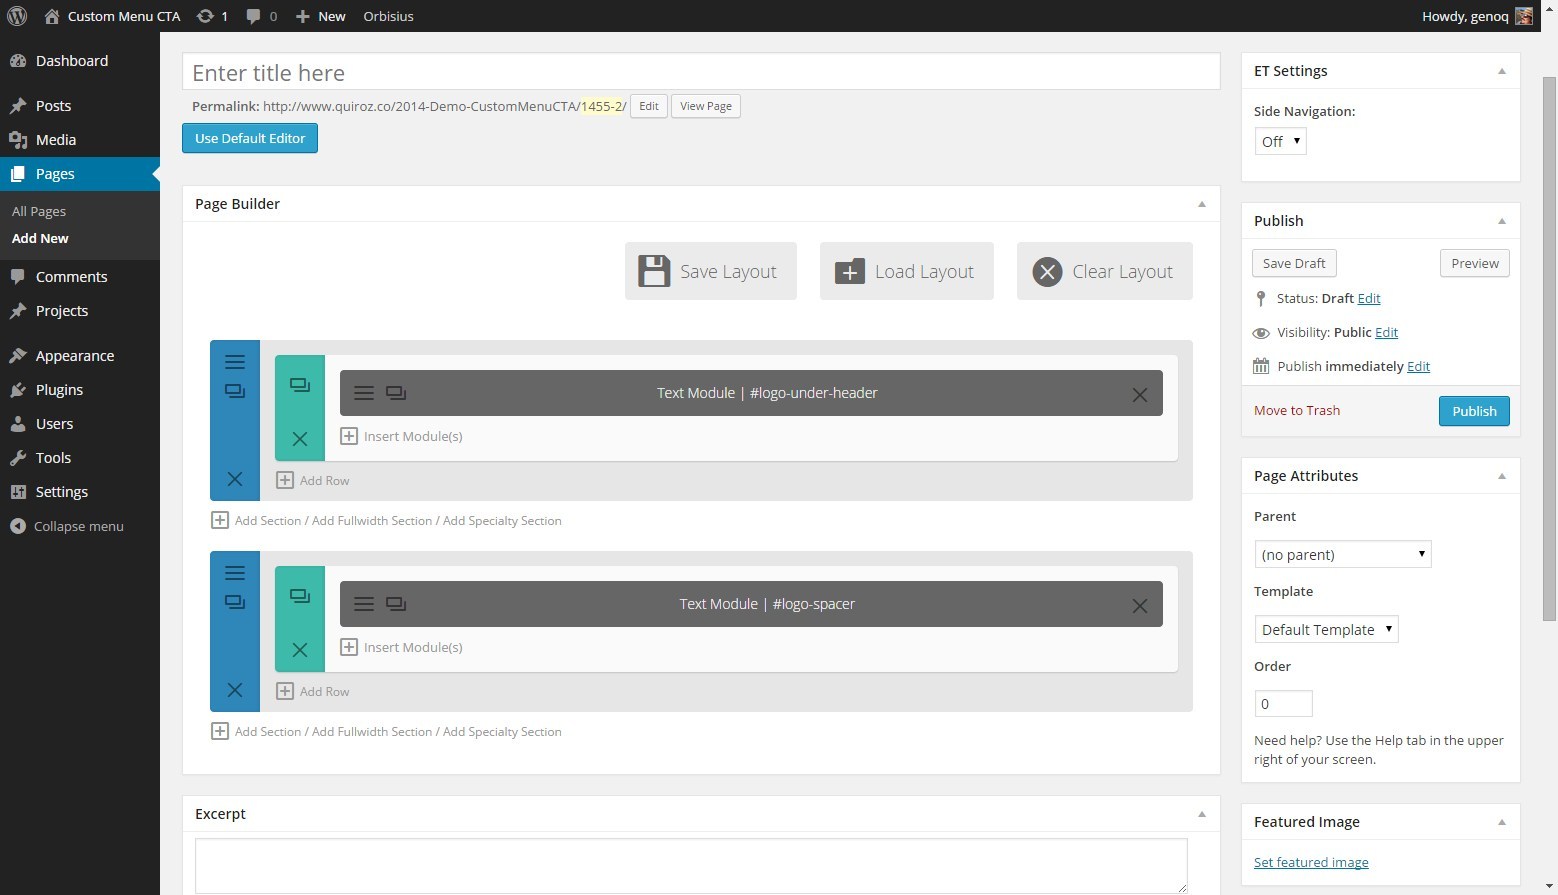
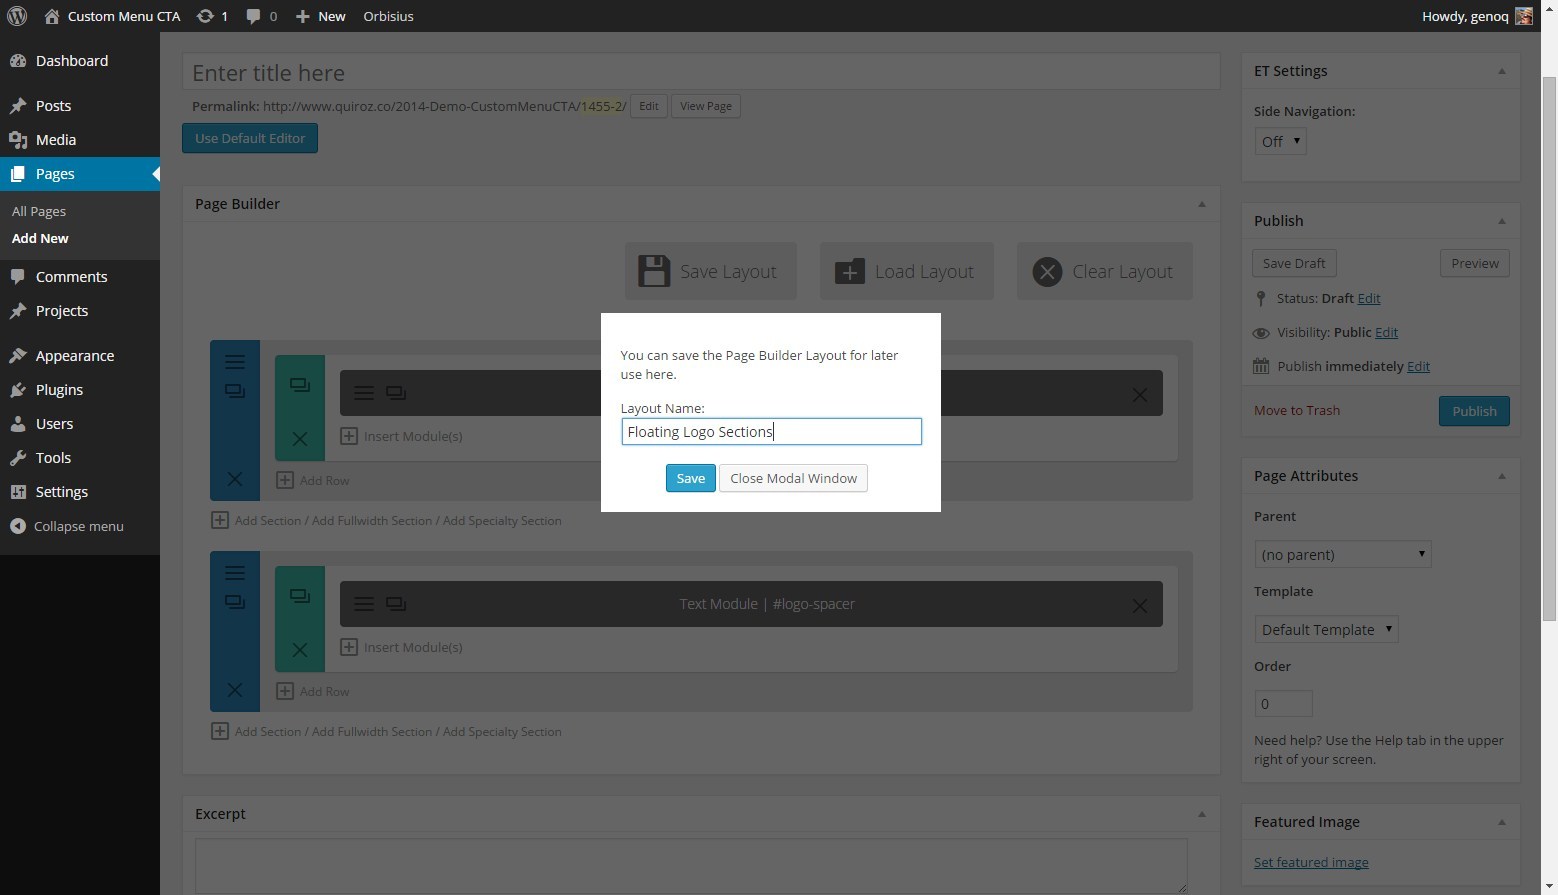
1. Save this page you have been working on as a layout and Update page
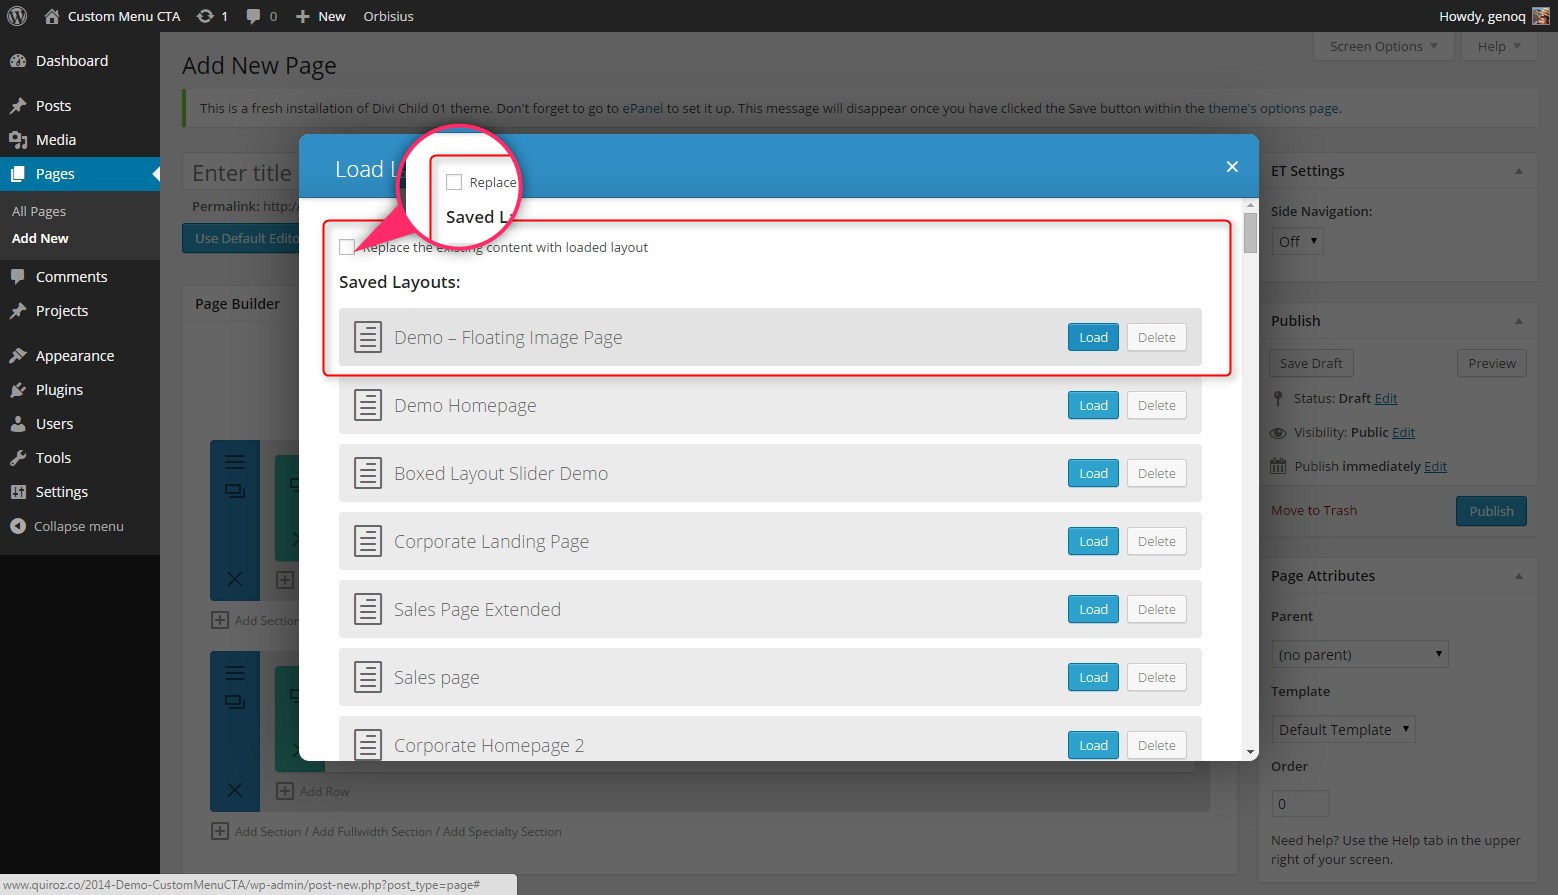
2. Add a new page, activate Page Builder and Load the Layout you just saved.
3. Delete all the sections except for the two that you just created.
4. Save this page as a Layout
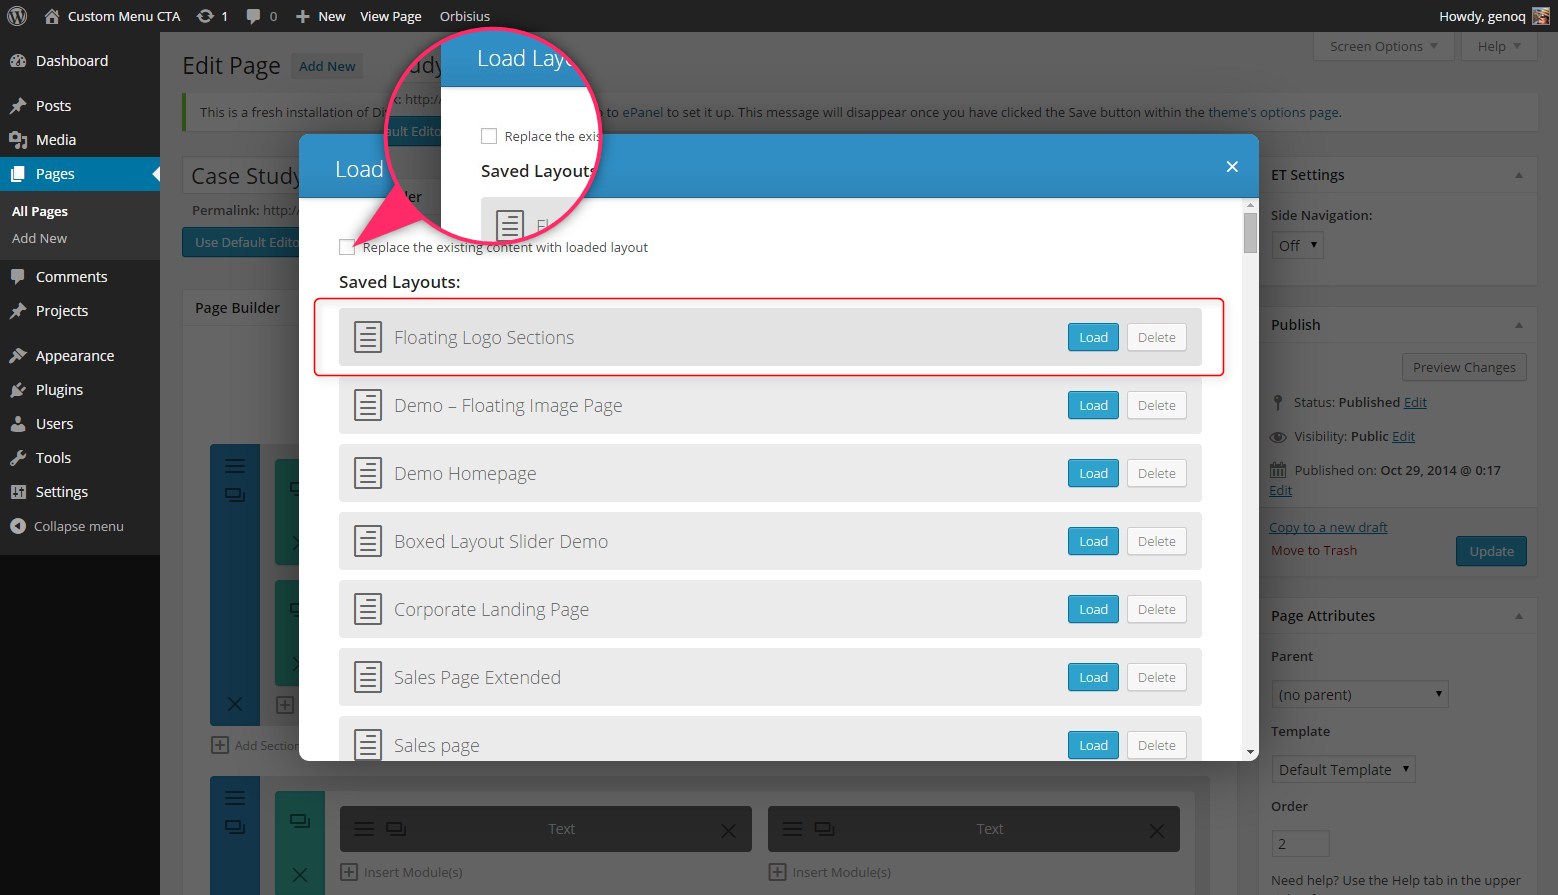
5. Leave this page without saving and delete the draft. Now when you are working on other pages, you can add these sections as a layout. Just remember to uncheck “Replace the existing content with loaded layout” so that you don’t lose any existing work on those pages.
Well that’s all for now. I hope you find this article useful.
![]()


Geno – Thanks for another great tutorial! BTW I love the animated menu on the Carpe Diem theme too 🙂
Thanks Alan
Great article! I think I might use this in a site I’m currently working on. Thanks Geno.
Awesome Scott!
Love this! Great tip and easy to follow tutorial. Thank you Geno, I really look forward to your tutorials and really appreciate all the info you share.
Thanks Alison 🙂
Nice work Geno. I wonder if this would work for the logo here: http://lowcostwebsites.com.au/Robyn You can see that its a large logo that shrinks as you slide down the page. The gap at the top is made by the top (or should I say, secondary menu). I was thinking your floating image might set this logo evenly between the two menus.
Thanks again for such a superb tut.
John.
The issue you are having is a little more complicated. You can move that logo up using a negative margin in the et_fixed_header set of rules but that top header is set to be over everything so you would have to figure out how to make the Logo one layer above the top header. I am pretty sure you would have to use z-index but there is more to it that I am missing at this point.
Awsome tutorial! Thanks Geno! How do u do the pictures between two section? for example the iPhone picture with whaley website in the “about us” page in http://montereypremier.com/
That is a post page that does not use the Divi page builder. So for that I just use the “Add Media” button and it inserts the image between the two paragraphs.
Cool Geno. I just used it to jazz up a rework of an old design of a 3 year old Pagelines Framework site at http://richardlouisct.wpengine.com/.
Originally there was too much space that left a white border between the sections behind the image. But, after fixing the space I decided I would like it with a thin blue line. Keep sending the cool ideas.
Great use of this option on your site 🙂 Love it!
Hi, the demo link is not working anymore.
Its back. Thanks.
Hi,
How did you make the slider image full height of screen size? How to get the similar page fold?
Try taking a look at this tutorial https://quiroz.co/ghost-home-page-and-change-menu-background/
cool.. thanks
🙂
My logo isn’t centered vertically and the top one has a line that I can’t seem to get rid of…..
http://accym.org/
1. Replace this
#logo-under-header img {
  margin-top: -105px;
  width: 150px;
  z-index: 1;
  position: relative;
}
with this
#logo-under-header img {
  margin-top: -105px;
  width: 150px;
  z-index: 1;
  position: relative;
  margin-bottom: -38px;
}
Add this to get rid of the slider pagination that is currently showing over the logo
.et-pb-controllers {display:none;}2. For the second logo replace this
#logo-spacer img {
  margin-top: -55px;
  width: 100px;
  z-index: 1;
  position: relative;
}
with this
#logo-spacer img { margin-top: -100px; width: 100px; z-index: 1; position: relative; }Geno – great tips. Thanks so much. My logo goes flush to top of the new text section instead of splitting the two sections. Any hints?
adrian.tphphoto.com
Add this
.logo-spacer-section img { margin-top: -46px; }Thanks!
Hi Geno, thanks for the fantastic tutorial, I’m getting my bottom margin skewiff on the home page – can you help http://www.stanleywebsites.com/
Hi Leisa. Looks like you got this resolved. It looks great!
yes I did Geno, thanks for your terrific tips
🙂
Thank you Geno for your tips!
Regards,
Igor
Thanks for the great tutorial! I’m using it on a page with dot navigation enabled. Unfortunately there is a dot added for each of these new sections. Is there a way to disable dot navigation for specific sections?
Thanks for the great tutorial! For those folks using this on a page with dot navigation enabled, you will want to remove the dot for this section. Here is a CSS code that will do just that. You should edit the digit to correspond with the dot you want to remove.
ul.et_pb_side_nav li.side_nav_item:nth-child(5){ display: none;}
Thanks for the share Dan.
Hi Dan, this is pretty close to what I am looking for, but I have several pages and this turns off all sections numbered by the child number in your case (5). Is there a way of targeting only specific sections using their class ID or anything else?
Sorry Dan, just answered my own question, but in the interests of anyone looking for this in the future;
You need to add the css to the DIVI overall page menu at the top of each page by clicking on the hamburger menu and in there is a css box:
ul.et_pb_side_nav li.side_nav_item:nth-child(2){ display: none;}
Changing the number (2) to correspond with the section you don’t want to appear and and adding this line repeatedly if needed with an amended number for each section. You will need to do this for each page.
Thanks for the initial CSS Dan!
Hey Geno, great tutorial. I cant seem to get the image to line up central to the page, it places the image way over to the left of centre?
Geno, why didn’t you put the CSS in one of the CSS sections in the module’s Custom CSS forms? I keep trying to put CSS in those sections and it never seems to work.
Its just a matter of preference. I like all my custom styling in one place. Plus there are some customizations that just wont work in the modules custom CSS form.
forgot to check the Notify box.
Hi Geno,
I’m somewhat of a beginner and I can’t seem to get this to work…I’m using a child theme and I copy pasted the CSS code after following the previous steps but it doesn’t seem to be working at all. Could you please tell me where I’m going wrong?
Check all your syntax to make sure you copied everything correctly. Also check to make sure you gave the Section settings the correct CSS Class. Do not use a period.
Hey Geno,
how would you go with an image that goes all the way between the sections. (screen : http://i65.tinypic.com/dfj19l.jpg the red line is the image between 2 normal sections)
the code used :
/* remove all padding in section */
.logo-spacer-section { padding:0px; margin:0 0 -97px 0;}
.logo-spacer-section .et_pb_row, .logo-spacer-section .et_pb_section { padding: 0px;}
/* logo under standard sections */
#logo-spacer {padding: 0px;margin:0px;}
#logo-spacer img {margin-top: -1px; width: 1926px;z-index:1; position: relative;}
The problem is within the .logo-spacer-section and the -97px margin. That works fine for my resolution, but everyone else isn’t seeing it in the way it’s supposed to be (always between those sections)
Any ideas maybe?
Hi Geno…
This is exactly what I was looking for — thanks!
I’d also like the boxed section to go over the footer too. Any tips?
Cheers,
Joe
Probably just give the #main-footer section a negative top margin and decrease the z-index so that its less than the boxed section above it.
Is this the same method that you used on your site ? https://montereypremier.com/portfolio/ Where the mock up is between sections?
Yes
Hi there! This tutorial is so helpful- thanks for posting.
Is there a way to increase the image size? I’m using a full image floated between two sections- much larger than a logo but it’s so tiny when I input the code.
Any help would be appreciated.
Thanks again!
I had the same tiny image problem with one of my projects. I would love to know how to fix that
Hello Geno, thanks for the tutorial.
I use this example on http://www.rugemb.cl, the site for a friend’s company.
The thing is that the image between sections works fine on my notebook, android phone and my friend’s iphone. But on a mac, the section shows completly and tha image is in a section with 0 padding. Do you know why this could be?
http://es.tinypic.com/r/2zxo42d/9
Thanks for trying it out. Unfortunately I am not sure why its not working on the mac.
Weird thing. My friend check today and works good.
Thanks for your tutos Geno!
Thanks for sharing your knowledge with all of us! Much appreciated. I’m wondering if this solution (or similar) could be applied to graphic buttons in order to emulate the effect on this demo site (see buttons “contribute”, “volunteer”, etc… directly below banner image): http://themeforest.net/item/political-wordpress-theme-frontrunner/full_screen_preview/13392446
Yes it could 🙂
I use a similar way. Thanks for the tutorial! I would add make it a global element that way it update across the site. Thanks again!
thank you very much, another great training session
Cool tip, just one thing: you’re using a CSS ID multiple times on the same page. That’s what classes are for, ID’s are supposed to be unique per page.
Hi, great! I am a newbie with Divi and css and now I have a problem with this floating image. I see a white box between the sections as high s the picture is. How can I solve that?
Hmmm…. That is not normal. If you provide us your url we might be able to identify what is going on.
Just wanted to post a quick thank you for this tutorial. I’m building our site using the visual composer add-on for WordPress which came with our theme and I couldn’t figure out how to do something like this. With a few minor differences, this tutorial was spot on for doing this with VC. Thanks again!!
Awesome! Thank you for sharing!
Sweet!!
Hi Geno, thanks for this amazing tip, I’ve an issue with big screen, could you please have a look at dev.ingnius.com ?
I’ve added this code
@media only screen and ( min-width: 1330px ) {
.logo-spacer-section { padding:0px; margin:-95px 0 -40px 0;}
.logo-spacer-section .et_pb_row, .logo-spacer-section .et_pb_section { padding: 0px;}
/* logo under header */
#logo-under-header {padding: 0px; margin: 0px;}
#logo-under-header img {margin-top:-105px; width: 150px; z-index: 2; position: relative;}
#logo-spacer {padding: 0px; margin: 47px;}
#logo-spacer img {margin-top: -55px; width: 150px; z-index: 2; position: relative;}}
But not working fine
Hello! That’s a great looking site, with lots of cool effects. I’m not sure what exactly you are trying to do that isn’t working.
So I seem to have some issues, from the info here it seems as though I have to kinda do the reverse. The logo spacer goes in the class css and the logo-under-header goes in the class id? Once I do that it looks way better with no white-space but now for some reason I get it aligned to the left? Any idea why it would align to the left instead of center?
I haven’t seen that before. Do you have a link so we can check out the page to see what might be causing that?
Hi Geno & Jerry,
Is it possible to have a video on 2 sections of the page like this site here – http://www.screencast.com/t/KkdsjPH7pKa – I know the button is over the 2 sections but let’s say if we slipped the video down over the two sections?
Thanks.
It is definitely possible to do that. If you add a CSS class to the video module, then can move it around pretty easily. Once you have the page setup you can give us the link to help you with the CSS.
Hi Geno & Jerry,
Thanks for the tutorial, works great!
Any tips to get this working on smaller screens? On mobile the image is below the section instead of floating…
Thanks!
Yes you can use media queries and adjust it accordingly for each device. https://divi.space/css-course/divi-media-queries/
Geno… great tutorial. I have used it a few times without issue – til now 🙂
Here are screenshots of what I am talking about…
http://www.chrislovemsm.com/files/floatimage.docx
The 1st image is what happens when I add the floating logo
The 2nd is without it – no other changes. Its pretty obvious what’s wrong.
I don’t know if it is messing with other code but here is what I have in my custom css
*/
/* Center Footer Menu */
.bottom-nav {
text-align: center;
}
a.footerlink {
color: #ffffff;
text-decoration: underline;
}
.showme{display: none;}
.showhim:hover .showme{display : block;}
.hideme{display:block;}
.showhim:hover .hideme{display:none;}
.custom_blurb .et_pb_main_blurb_image:hover+.et_pb_blurb_container .showme{display:block;}
/*————————————————*/
/*——-[Float and Image Between Sections]——-*/
/*————————————————*/
/* remove all padding in section */
.logo-spacer-section { padding:0px; margin:0 0 -40px 0;}
.logo-spacer-section .et_pb_row, .logo-spacer-section .et_pb_section { padding: 0px;}
/* logo under header */
#logo-under-header {padding: 0px; margin: 0px;}
#logo-under-header img {margin-top:-75px; width: 150px; z-index: 1; position: relative;}
/* logo under standard sections */
#logo-spacer {padding: 0px; margin: 0px;}
#logo-spacer img {margin-top: -55px; width: 100px; z-index: 1; position: relative;}
-top: -55px; width: 80px; z-index: 1; position: relative;}
/*————————————————*/
* Remove sidebar on all archive pages
/*————————————————*/
.search #main-content .container::before,
.archive #main-content .container::before {
display: none;
}
.search #left-area,
.archive #left-area {
width: 100%;
float: none;
padding-right: 0;
}
.search #sidebar,
.archive #sidebar {
display: none;
}
Thanks in advance! And Happy New Year!
Chris
The css looks fine. Looks like there might be some other conflicts with the settings of the page builder.
It looks like there might be an issue…. I get the same result as Chris when I use the code. I have had to disable the image sections at the moment
A lot depends on whether or not you have made any padding or margin adjustments in the settings. On the demo it is working great. http://montereydev.com/demos/menucta-and-logoswap/floating-image-demo/
Awesome tutorial! Thank you Geno. I am constantly learning in Divi (still relatively new to design). I used your float image for an opt-in on my Landing page and it looks great on desktop and laptop, but get’s messed up on tablet and mobile. I looked up the Divi media queries, but I am not very experienced in CSS and am not sure how to make the floating image stack above the sign-up bar http://michellec.co/welcome/ Can you help?
Hi, thanks for the tutorial! But Im having some issue here, can you help me? First of all, Safari works perfect, Chrome have a white space between 2 section, and then Firefox is the bottom section is being push to the right side. I have follow exactly your step and have no idea at all whats mistake have I made. Please help.
Here is the link to my page
http://magicbites.com.my/magicbites/
Thanks in advance.
Hi Ally, I just checked but it looks like you have removed it. Sorry it could not work for you.
I’m also having this problem! Safari is perfect but google chrome puts the overlapped section underneath instead of on top… Any help would be appreciated :/
Great tutorial! However none of the css works if I place it in the child theme CSS nor in the main Divi custom CSS sections, in all your tutorials CSS only works if I place it in the individual PAGE custom css field..(not for the module, for the page) – any idea why this would happen?
Hi Pat. It is most likely a caching issue. There are three places to clear your cache.
1. Clear the cache on your browser
2. Clear the cache on any caching plugins you are using
3. Check to see if your host is using cache and if so, reset the cache on your server (usually in the cPanel).
Hey, I just discovered your website, wonderful ideas!
Can you tell me how to make the same kind of layout but with an image or a form on the left or right of a column?
Thx
Hi Pierre. Do you have an example of what you are trying to achieve?
Hey Geno, you are like a Wikepedia for Divi users (Divipedia?)
This magnificent trick does not work if you select “parallax effect” in the section, right?
The Parallax effect hides anything that overflows into another section. That’s how they get the background effect. But you could try having it overflow INTO the parallax section from a section above or below. You would have to play with the z-index of the overflowing image. I have not tried but thats where I would start.
Hello Quiroz.
Can you inspect or check what happens to my image?
I have followed the tutorial but when I saw my site the image was cropped.
Hope you can reply this fast
My website: https://www.febryanasa.com/
Thank you:)
Looks like you got this one figured out. Looks nice.
Could you use a SVG file (animated logo)?
I am sure you could but there would have to be a few extra steps to enable svg’s in Divi.
I love this trick, works perfectly! I have not had luck floating the image half over an image slider, any advice on that?
Thanks
I think the image sliders have a rule that hides any overflow meaning nothing is allowed to overflow into that slider space.
Looks like this doesn’t work anymore even in your own live demo. Anything that needs to be changed to correct it?
Divi added a new media query for larger devices bringing back the section padding. To fix that just add this CSS.
@media only screen and (min-width: 1350px){
.logo-spacer-section {
	padding: 0px!important;
}}
Also update this
.logo-spacer-section { padding:0px!important; margin:0 0 -54px 0;}I have updated this tutorial and the demo site 🙂
If you are changing the settings in the module builder, they will overwrite the custom CSS. So you will have to make it responsive via the module settings.
Hi Geno, I’m in your mailing list now! I would try this tutorial thank you for your sharing, you are really great 🙂