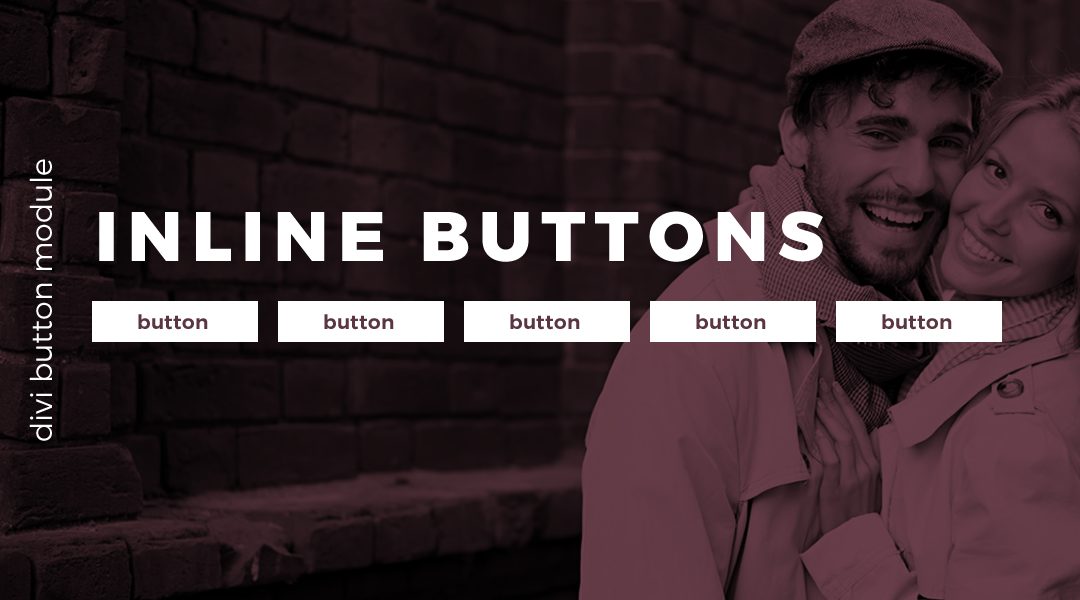
One of my clients sells books on several different platforms. So for each book, we wanted to replace his links with buttons so that the page looked more professional. But we we did not want to use columns and I did not want my client to have to go in and modify the html so that we could use custom classes for the links.
We wanted to use the button module but we did not want to use multiple columns either because we would have to modify the column width. Not to mention you are limited to only four columns and even then they are spread too far apart. So I decided to use a little CSS so that we can easily make several buttons added to a single row all line up horizontally.
In this tutorial, I will show you how we use a little custom CSS to make several inline buttons in a single row. This effect is great for headers or call to action sections that need two or more buttons right next to each other.
Let’s Get Started Setting up the standard Divi Section.
Adding the section and custom class
1. Create a single column section.

2. Open up the row settings, go to the “Advanced tab”, and add this custom CSS Class: gq_r_inline_buttons


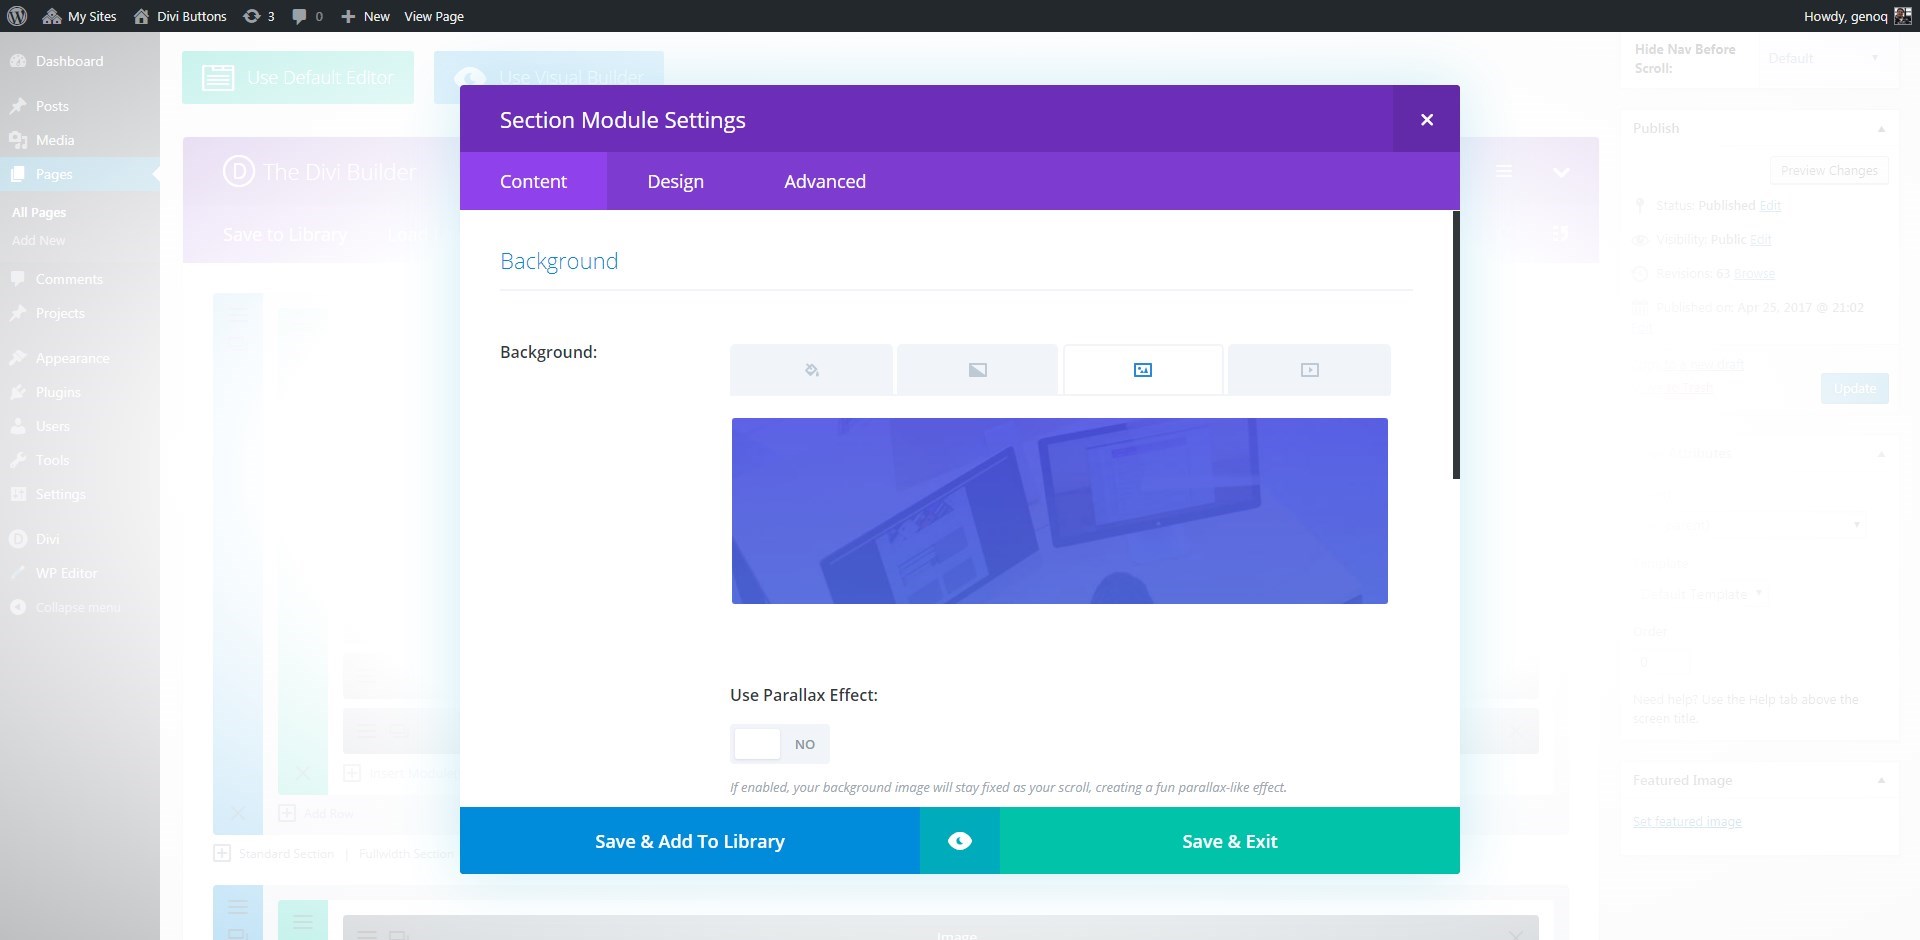
3. Optional: In the section settings, go to the Content tab, click on the Background Image tab, then add your background picture. (tip: background images should always be at least 1980px wide for optimum appeal)
4. Go ahead and add your text modules, button modules, or whatever you want in that section. In my demo I added three text modules followed by 5 button modules.

5. Save your page and move on to the magic of adding a little CSS.
Adding The Custom CSS
If you are working with a child theme you can go to Appearance>Editor and open your stylesheet. If not, go to Appearance>Divi Theme Options>Custom CSS (which is located at the bottom of the first tab in Theme Options)
Add this CSS.
/*------------------------------------------------*/
/*--------------[GQ INLINE BUTTONS]---------------*/
/*------------------------------------------------*/

	/* inline buttons */
		.gq_r_inline_buttons .et_pb_button_module_wrapper {
			display: inline-block;
			margin: 10px 10px 0px 0px!important;}
Making Adjustments To The CSS
As with all my tutorials, my goal is not to teach you how to use Divi Settings as much as it is to teach you how to customize your website learning a little CSS along the way. So with that being said, here are a few CSS tips to help you learn a little more about CSS.
To the margin around the button, you can do so here. The margin order goes like this: top, right, bottom, left.

And that’s it.
If you used this on one of your projects, please share a link below so we can see how you used it.
Have fun!
Well, that’s all for now. I hope you find this article useful.
![]()


Thank you for your wonderful tutorials. I’ve needed help with buttons for several sites I’ve worked on. I’ve left you a donation. 🙂 God bless you!
Thank you Janis. And God Bless you as well 🙂
I was inspired by your demo. I tried something like the following using Elementor, I wonder if it works in Divi:
/* FlexBox Inline Buttons */
.gq_flex-buttons .et_pb_button_module_wrapper {
display:flex;
flex-flow: row wrap;
justify-content: space-around;
}
how do you rotate “divi button module” ? thx Jim
Hi Jim. I am not sure what you mean.
Hey Gino
Thanks for this is there a way to make all the buttons the same width and to fill the whole row width?
I am not sure on that one. Need to dig deeper on that.
Is it possible to css it, so the buttons stretch to the width of the row, or center them in the row ?
I am not sure on that one.
Cool, simple and effective. But I haven’t been able to get these buttons centered in the row. Is it possible?
Working on a solution for centering them.
Hi Bill. Try this.
Move the buttons to their own row. Then in the CSS box for the column main element, add this:
display: flex;
justify-content: center;
align-items: center;
Hey Geno, any idea how I can center the whole thing?
I had some hacks but working on a better solution for that.
Hi Tanya. Try this.
Move the buttons to their own row. Then in the CSS box for the column main element, add this:
display: flex;
justify-content: center;
align-items: center;
Hi Geno
Then in the CSS of the line > main element column
display: flex;
justify-content: center;
align-items: center;
It work good for me
Best Regard 😉
This worked perfectly for me! Thanks so much, Geno!
My pleasure Patty 🙂
Hey Geno, thanks so much for this tutorial, is there any way to align the buttons to the right of the page?
Just move the buttons into their own row (single column) then in the CSS box of the main element COLUMN, add this CSS…
display: flex;
justify-content: flex-end;
Is there a way to move the buttons vertically in the hero image. Something like in this website influenceandco.com. Currently the button go to the bottom of the box. I have done a work around by creating the banner box and button box in separate rows and then using negative px for the banner box to pullup the button row into the banner row.
Hi Adnan. Try this.
Move the buttons to their own row. Then in the CSS box for the column main element, add this:
display: flex;
justify-content: center;
align-items: center;
Thank you Geno! I found this by Googling and it was just what I needed! You’re the best!
This was GREAT! I used it on the following site with full image. http://www.calbizexpo.com. It would be helpful to have the css to move to the center in the tutorial, I found it in of the reply’s bu it didn’t work.