
Are you looking for a quick and easy way to swap the Divi Blurb Header and Image?
I assumed this would be an easy solution using CSS & Flex. Once I realized that the header is nested in a DIV within a DIV, other than the parent, I knew I might have some issues.
I figured a little jQuery must be the way to go. After a lot of trial and error, a post on Stack Overflow, and then being thrown a safety line by my good friend Jerry (yes, that Jerry), we finally have a pretty good solution that only takes minutes.
In this tutorial, I will show you how to use a little custom jQuery to swap the Divi Blurb Header and Image so that the header is on the top of the blurb.
All Blurb Modules or Specific Blurb Modules?
We have the option to target all Divi blurb modules on the website or just ones with a specific class.
First I will show you how to target all blurb modules.
All Blurb Modules
1. Once you have created the blurb modules, go to Divi Theme Options>Integrations
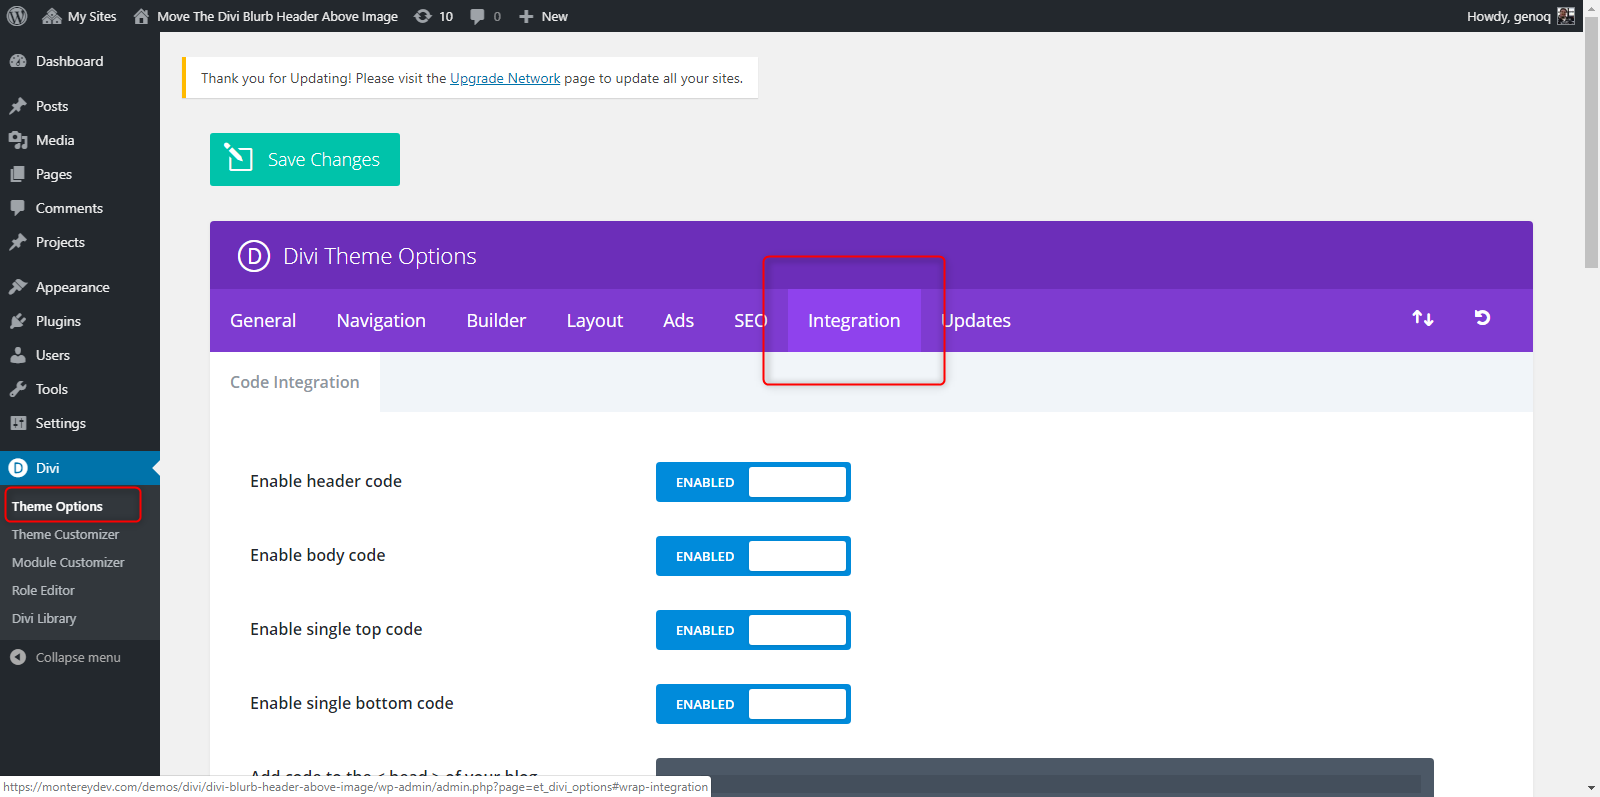
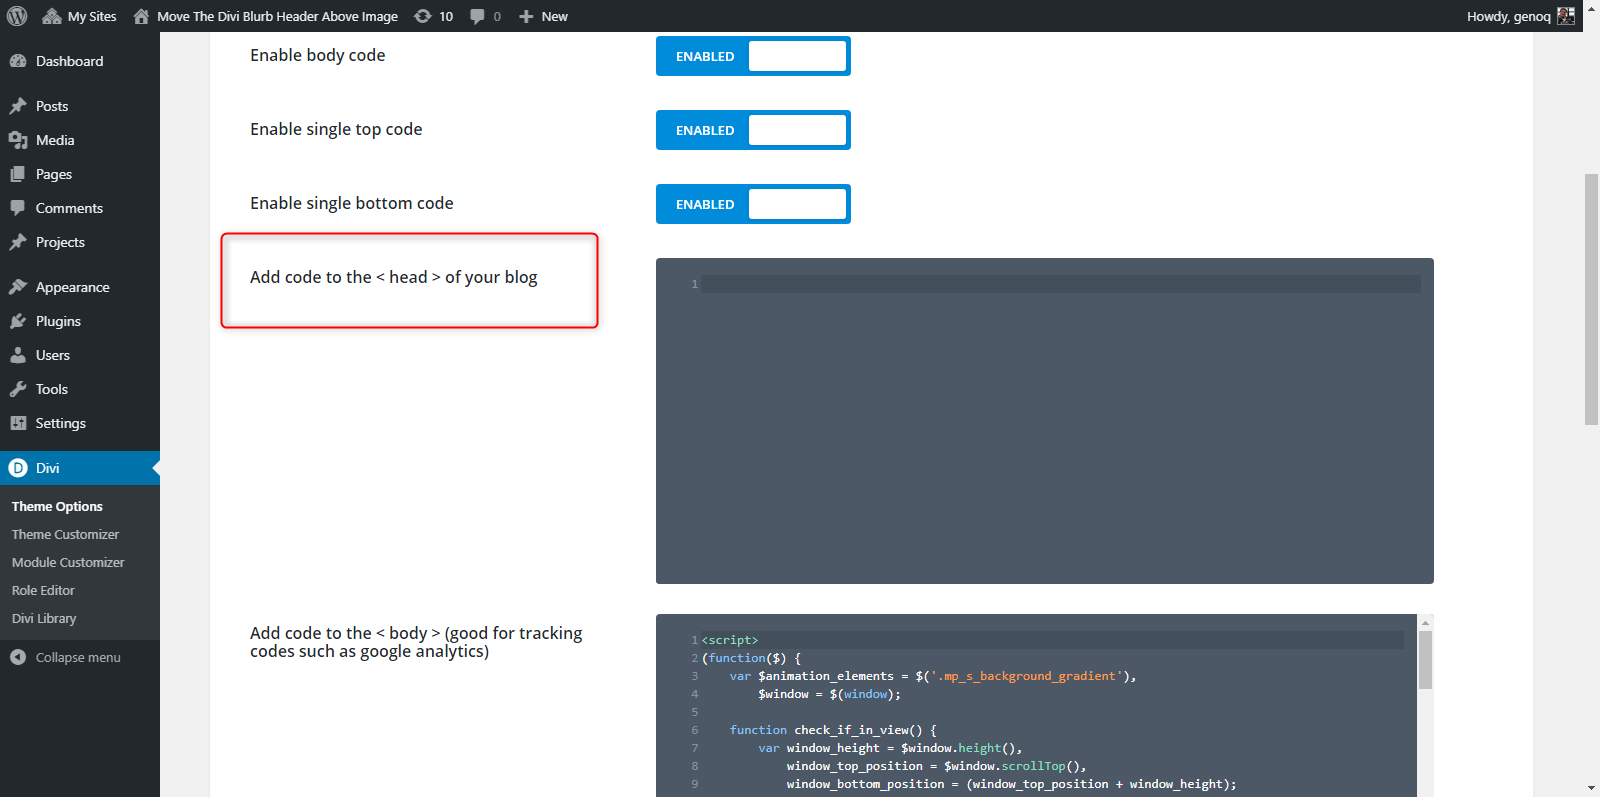
2. Scroll down to the section that says Add code to the < head > of your blog
3. Download & unzip this text file to grab the snippet you will need to copy and paste into the integration box.
4. Once you open up the zipped folder and the .txt file, copy and paste the snippet as is, into the “Add code to the < head > of your blog” box.

And that’s it.
If you would prefer to use this on specific modules only, then the these next steps are for you
Specific Blurb Modules
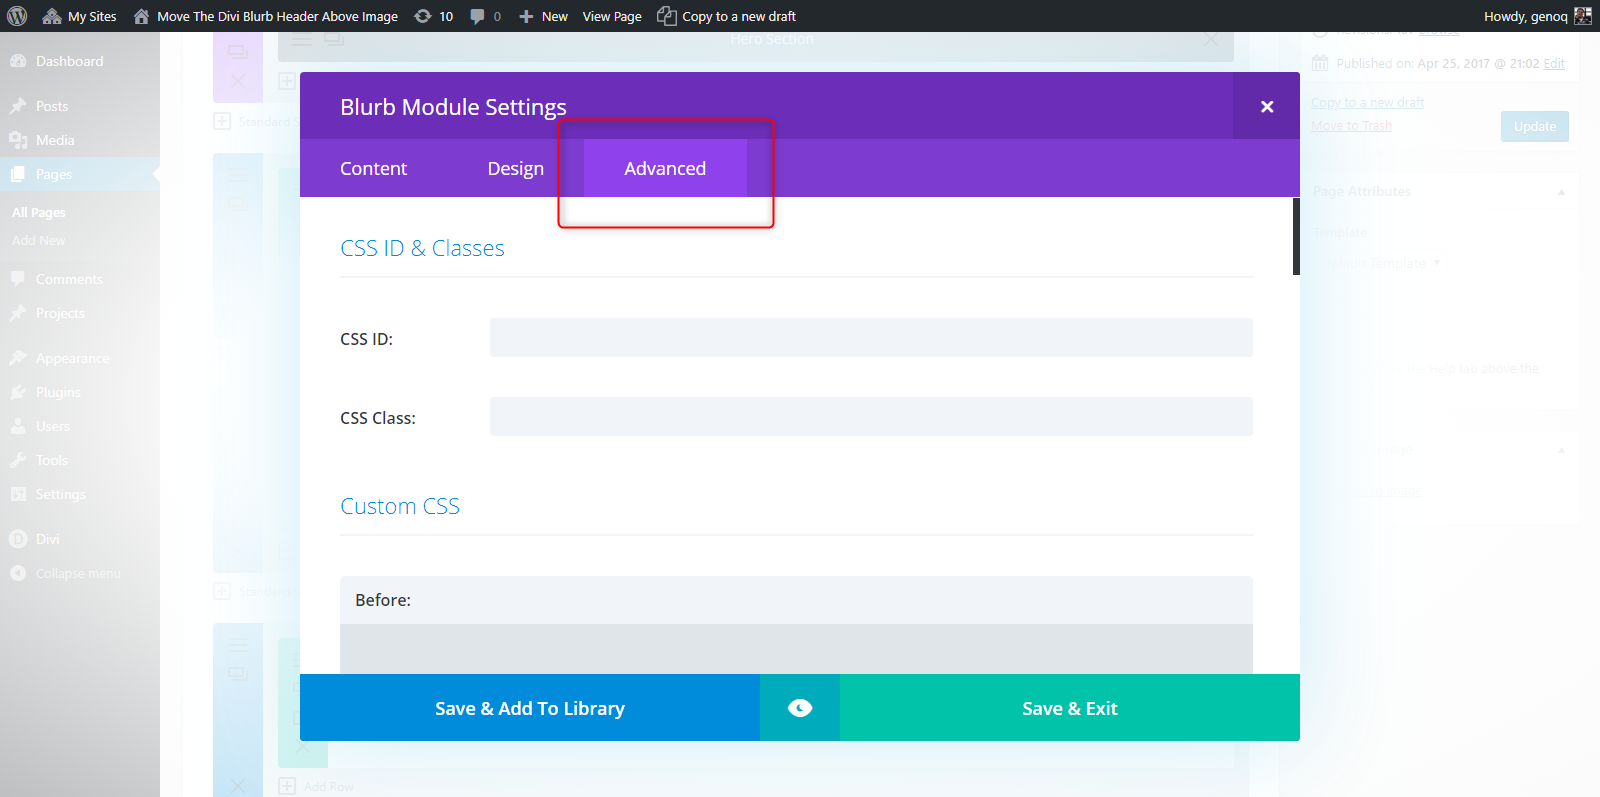
1. Create a blurb module, and go to the Advanced Settings
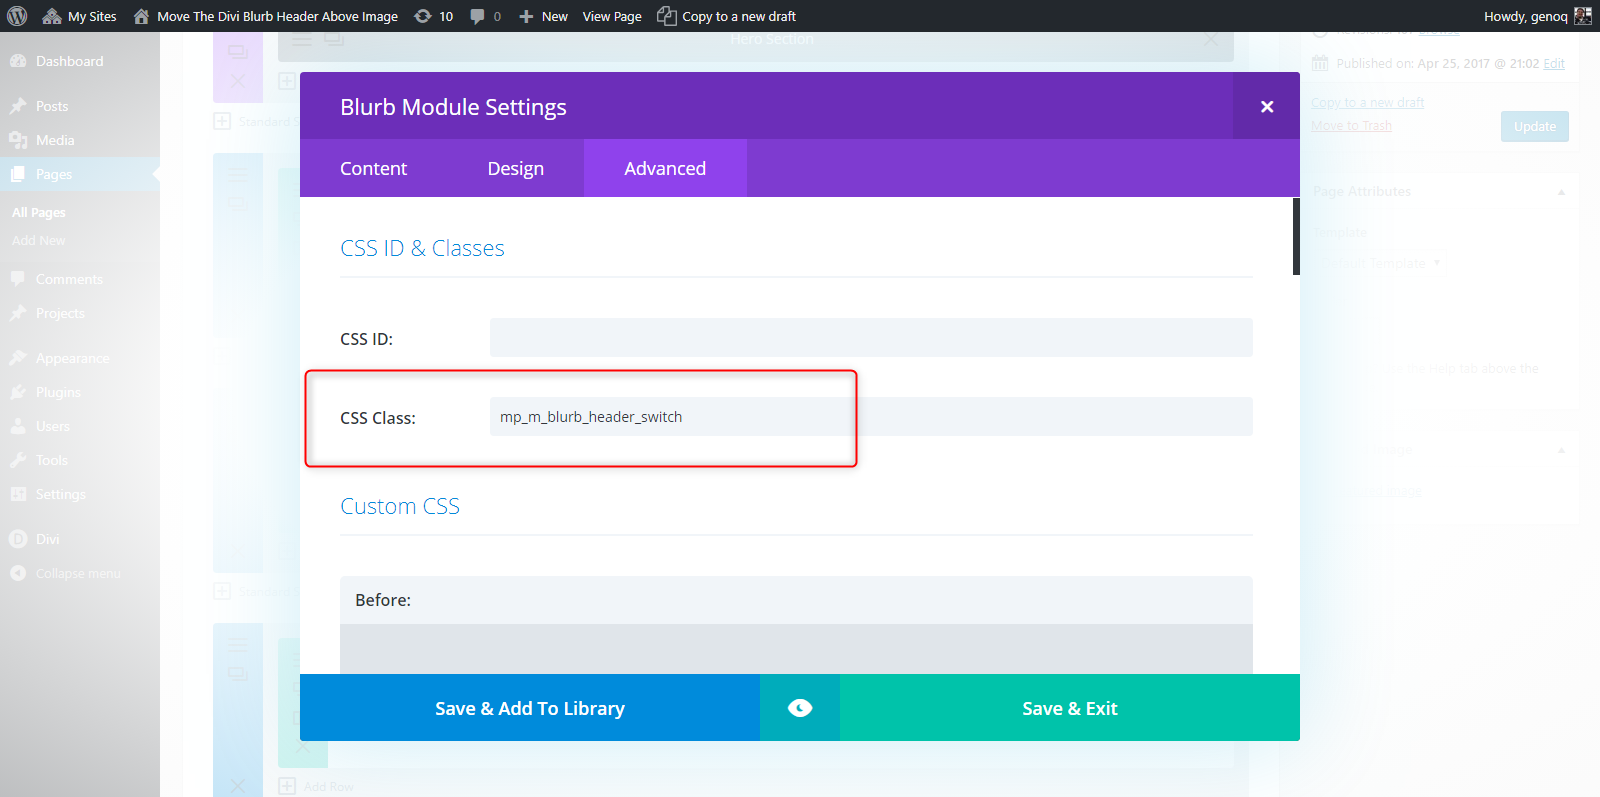
2. Add a custom class to the CSS Class section. I am using this one for the tutorial: mp_m_blurb_header_switch
3. Once you have created and saved all the blurb modules, go to Divi Theme Options>Integrations
2. Scroll down to the section that says Add code to the < head > of your blog
3. Download and unzip this text file to grab the snippet you will need to copy and paste into the integration box.
4. Once you open up the zipped folder and the .txt file, copy and paste the snippet as is, into the “Add code to the < head > of your blog” box.

And that’s it.
If you used this on one of your projects, please share a link below so we can see how you used it.
Have fun!
Well, that’s all for now. I hope you find this article useful.


Thank you for this article 🙂
My pleasure 🙂 Thanks for taking the time to comment 🙂
You shared very simple way to move the header above the image. This is such a useful guide for beginners and fresh developers.
Really impressive article I have ever read. Thanks for sharing keep writing these type of articles and help people to get more knowledge.
Yo Geno, I fooled around with your script but couldn’t manage to target specific blurbs based upon custom CSS ID. Have you tried that? It would be cool to avoid using it on all blurbs globally – don’t ‘cha think 🙂
Hi Flash, the CSS and JS only targets modules with the custom class .mp_m_blurb_header_switch. Is it not working for you?
Hey Flash!
I got the same problem. I then discovered that I had an H3 Title, and the script was talking about an H2 Title. So just change one of them to match the other and it will work on the live site. 🙂
Brilliant! Thanks so much for this very useful tip 🙂
Thank you so much! This way exactly what I needed!