
I love the Image Module in Divi but sometimes I feel like adding an image in a Text Module gives me a little more control over the image.
So for those of you who feel more comfortable adding an image in the text module, here are some examples of how you can apply some style to those images using CSS. Such as borders, making a square image a circle image, making it black & white, making it blurry and giving it cool hover effects.
Check out our Demo Page Here

First things first.
1. The first thing you will need to do is add a text module to your page and add an image in that text module.

2. Next you will have to assign your text module a unique CSS Class. In this first case I will use: image-square

Now The Magic of CSS
If you are working with a child theme you can go to Appearance>Editor and open your stylesheet. If not go to Divi>Theme Options. This will open up the ePanel. Now scroll down until you get to the Custom CSS box on the bottom of this page. This is where you will be adding the CSS.
The Basic Square Border
With this image I reduced the maximum width to 250px and gave it a black border using CSS

Use this CSS.
/* change size and add border */
	.image-square img {
    		max-width: 250px;
    		border: 10px solid #000;}
The Circle Border
With this image I changed the border color and made it round using a border-radius in the CSS. This works best on square images only.

Change the CSS Class in the Text Module to : image-round
Then use this CSS.
/* rounded corners */
	.image-round img {
    		max-width: 250px;
    		border: 10px solid #da2127;
    		border-radius: 150px;}
The Black & White Image
With this image I gave the image the appearance of being black and white using the grayscale filter in the CSS.

Change the CSS Class in the Text Module to : image-grey
Then use this CSS.
/* black & white */
	.image-grey img {
    		max-width: 250px;
    		border: 10px solid #54544b;
    		border-radius: 150px;
    		-webkit-filter: grayscale(100%);
    		filter: grayscale(100%);}
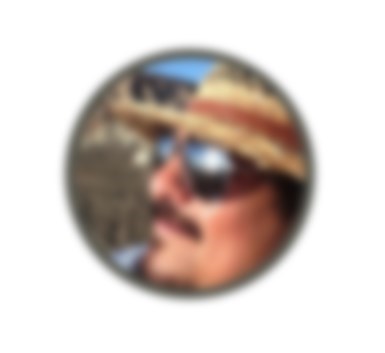
The Blurry Image
With this image I gave the image the appearance of being blurred using the blur filter in the CSS.
Change the CSS Class in the Text Module to : image-blur
Then use this CSS.
/* blur */
	.image-blur img {
    		max-width: 250px;
    		border: 10px solid #54544b;
    		border-radius: 150px;
    		-webkit-filter: blur(5px);
    		filter: blur(5px);}
The Combined Filters & Hover Effect
With this image I combined the filters and added a hover effect that removes the blur and grayscale in the CSS

Change the CSS Class in the Text Module to : image-combined
Then use this CSS.
/* combined with hover */
	.image-combined img {
    		max-width: 250px;
    		border: 10px solid #54544b;
    		border-radius: 150px;
    		-webkit-filter: grayscale(100%) blur(2px);
    		filter: grayscale(100%) blur(2px);}

	.image-combined img:hover {
    		border: 10px solid #da2127;
    		-webkit-filter: grayscale(0%) blur(0px);
    		filter: grayscale(0%) blur(0px);}
A Smooth Transition to the Hover Effect
With this image I added a transition time to the hover so it has the effect of a smoother transition rather than just an instant change.

Change the CSS Class in the Text Module to : image-transition-delay
Then use this CSS.
/* transition delay */
	.image-transition-delay img {
    		max-width: 250px;
    		border: 10px solid #26da20;
    		border-radius: 150px;
    		-webkit-filter: grayscale(100%) blur(2px);
    		filter: grayscale(100%) blur(2px);
		transition: 0.8s;
		-moz-transition: 0.8s;
		-webkit-transition: 0.8s;}

	.image-transition-delay img:hover {
    		border: 10px solid #267924;
    		-webkit-filter: grayscale(0%) blur(0px);
    		filter: grayscale(0%) blur(0px);}
Check out our Demo Page Here
Well that’s all for now. I hope you find this article useful.
![]()


Very useful, and very cool effects – thanks so much for your help!
It’s an excellent tutorial. Thanks Geno. You are awesome.
I love this. I have sent you an email from Norway – before I saw this commentbox; to this adress: Geno Quiroz 🙂
Thank you for publishing things like this.
But for us not so experienced: will this (or how to:-) influence on ALL text-images I put in?
We do have some difficulties with resizeable blocks in divi, and is trying a Moto-express plugin, because wisywig could be wonderful for us.
We also have problems with image-sizes : For example the picture of this to persons: http://tannhjulet.no/produkt/drammen-tannlegesenter/
:: we think the way is to change the CSS, but we are not very familiar with it (but has some experience in doing things like this carefully) and would like to change the dimensions for this picture for all at the same place. And we will need to do it again when updating Divi?
We need help with Divi
Using this method will impact each image the same within that particular text module or any text module using the same CSS Class that you have to enter in the settings. If you wanted it to effect only one image in particular within a text module with multiple images, you can assign the CSS Class to the image itself by editing the image. Its that little pencil icon you see when you mouse over the image. Then just remove the “img” from the css used in the tutorial examxples.
Would placing an image accompanied with multiple lines of text inside a text module help to vertically center the text next to the image? I have been reading all the support tickets in Elegant Themes and so far none has been convincing. Any ideas how to go about it? Thank you.
Not sure. would have to give it some thought.
Managed to find the answer to my question in one of your resources: Divi Tutorials Directory.
Thank you.
But why do you need to use the text module for this ? You can have this control in the image module, can’t you ?
Hi Cedric I love the Image Module and use it quite often, but sometimes I feel like adding an image in a Text Module gives me a little more control over the image. For example it is so much easier to change the size without CSS. Another example is when you want the image inline within a paragraph. That is hard to achieve with the other modules. Yes you can achieve some of this basic styles to image module, person module and blurb module but sometimes the text module is just a better solution.
Does this only work with an official Text module or would it work in a Blurb module?
Hey Melissa. Absolutely. Thanks for bringing up this point. You can use this trick on the Person Module and Blurb Module as well.
Hi. I was wondering how to change the color of the rounded border. Thanks
The color is called out in the 5 digit hex code in the “border” css rule.
/* rounded corners */ .image-round img { max-width: 250px; border: 10px solid #da2127; /* change 6 digit hex code for color */ border-radius: 150px;}is there any way to use it for the picture of the person module ?
Awesome stuff. Thanks for sharing. You make me better at what I do.
Thanks for visiting the blog and commenting 🙂
Hi Geno! These are so fantastic. Thank you for these tutorials! Stellar!
I’d love to add a header on each image linking to another page that shows up when someone hovers over the circular image. Any tips on how to make that happen? Thanks again!
Check out these tutorials by Michelle Nunan http://divisoup.com/four-more-linkable-image-hover-effects/
wouldn’t border-radius: 50%; not be better as it wouldn’t depend on the dimensions of the picture? 🙂 Great stuff on your site though
That would also work, in this case the image size is being specified though.
Great tips and commands. I would like to apply on my site but I can not.
Has anything changed in DIVI code should I do to make this transformation?
Thank you
Hi John! This still works in Divi, nothing has changed that would prevent these things from working. One thing to double-check though, is that you are using the Text Tab when you doing the editing. It will not work if you use the Visual Tab.
I wonder why these classes are added to the text-module and not to the image in the text-module itself?
You can enter classes to images in a textmodule as well, using the “extended editing” of the image” (the small pencil above the image when hovering=
Hi Connie! You are right, the classes can be added to the images. That is another way to do it. Adding the class to the text module has a couple of advantages. One is that it will impact any images you add, so you don’t have to modify each image individually.
Hi Jerry,
both ways have advantages. To add the class to the image itself is more easy to teach / to explain to users
but “normal users” who write posts from time to time won’t remember the name of the CSS-classes in general ;=)
Cheers, Connie
Not working for me…the only one of these that works for me is the “Image-Rounded” which I love!
I would like that my image “popups” in a lightbox like into the image module…Is there a way to do it if possible?
There are several “lightbox” plugins you can use. YOu just have to find one that is compatible with Divi or you might have to adjust the Divi settings. Then just link the text image to the media file in the image settings.
This is not working for me ;-( Can the CSS class be any name? Reason i am asking is that my pic is not squared. Its rectangular and i want to keep it that way. I am working on an About Me page and I started with the Text Module and the Image module separately. But noticed that the Text doesn’t wrap that way around my right-aligned image. Makes sense since its considered a separate column. So I need to make the Image in the Text module work somehow. Thanks for any help.
This tutorial is designed for images in a text module. I am not sure why it would not be working for you. Did you add the class name to the text module?
i figured it out, Thanks.
When adding an image in the text module, I get a caption shortcode around the image if there is an image-caption recorded against the picture. That’s brilliant. Do you have any tip on how I can style the caption? By default it seems to give a light-grey box with a black border around the picture. Can I change the colour of the caption area and/or the font used?
I would need a link to check it out.
Hey Geno,
Thanks for sharing these infos with us, poor mortals.
LOL. My pleasure Lester 🙂