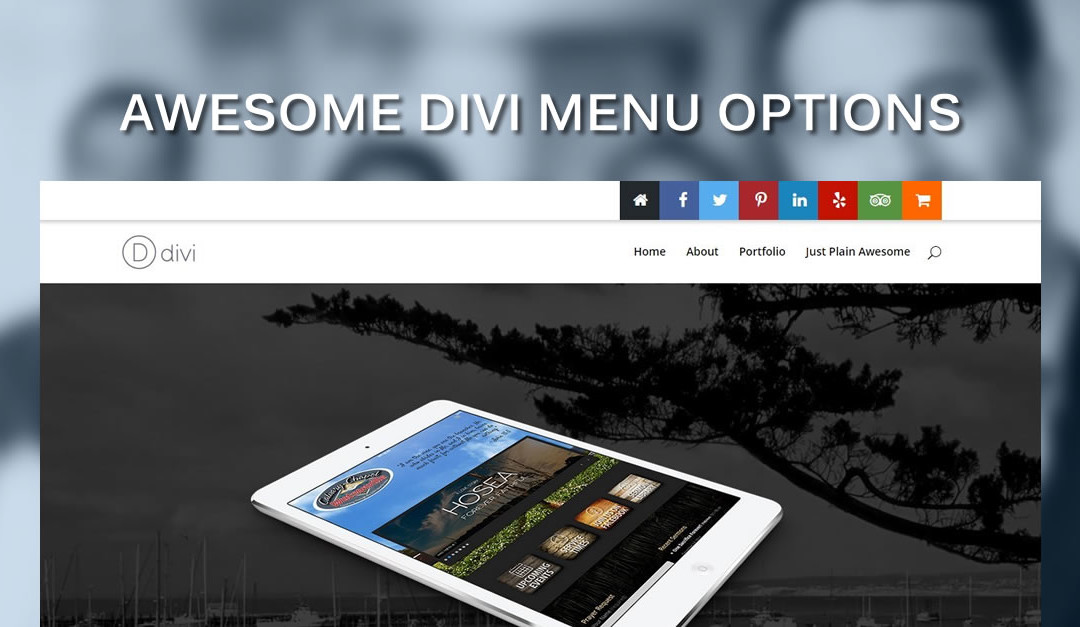
How would you like to make cool Social Media Icons on the top of your page like this without any plugins ?

Here is a cool way to add your own cool social media icons or any type of icon in the top header of your Divi website using Font Awesome, CSS and a little Divi Wizardry.
Font Awesome
The first thing you will need to do is add the code needed to start using font awesome icons on your website.
1. Go to your Divi Theme Options and once in the epanel select Integration
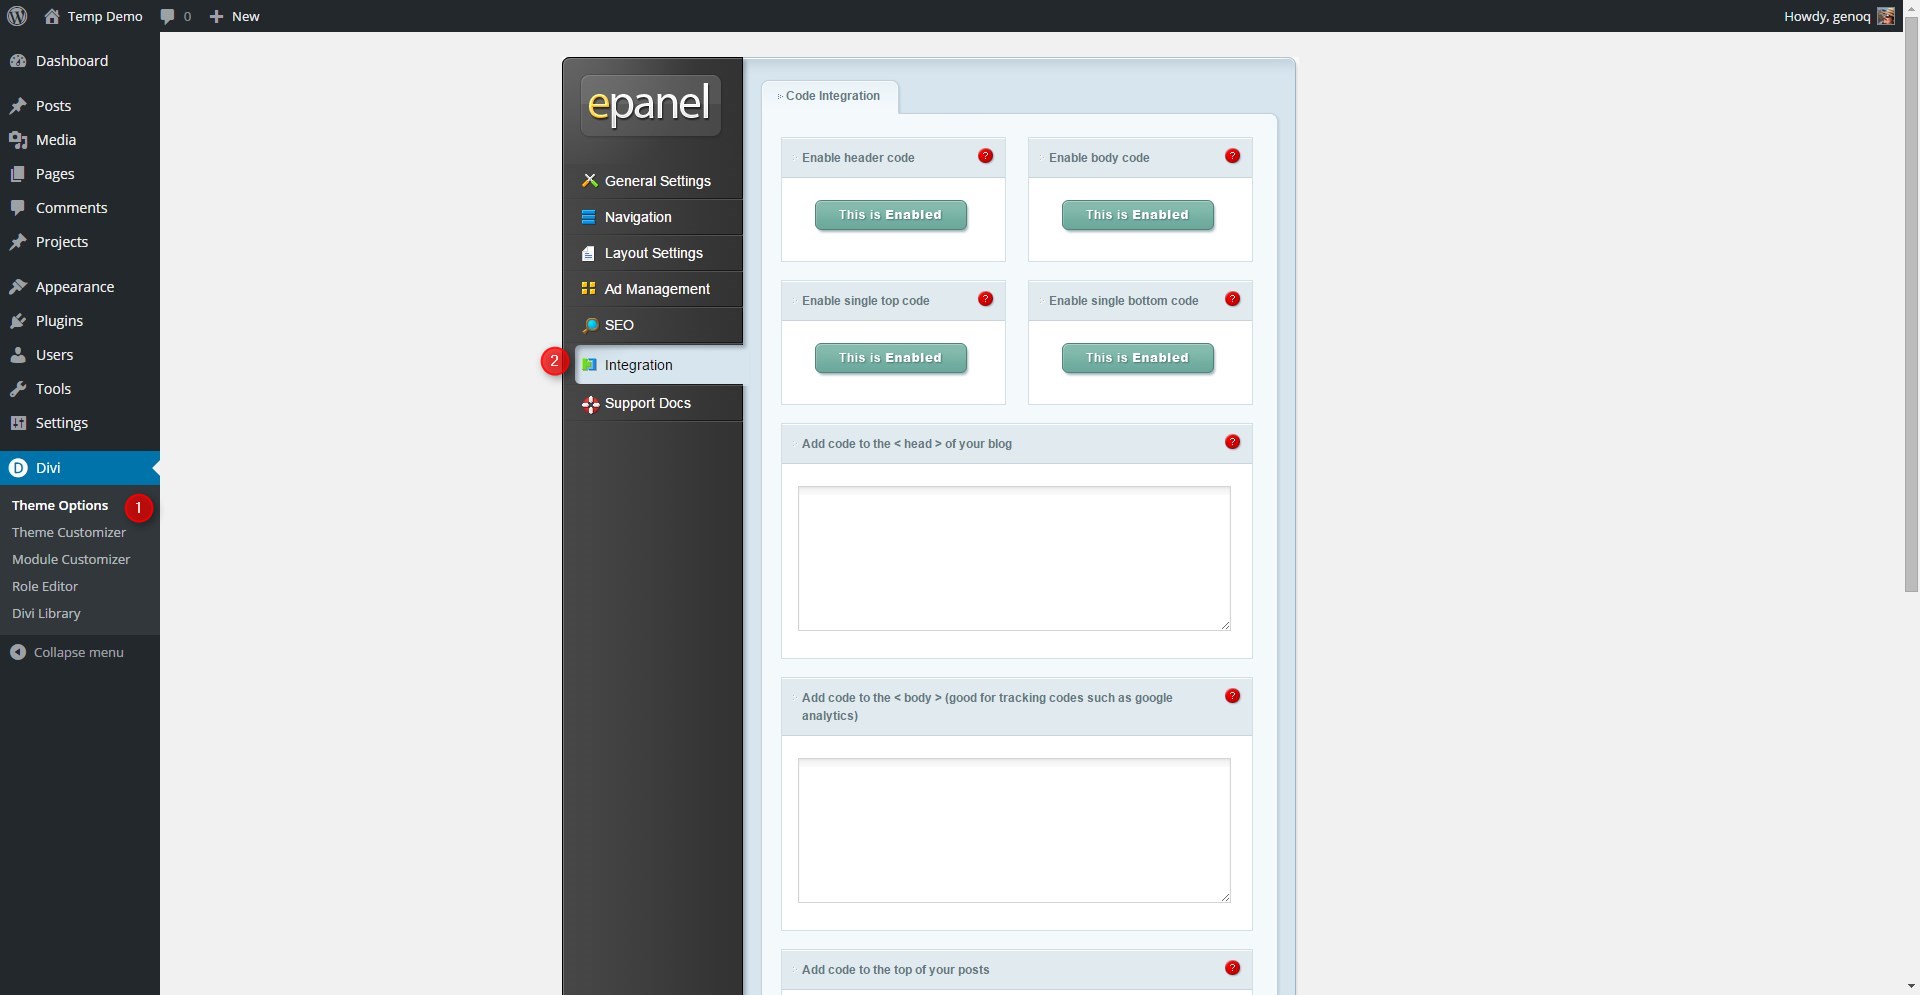
2. Paste the following code into the first section that says “Add code to the < head > of your blog”
<link rel="stylesheet" href="https://maxcdn.bootstrapcdn.com/font-awesome/4.4.0/css/font-awesome.min.css">

Now you are ready to start using Font Awesome on your website.
Setting Up The Custom Menu
1. Go to Appearance>Menu and then create a new menu called Secondary Menu. Be sure to tick the option in the Menu Setting to make it your official Secondary Menu.

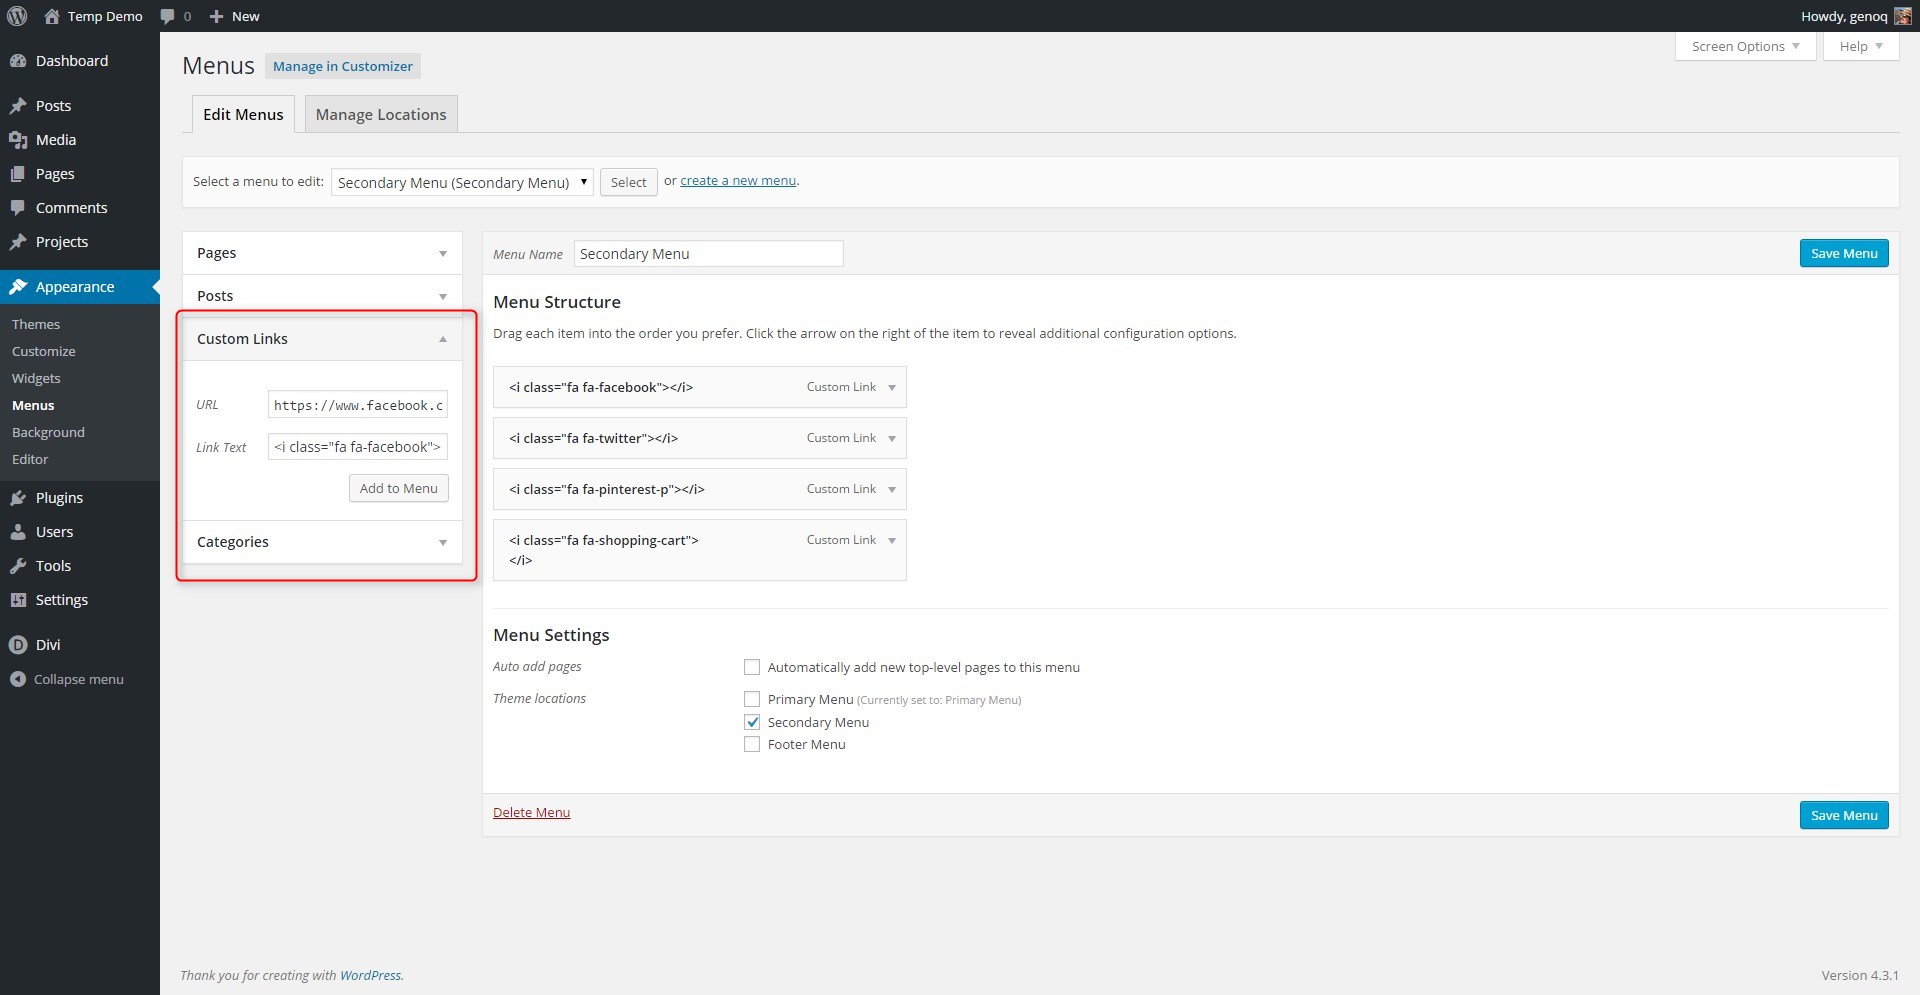
2. In the upper right hand corner of the screen is a tab that says “Screen Options” Click on that to bring down the options and tick the CSS Classes box
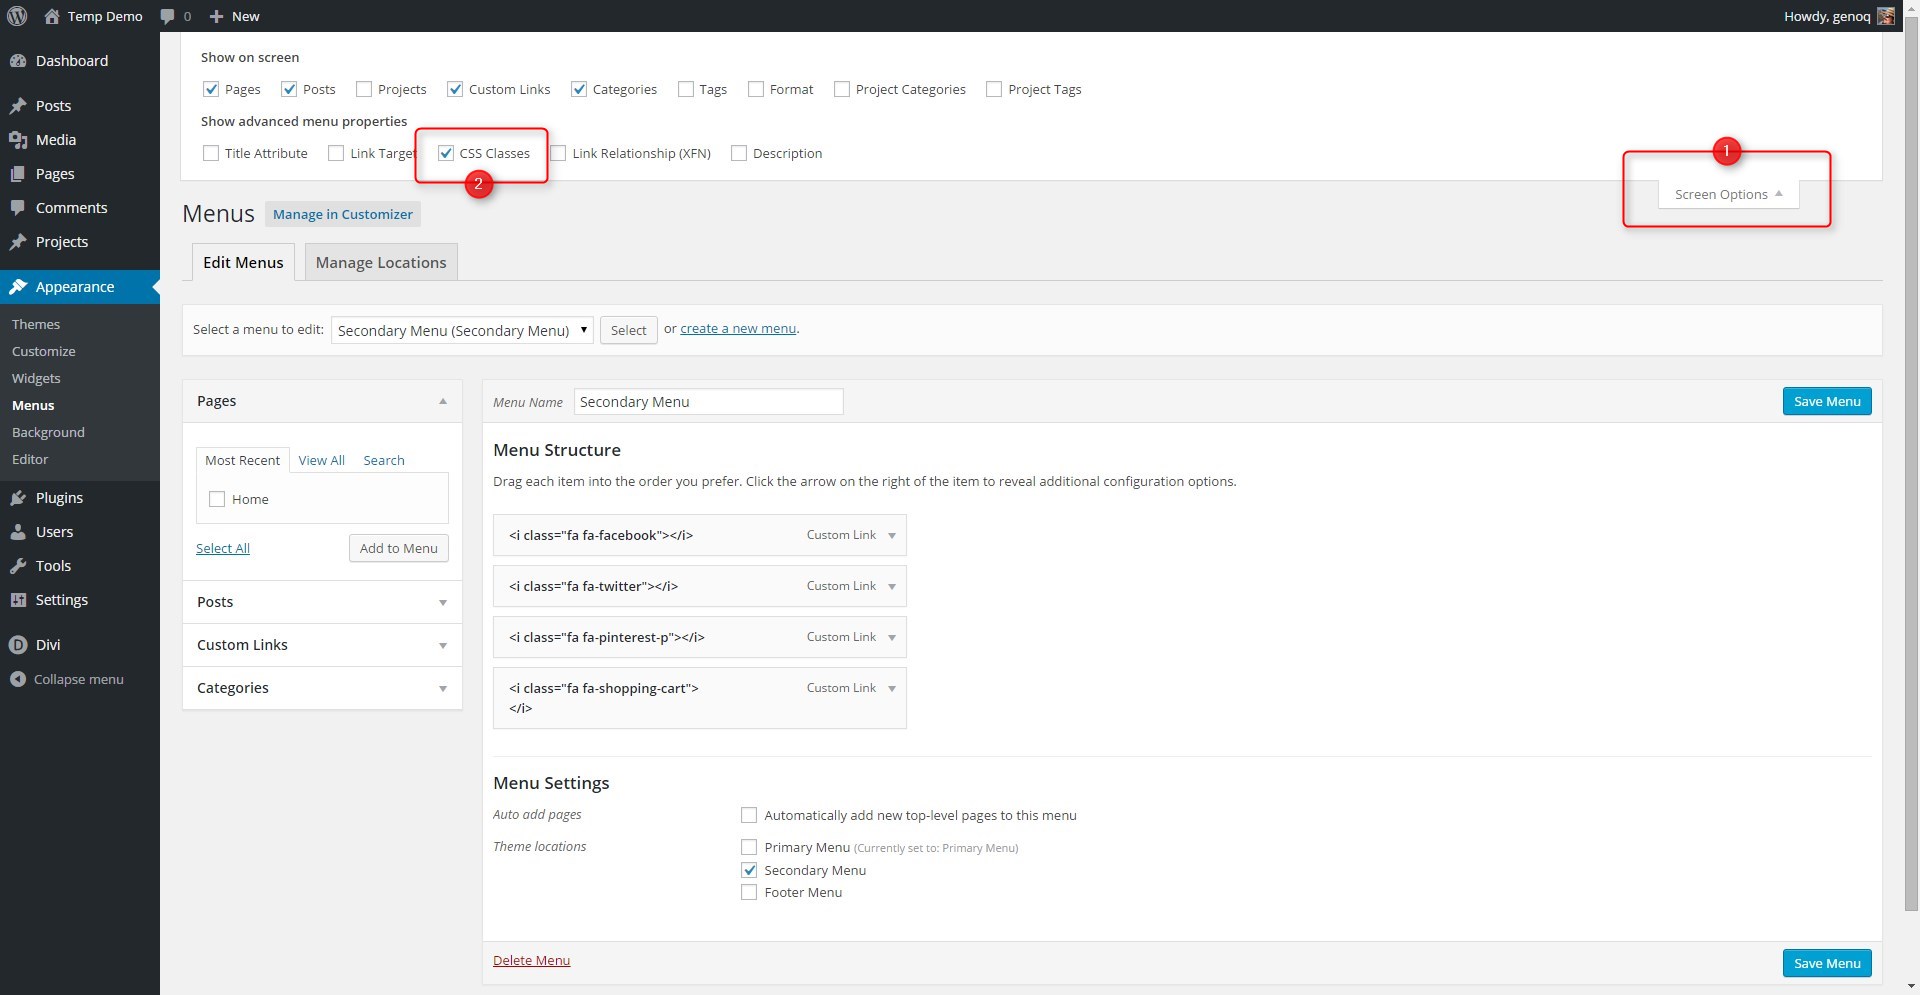
3. Under the “Custom Links” option is where we will begin adding our links. Select the option and add your url. In this case it’s my Facebook page url

4. Next you will need to grab the code for your font icon. Head on over to Font Awesome to see their library of 585 icons and growing. Once you find the icon you want, select it and it will take you to the page where you can copy and paste the code.
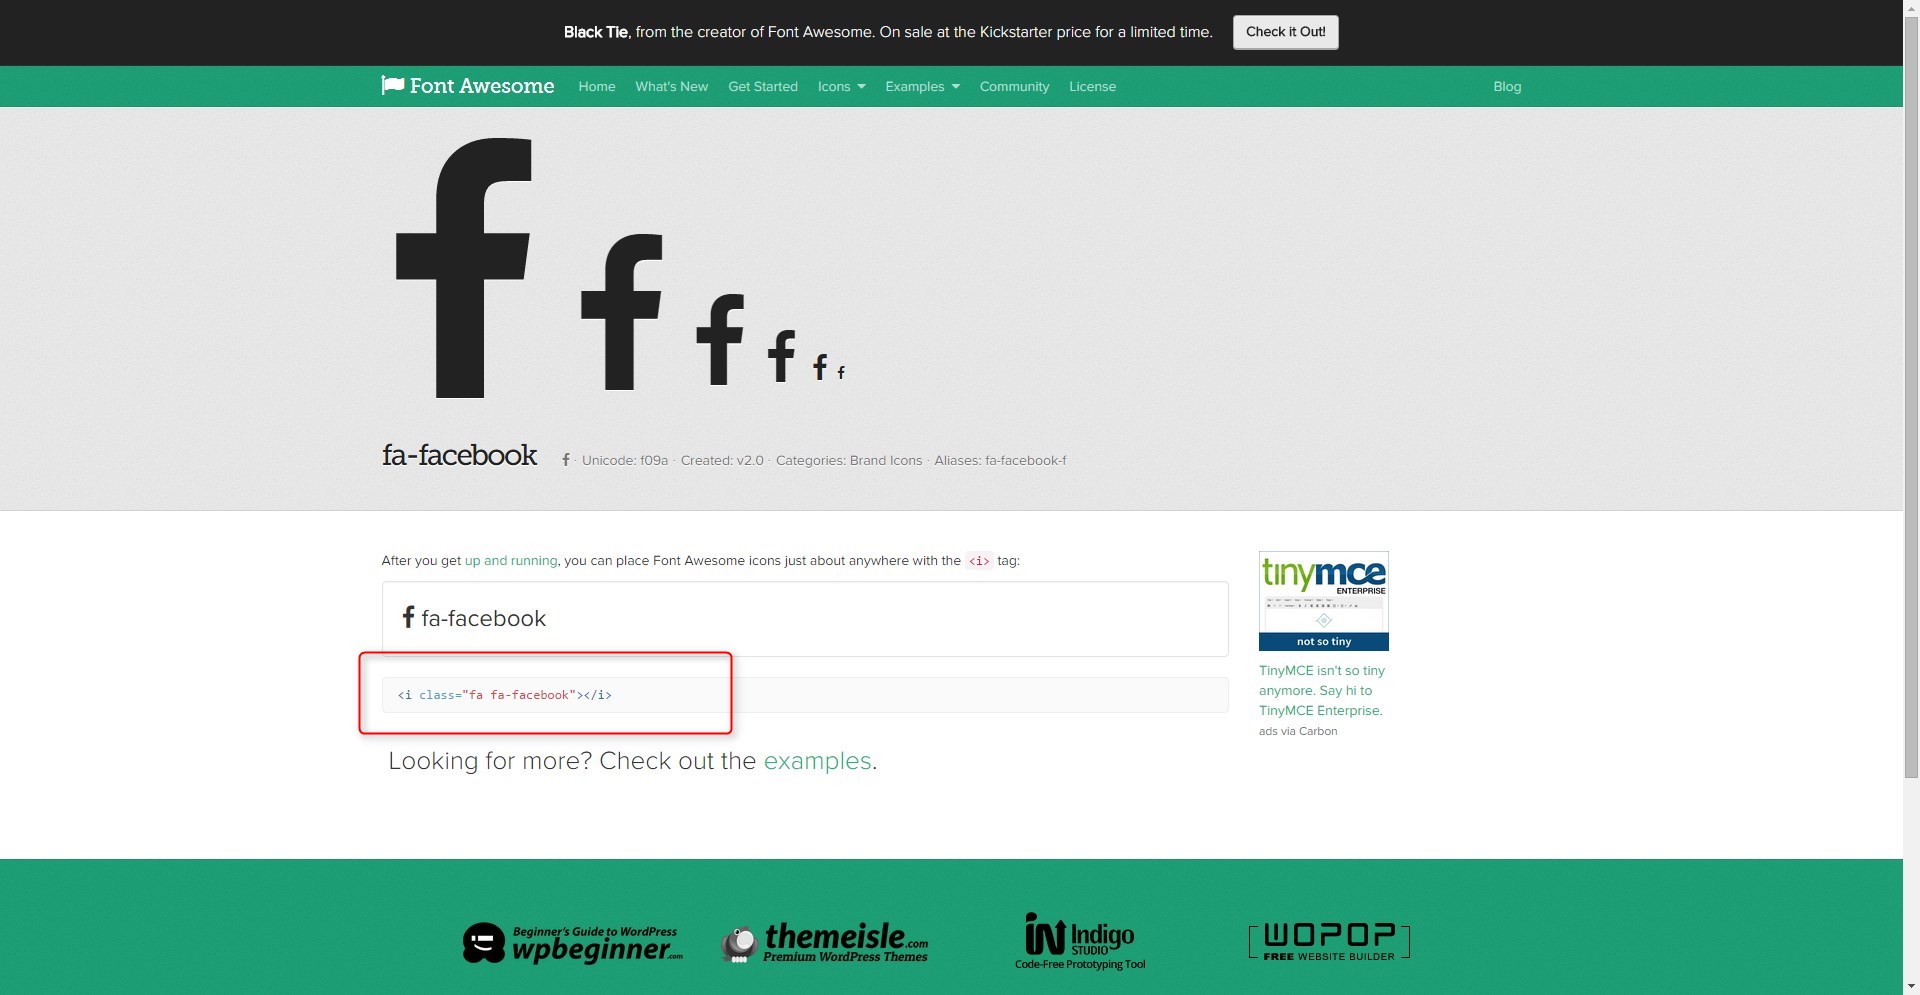
Here are some of the common links for quick reference.
<i class="fa fa-home"></i>
<i class="fa fa-facebook"></i>
<i class="fa fa-twitter"></i>
<i class="fa fa-pinterest-p"></i>
<i class="fa fa-linkedin"></i>
<i class="fa fa-yelp"></i>
<i class="fa fa-tripadvisor"></i>
<i class="fa fa-shopping-cart"></i>
5. Now that have the codes you want, you will add it to the “Link Text” in the Custom Link and then select add to menu. Repeat these steps for all the links you want to have in your top header using an icon only.
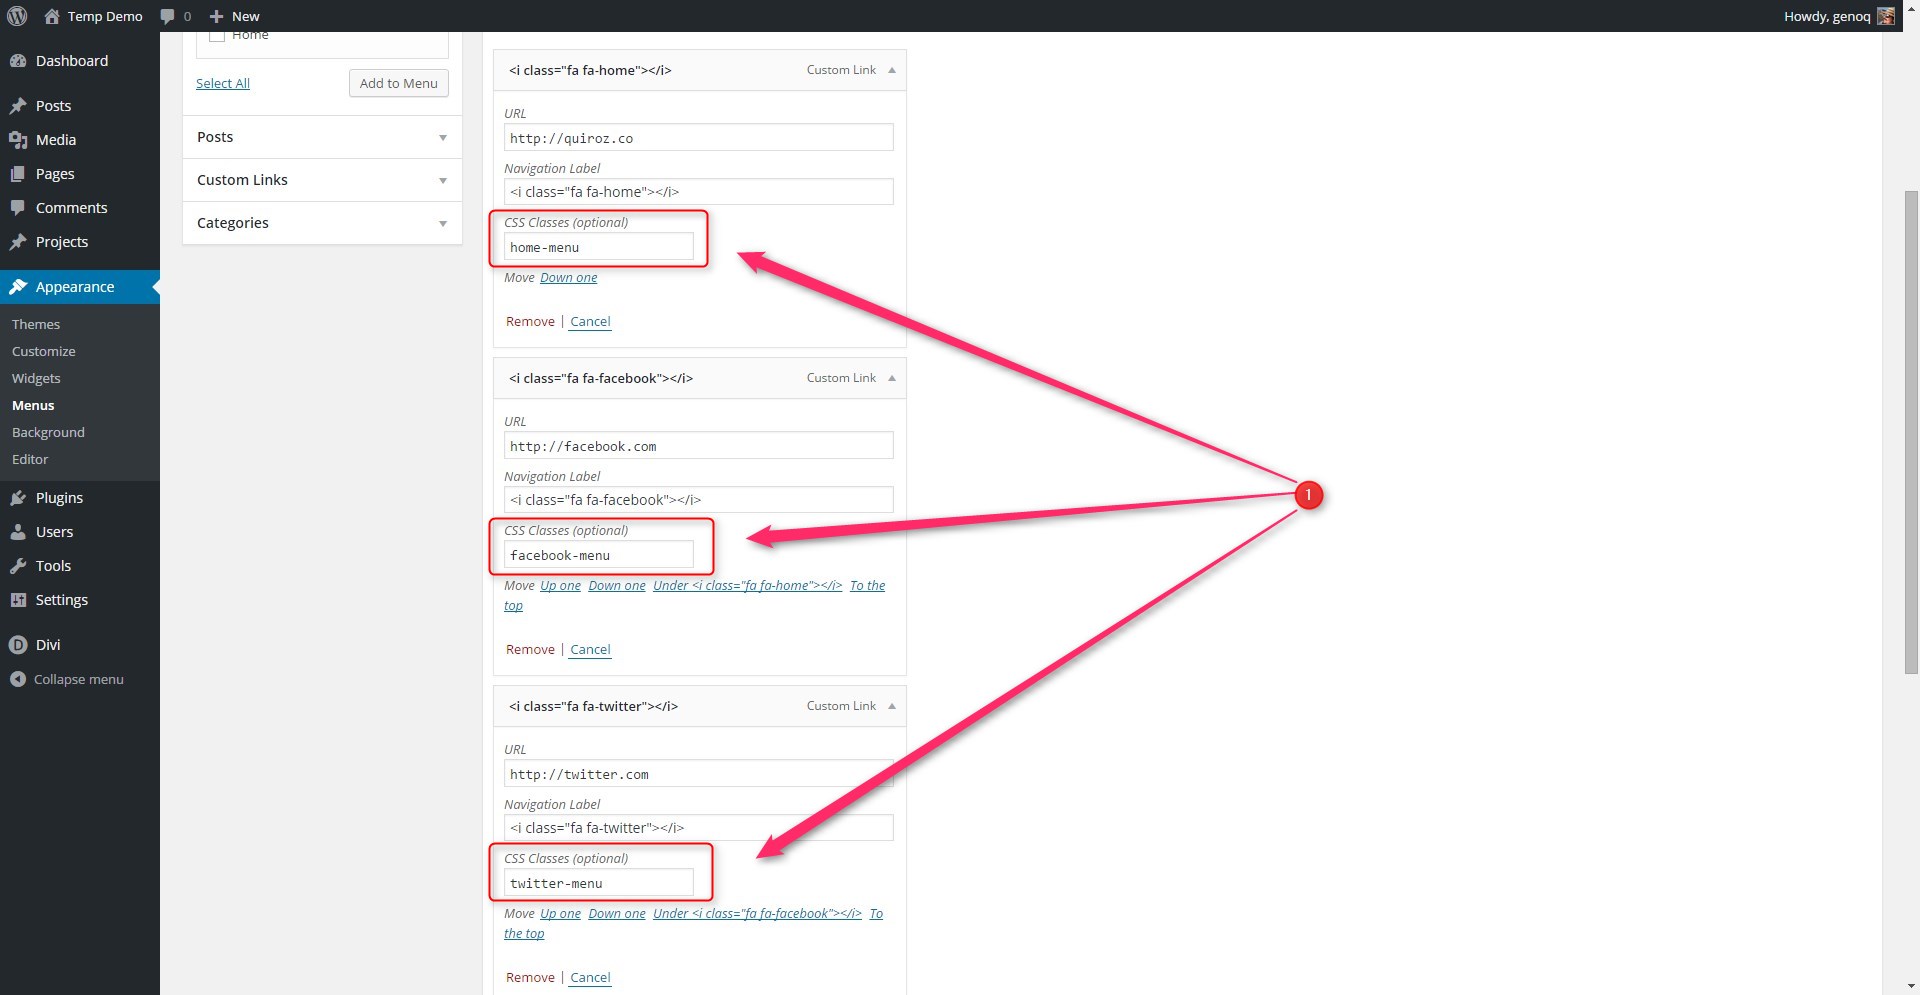
6. Once you have all the menu items added, you will have to go through each one and add a CSS Class. For example facebook-menu, twitter-menu, pinterest-menu, etc…
Now we just need to make sure the top header is enabled.
Enable Top Header In Theme Customizer
1. Go to Divi>Theme Customizer

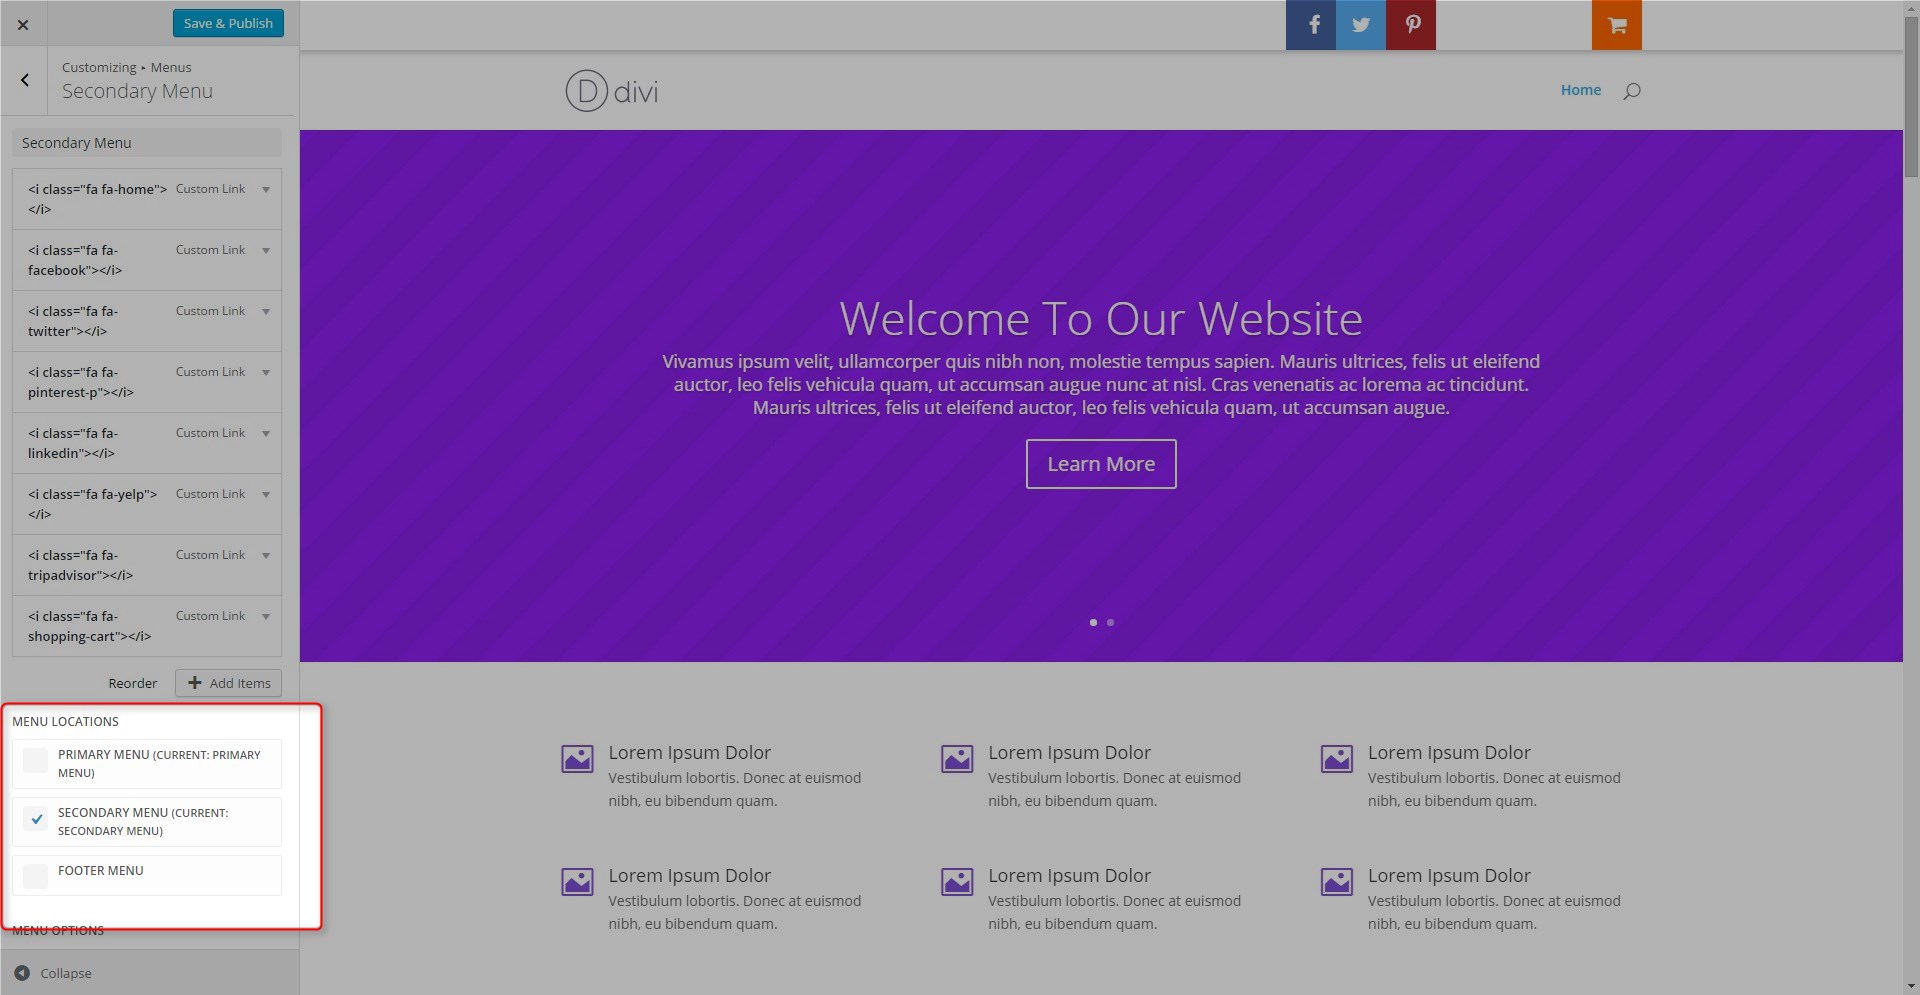
2. Go to Menus>Secondary Menu>Menu Locations and Make Sure the Secondary Header is enabled (ticked). Then click Save & Publish and go back to main menu in Customizer.
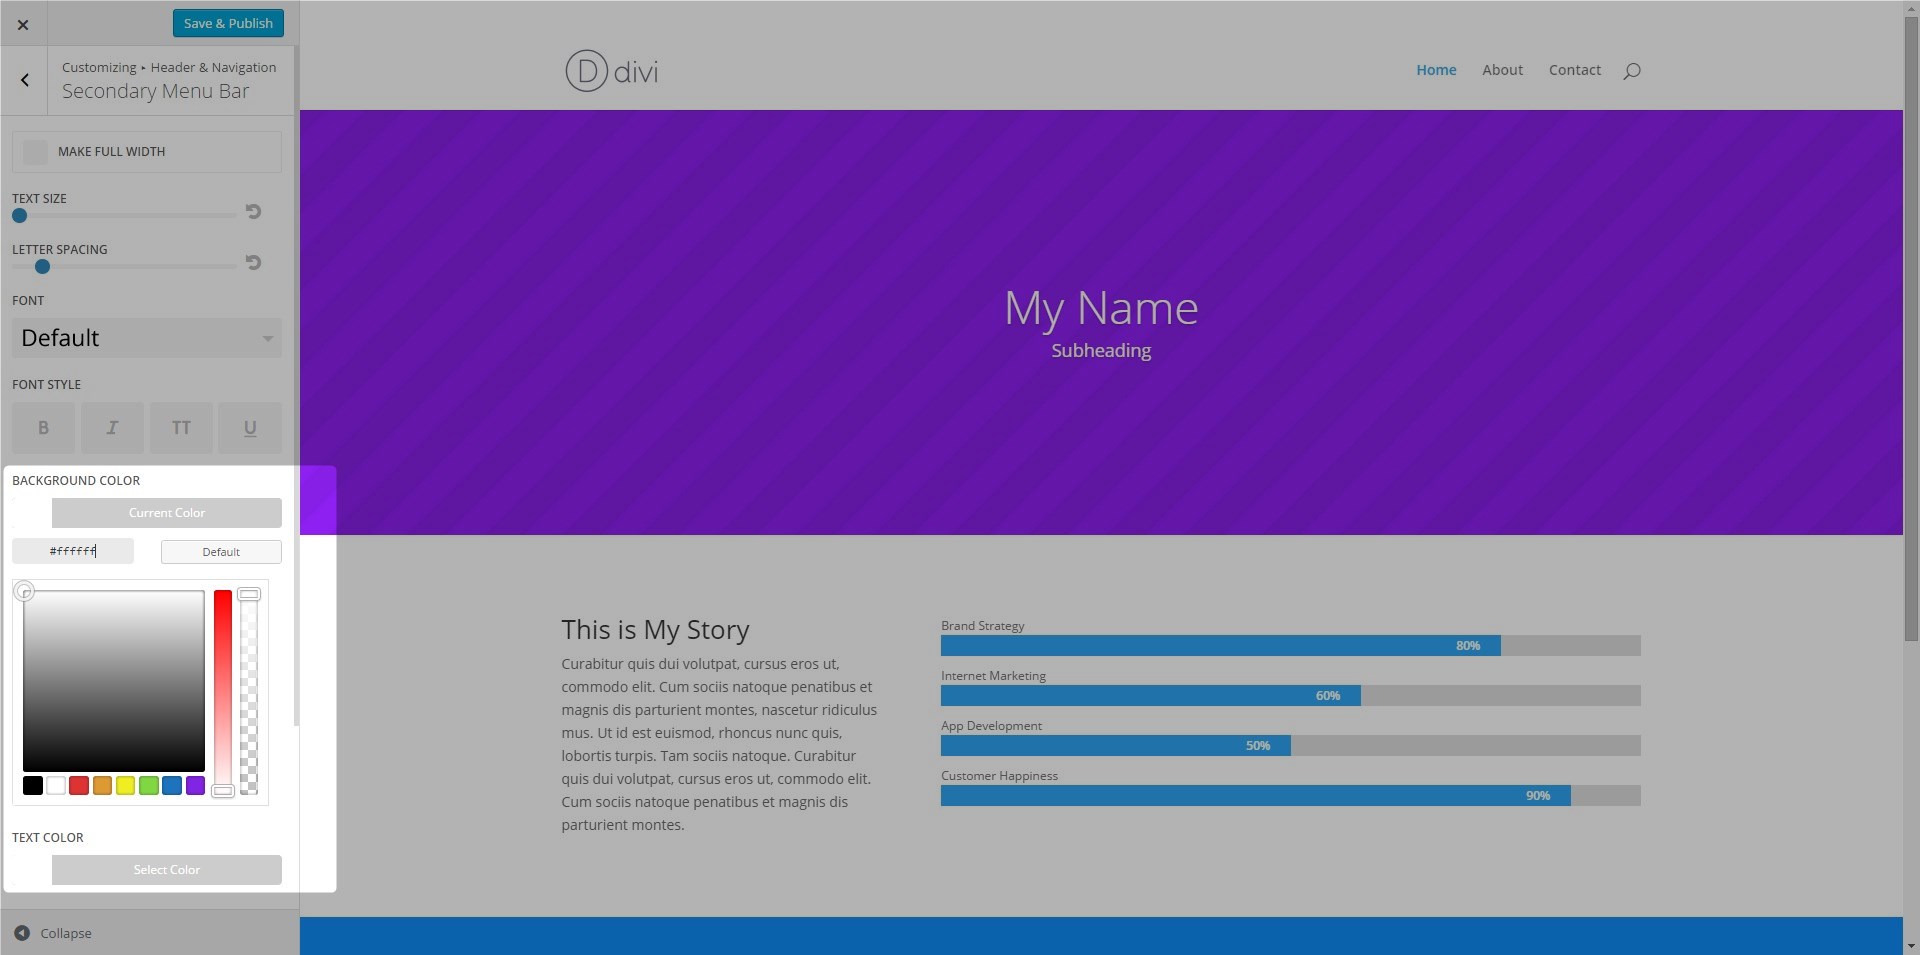
3. Next go to Header & Navigation>Secondary Menu Bar and change the background color to white. Click Save & Publish
And Now The Magic of CSS.
If you are working with a child theme you can go to Appearance>Editor and open your stylesheet. If not, go to Appearance>Divi Theme Options>ePanel>Custom CSS (which is located at the bottom of the ePanel)
1. Add this CSS.
/*------------------------------------------------*/
/*---[Square Icon Menu Links - By Geno Quiroz]----*/
/*-----------------[Quiroz.Co]--------------------*/
/*------------------------------------------------*/


/* readjust padding */
	#top-header .container {padding-top: 0px;}
	#et-secondary-menu {height: 50px;}
	#et-secondary-menu > ul > li a { padding-bottom: 0px;}
	#et-secondary-nav .menu-item.menu-item-type-custom {padding:15px; width:50px; margin-right: 0px;}
	#et-secondary-nav li {display: table-cell;}
	#et-info {padding-top: 23px;}


/* font icon size and color */
	i.fa {font-size: 20px; color:#fff;}


/* colors */
	li.home-menu {background-color:#23282d;}
	li.home-menu:hover {background-color:#616f7c;}

	li.facebook-menu {background-color:#43609c;}
	li.facebook-menu:hover {background-color:#8198c9;}

	li.twitter-menu {background-color:#55acee;}
	li.twitter-menu:hover {background-color:#8fc9f3;}

	li.pinterest-menu {background-color:#a9262a;}
	li.pinterest-menu:hover {background-color:#dc6164;}

	li.linked-menu {background-color:#1a84bc;}
	li.linked-menu:hover {background-color:#64bbea;}

	li.yelp-menu {background-color:#c41200;}
	li.yelp-menu:hover {background-color:#930c00;}

	li.trip-menu {background-color:#579441;}
	li.trip-menu:hover {background-color:#73b759;}


	li.shop-menu {background-color:#ff6600;}
	li.shop-menu:hover {background-color:#883600;}


/*------------------------------------------------*/
/*------------------ OPTIONAL --------------------*/
/*------------------------------------------------*/


/* add a drop shadow to the top header */
	#top-header {
    		-moz-box-shadow: 0px 1px 7px 2px #ccc;
    		-webkit-box-shadow: 0px 1px 7px 2px #ccc;
    		box-shadow: 0px 1px 7px 2px #ccc;}


/*------------------------------------------------*/
/*--------[End Square Icon Menu Links] -----------*/
/*------------------------------------------------*/
As you can see I threw in a little snippet in case you wanted to add a slight shadow underneath the top header. It works well when using the same color on the top-header and the main-header.
But if you dont want it, just leave it out when you copy and paste. You can also remove icons and add icons to the CSS above and the menu.
Well that’s all for now. I hope you find this article useful.
![]()


Always great tips. God bless you, and keep his genius !
Very cool! Thank to share8
Awesome, thank you.
Hey there
This is not exactly about the topic of this blog. However, I believe you can help me:
I’d like right-align the item menu “deutsch” in my menu
http://www.gymperformance.ch
do you have any idea how I can achieve that?
Thanks in advance
Martin
Looks like this has been resolved?
Did it using the secondary menu bar.
couldn’t manage it with the main bar
Hello, is there a way to make these icon links open in new windows?
Yes. When you are on the menu page, open up the screen options tab in the upper right hand corner of the page. Ticxk the “Link Target” option. You will now have the option in each menu item to tick the “Open link in a new tab” option.
Is there a way to add an icon that is not available on font awesome? Zillow in particular
Yes but that requires a completely different approach. IF you can find an icon font with that logo that would be great. Otherwise one option would be to upload an image and hardcode it into the header.php file. Or use a :before pseudo and add the image as a background image which would require a few additional lines of css to make it look right.
Thank you! I just used the Home icon to make it easier on myself. I seen lot of people have requested it on git hub so we might see it in the future. http://www.mackpropertieskeywest.com/home2/
Just started building this one. Thank you for the awesome turtorial!
Nice. The site is looking good Oliver
This actually didn’t work for me. Rather, the entire code from step 2 showed up on my page. Any suggestions?
It must have been pasted in the wrong place. You can also add it to the Divi Theme options Integration page. There is a box for header code.
Shouldn’t there be a way to do this using the Divi font icons? Then you’re not loading another font icon set.
Sure. They dont have nearly as many options but like you said, its already there. Here is a great tutorial on it from SJ over at Divi.Space https://divi.space/divi-tutorials/divi-menu-icons-without-plugins-or-font-awesome/
Cool! Thanks.
There no way to put a snapchat icon on my top menu bar :/
The text is:
and the css: snapchat-menu
right? Nothing appears :/
Thanks if someone could help me!
Hi Geno – in theory, would it be possible to replicate this with four images instead of the social media icons? could I swap out the font awesome codes and replace with img src links? Or would I be better off finding a suitable menu plugin to achieve that? Many thanks as always
Sounds like it is worth trying. Let us know how it goes!
Great tutorial thanks very much. Quick question, how would I go about moving these icons to the left hand side of the website rather than the right.
Just add this css
#et-secondary-menu { float: left; }This rocks (Thank you!)
Is there a way to add this to the main navigation menu/bar instead of a secondary menu? (I’m thinking where the search icon normally is, to the right of the menu items)
Sure: https://quiroz.co/large-square-menu-buttons-divi/
^^ Almost like the nexus theme
https://www.elegantthemes.com/gallery/nexus/
Is it possible and if so, could you help me with code to include a large phone number in this same menu bar – the social icons to the left and large contact phone # aligned to right? Thank you!
That would take a little extra customization. In the meantime this tutorial shows you how to add clickable phone numbers. Then you would assign a special class to the icons and write the css to make them float left. They would also need to be “position:absolute;”. You might have to have some custom padding or margins to make them align correctly
Very helpful article, thank you 🙂
Hi Geno,
I was referred to your site. Very cool stuff! I wanted to give a one of your tutorials a try and it worked! (Like a charm in fact). I do have one question. On the mobile menu, is there a way to add text to describe the icons. It may seem a little redundant in fact, but on the mobile menu it looks so plan with nothing there. Any help would be great. http://tees4relief.org/
Hey Gino, does this not work with the latest version of Divi? The icons are controlled by the theme not the CSS. So, I am getting the icon (with the latest Font Awesome code) in – appearing tiny and not the right colours.
Hi! Thanks for the tutorial. It’s possible to display outside (above) the menu in the mobile version?
Yes but I would probably need to take a few hours to write up a tutorial for that.